Are you struggling to get your pizza dough just right? You’re not alone.
One of the trickiest parts of making perfect pizza at home is mastering dough hydration—the balance between water and flour that shapes your crust’s texture and flavor. Too much water, and your dough becomes sticky and hard to handle; too little, and it turns dry and tough.
But don’t worry, you can fix these common hydration problems with a few simple tweaks. Keep reading, and you’ll learn how to troubleshoot your pizza dough hydration like a pro, so every pizza you bake comes out crispy, chewy, and absolutely delicious.
Basics Of Dough Hydration
Understanding dough hydration is key to making great pizza. Hydration affects how your dough feels, stretches, and bakes. It influences the crust’s texture and the dough’s ease of handling. Knowing the basics helps fix common dough issues quickly. Below are important points about dough hydration every pizza maker should know.
What Hydration Means
Dough hydration is the amount of water compared to flour. It is shown as a percentage. For example, 60% hydration means 60 grams of water for every 100 grams of flour. Water activates gluten and yeast. It also changes dough softness and elasticity.
Typical Hydration Percentages
Most pizza doughs have hydration between 55% and 70%. Lower hydration means stiffer dough. Higher hydration means wetter dough. Neapolitan pizza dough often uses 60-65% hydration. Some artisan styles go up to 70% or more. Different hydration suits different baking styles and ovens.
Impact On Dough Texture
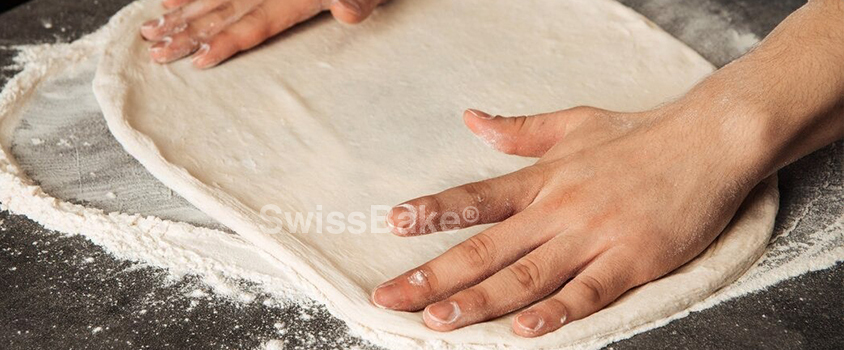
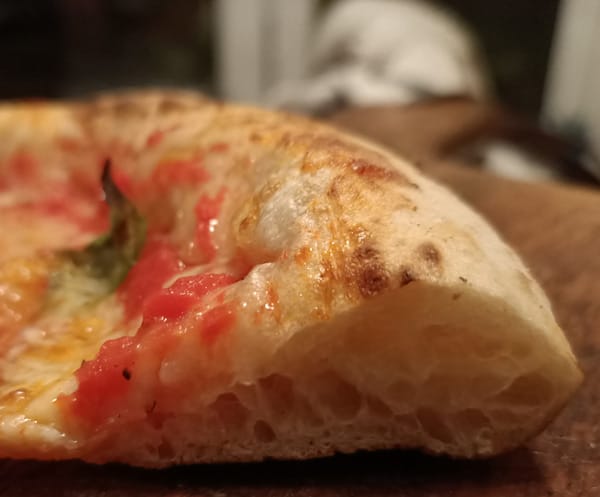
Low hydration dough feels firm and less sticky. It is easier to shape and holds its form well. High hydration dough is softer and stickier. It creates a lighter, airier crust with bigger holes. Too much water makes dough hard to handle. Finding the right balance is important for your pizza style.
Credit: www.swissbake.in
Signs Of Hydration Problems
Pizza dough hydration affects texture, rise, and baking results. Spotting hydration problems early helps fix dough issues. Understanding the signs guides adjustments for better dough. Here are common signs of hydration problems in pizza dough.
Sticky And Too Wet Dough
Sticky dough feels wet and clings to hands. It is hard to shape and tears easily. Too much water causes this problem. It also makes dough hard to handle and stretch. Dough may spread out too much while baking. The crust can become soggy or flat. Reducing water or adding more flour helps balance hydration.
Dry And Crumbly Dough
Dry dough cracks and breaks apart when stretched. It lacks elasticity and feels rough. Not enough water causes dry dough problems. It is difficult to knead and shape properly. The baked crust becomes hard and crumbly. Increasing water slightly improves dough moisture. Proper mixing ensures water is well absorbed.
Tough And Dense Dough
Tough dough feels stiff and heavy. It resists stretching and pulls back quickly. Dense dough does not rise well or create air pockets. Incorrect hydration makes gluten tight and dough hard. This results in a chewy, thick crust. Adjusting water quantity softens dough. Gentle kneading relaxes gluten strands for better texture.
Adjusting Hydration Levels
Adjusting hydration levels in pizza dough is key to getting the perfect texture. Hydration means the amount of water compared to flour in your dough. Changing this balance affects how soft, chewy, or crispy your pizza crust will be.
Small tweaks in water content can make a big difference. Too much water makes the dough sticky and hard to handle. Too little water results in a dry, tough dough. Understanding how to adjust hydration helps fix common dough problems and improve your pizza.
Increasing Water Content
Add water slowly to your dough if it feels dry or crumbly. More water makes the dough softer and stretchier. It helps develop gluten, giving the crust a nice chew. Use room temperature water for better yeast activation. Mix well after adding water to ensure even hydration. Watch the dough; it should be slightly sticky but not wet.
Reducing Water Content
Cut back on water if your dough is too sticky or hard to shape. Less water creates a firmer dough that is easier to handle. It results in a crispier crust after baking. Use a kitchen scale for precise measurements. Adjust in small steps to avoid making the dough too dry. Rest the dough longer to absorb water fully if needed.
Balancing Flour Types
Different flours absorb water differently. Bread flour soaks up more water than all-purpose flour. Whole wheat flour needs even more water because of its bran content. Mix flours carefully to balance hydration levels. Adjust water amounts based on the flour blend you use. Test small batches to find the right hydration for your flour mix.
Temperature Effects
Temperature plays a key role in pizza dough hydration. It affects yeast activity, gluten development, and dough texture. Small temperature changes can change how the dough feels and rises. Understanding these effects helps you fix hydration problems and make better dough.
Flour Temperature
Flour temperature impacts dough moisture absorption. Cold flour slows down yeast and gluten formation. Warm flour speeds up fermentation and makes dough softer. Use flour at room temperature for more consistent results. Avoid storing flour in the fridge unless needed for a specific recipe.
Water Temperature
Water temperature controls yeast activity and dough consistency. Warm water (around 75°F or 24°C) wakes up yeast quickly. Too hot water can kill yeast and stop rising. Cold water slows fermentation and tightens gluten. Adjust water temperature based on room conditions and desired dough speed.
Room Temperature Impact
Room temperature affects dough rising time and hydration feel. Warmer rooms speed fermentation and soften dough. Cooler rooms slow yeast and firm up dough texture. Keep dough covered to maintain temperature and prevent drying. Adjust proofing time based on your kitchen’s temperature.
Kneading Techniques
Kneading is a key step in making pizza dough. It helps develop gluten, which gives dough its structure and texture. Different hydration levels affect how you should knead the dough. Using the right kneading technique can solve many common hydration issues. This section covers how to handle high hydration dough, avoid over-kneading, and use the stretch and fold method for better results.
Handling High Hydration Dough
High hydration dough feels sticky and soft. It can be hard to handle with regular kneading. Use wet hands or a dough scraper to prevent sticking. Knead gently to avoid tearing the dough. Work slowly and fold the dough onto itself. This helps build strength without losing moisture. Let the dough rest if it feels too loose. Resting helps the flour absorb water fully.
Avoiding Over-kneading
Over-kneading makes dough tough and hard to shape. The gluten becomes too tight and elastic. This can cause a dense and chewy crust. Knead just until the dough is smooth and elastic. Stop when the dough springs back after pressing lightly. If using a machine, watch the dough closely. It is easy to over-knead with mixers or food processors.
Using Stretch And Fold
The stretch and fold method works well for wet dough. Instead of continuous kneading, stretch the dough gently. Fold it over itself and turn the bowl. Repeat this several times with breaks in between. This strengthens gluten slowly and evenly. It also traps air in the dough. The result is a light and airy crust with good structure.
Credit: mypizzacorner.com
Proofing And Fermentation
Proofing and fermentation are crucial steps in pizza dough preparation. They allow yeast to develop flavor and texture. During this phase, yeast consumes sugars and releases gases. These gases create air pockets, making the dough rise. Proper proofing ensures a soft, airy crust with good chewiness.
Both underproofing and overproofing affect dough quality. Watching the dough closely helps achieve the right balance. Adjusting proofing time based on temperature and dough hydration is key to success.
Underproofed Dough Traits
Underproofed dough looks tight and dense. It feels firm and resists stretching. The dough springs back quickly when pressed. The crust turns tough and chewy after baking. Flavor may be bland and less developed.
Overproofed Dough Traits
Overproofed dough appears loose and slack. It may have a wrinkled or rippled surface. The dough feels sticky and weak to handle. Poking the dough leaves a deep, slow-filling hole. The crust can collapse or become overly airy.
Adjusting Proofing Time
Shorten proofing time if the dough is underproofed. Increase proofing time for sluggish yeast activity. Keep dough at room temperature for consistent fermentation. Use a warm, draft-free place to speed proofing. Cold temperatures slow yeast, requiring more time. Check dough every 30 minutes for readiness.
Troubleshooting Common Issues
Pizza dough hydration can sometimes cause problems during preparation. Some issues are common but easy to fix. Knowing how to spot and solve these problems keeps your dough on track. This section explains how to troubleshoot common hydration problems in pizza dough.
Saving Dough That Didn’t Rise
Dough that fails to rise often means yeast is inactive or too cold. Warm the dough slightly and place it in a warm, draft-free spot. Give it more time to rise, usually 30 to 60 minutes. If the dough still does not rise, add a small amount of fresh yeast mixed in warm water. Knead gently and let it rest again. This can help reactivate the yeast and improve rising.
Fixing Overly Sticky Dough
Sticky dough often means too much water or not enough flour. Sprinkle a little flour onto your work surface and hands. Gently fold the dough to mix in the flour without overworking it. Avoid adding too much flour at once, which can dry out the dough. Allow the dough to rest for 10-15 minutes to absorb the flour evenly. This rest time reduces stickiness and makes the dough easier to handle.
Dealing With Tough Crusts
Tough crusts happen when dough is overworked or hydration is too low. Use less flour during kneading and handle the dough gently. Increase hydration by adding a small amount of water next time. Let the dough rise longer to relax gluten strands. Bake at a high temperature to create a crispy yet tender crust. Avoid pressing the dough too hard when shaping, which can make it dense.
Tools And Tips
Proper tools and practical tips simplify pizza dough hydration troubleshooting. These help maintain the right water-to-flour balance. Precise measurements and correct equipment ensure consistent dough quality. This section covers essential tools and tips to improve your dough results.
Measuring Ingredients Accurately
Accurate measurement of flour and water is key. Use a digital scale for best results. Avoid using cups or spoons, which vary in size. Weigh ingredients in grams for consistency. Small errors in water amount change hydration significantly. Measure water at room temperature to keep results stable.
Using Bakers’ Percentages
Bakers’ percentages express ingredient amounts relative to flour weight. Flour is always 100%, and water is a percentage of that. For example, 60% hydration means 60 grams of water per 100 grams of flour. This method helps adjust recipes easily. It allows clear comparison between different doughs.
Recommended Equipment
Use a reliable digital kitchen scale for precise weighing. A large mixing bowl helps combine ingredients well. A dough scraper assists in handling sticky dough without mess. Use a thermometer to check water temperature. Proper tools reduce errors and improve dough texture.
Recipe Tweaks For Perfect Texture
Perfect pizza dough texture depends on the right recipe tweaks. Small changes can improve dough softness, elasticity, and crust crispiness. Adjusting ingredients helps control hydration and dough behavior. Experimenting with salt, yeast, oil, sugar, and flour blends can lead to better results. These tweaks are simple yet effective for home bakers.
Adjusting Salt And Yeast
Salt controls dough flavor and gluten strength. Too much salt tightens the dough, making it tough. Too little salt weakens gluten, causing sticky dough. Use 1.5% to 2% salt of the flour weight for balance.
Yeast affects dough rise and texture. Too much yeast causes overproofing and holes. Too little yeast slows fermentation, making dense crusts. Use the right yeast amount and check dough rise times.
Incorporating Oil Or Sugar
Adding oil softens dough and adds richness. It makes crust tender and easier to stretch. Use 1 to 2 tablespoons of olive oil per 500g flour.
Sugar feeds yeast and boosts browning. It creates a slightly sweeter, crispier crust. Add 1 teaspoon sugar for better fermentation and color.
Experimenting With Flour Blends
Different flours affect dough hydration and texture. High-protein bread flour gives chewiness and strength. All-purpose flour makes softer, less elastic dough.
Mixing flours can balance texture. Try 70% bread flour and 30% all-purpose for a softer, strong dough. Whole wheat or rye flours add flavor but absorb more water. Adjust hydration accordingly.

Credit: www.reddit.com
Frequently Asked Questions
What Is The 55 Rule For Pizza Dough?
The 55 rule for pizza dough means using 55% water relative to flour weight. It creates a firmer, less sticky dough. This ratio helps achieve a crispier crust and easier handling, ideal for traditional Neapolitan-style pizzas.
What Does Overproofed Pizza Dough Look Like?
Overproofed pizza dough looks gray with a loose, sticky texture. Its surface appears rippled or bubbly. It feels overly soft and may collapse when handled.
Is 60 Or 70 Hydration Pizza Dough Better?
A 60% hydration dough is firmer and easier to handle, ideal for crispier crusts. A 70% dough feels wetter, creating a lighter, airier crust but needs more skill to manage. Choose based on your texture preference and kneading comfort.
How To Fix Pizza Dough That Didn’t Rise?
Check yeast freshness and dough temperature. Knead dough again and let it rise in a warm spot. Use sugar to boost yeast activity next time.
Conclusion
Perfect pizza dough needs the right hydration balance. Too much water makes dough sticky and hard to handle. Too little water creates a dry, tough dough. Adjust water slowly and watch your dough’s feel closely. Warm water and proper flour help too.
Practice and patience improve your results. Each batch teaches something new. Keep experimenting to find your ideal dough. Enjoy making delicious pizza with confidence every time.

As the author of the “Ultimate Pizza Guide: Recipes, Tips & Secrets Revealed,” I’m dedicated to sharing my love for pizza and empowering others to create delicious homemade pizzas with ease. Join me on a journey to uncover the secrets to perfecting your pizza game!