For best results, proof pizza dough for at least 1 hour and ideally 24 hours. For a quick rise, 1-2 hours at room temperature will suffice.
Creating the perfect pizza dough is both an art and a science. When mastering the art of pizza making, understanding the proofing process is critical; it allows the dough to develop the right flavor and texture. Proving is a key step where the yeast ferments the dough, creating gas bubbles that make the pizza crust light and airy.
The duration of this process can significantly influence the quality of your pizza. For a robust flavor and ideal consistency, slow fermentation in the refrigerator for up to 24 hours is recommended, although a shorter proofing period can still yield delicious results. Patience in this stage pays off in the form of an exquisite homemade pizza that rivals your favorite pizzeria.
Rising To The Occasion: An Introduction To Proofing Pizza Dough
Creating the perfect pizza depends on the dough. Proofing, also known as fermentation, is a crucial step. It involves the dough rising before baking. Good proofing equals a delicious, airy crust. This section will guide you through the essentials of pizza dough fermentation.
The Magic Behind Dough Fermentation
Proofing pizza dough is like casting a spell. Yeast works its magic during this process. It converts sugars in the flour into carbon dioxide and alcohol. This makes the dough expand and develop flavor. Understanding fermentation helps achieve the perfect pizza base.
- Yeast activation: Warmth and moisture wake the yeast up.
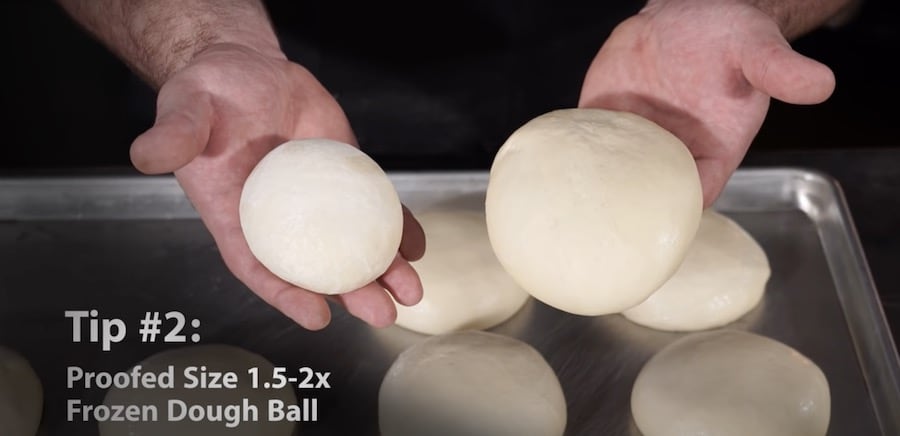
- Dough rise: Dough doubles in size due to gas bubbles.
- Flavor development: Longer fermentation means tastier dough.
Optimal Conditions For Proofing Pizza Dough
Creating the right environment for proofing is key. Here’s how to ensure ideal conditions:
- Temperature: Dough proofs best between 75-90°F (24-32°C).
- Time: Proof for 1-24 hours. Longer times increase flavor.
- Covering: Keep the dough covered with a damp cloth to prevent drying.
Note: Conditions like humidity and dough size affect proofing time. Adjustments may be necessary.
| Proofing Time | Temperature | Result |
| 1-2 hours | Warm | Quick rise, good for a fast pizza. |
| 8-24 hours | Cooler | Slow rise, develops rich flavors. |
Credit: www.akcrust.com
Unveiling The Ideal Proofing Duration
Crafting the perfect pizza dough is an art. Yeast, flour, water, and time blend to create the ultimate base for a delicious pizza. The
proofing duration is critical. This process allows the dough to develop its flavor and texture. Let’s dive into the specifics and unravel the mystery of the ideal proofing time.
Short Proof Vs. Long Fermentation
Each method has its merits. Short proofs are speedy and perfect for last-minute meals. The dough rises in one to three hours. But for a richer taste, long fermentation is key. It could take from 24 to 72 hours. The dough sits, and the flavors deepen.
Long fermentation might sound daunting, but the patience pays off in taste. Think of it like a fine wine. Time is an ingredient. It transforms simple dough into a complex, aromatic base for toppings to shine.
Time Frames For Various Types Of Pizza Dough
- Neapolitan Pizza Dough: Traditionally, 8 to 24 hours at room temperature.
- New York-Style Dough: Best if proofed for 24 to 48 hours in the fridge.
- Sicilian Pizza Dough: Requires 24 hours in the fridge for optimal thickness and texture.
Remember: Cold proof is slow but steady.
Warm environments speed up the rise.
Room temperature is good for a quick boost.
| Type of Pizza | Proofing Time (Room Temp) | Proofing Time (Fridge) |
| Neapolitan | 8 – 24 hours | N/A |
| New York-Style | 2 – 4 hours (initial) | 24 – 48 hours |
| Sicilian | 2 hours (initial) | 24 hours |
Factors Influencing Proofing Time
Understanding the factors influencing proofing time is a baker’s secret to creating the perfect pizza dough. Proofing dough is an art. It requires patience. Small changes make big differences. Our journey into the world of pizza perfection begins now.
Temperature’s Role In Proofing
Temperature is the driving force behind dough rising. Warmth accelerates yeast activity, while cooler conditions slow it down. For optimal growth, aim for a cozy 75-85°F (24-29°C). Keep a close eye on the thermometer. Even a few degrees can change your wait time.
- Below 70°F (21°C) – Dough rises slowly, may take hours.
- Around 75-85°F (24-29°C) – Ideal rapid rise, expect shorter proofing.
- Above 95°F (35°C) – Yeast could overheat, ruining the dough.
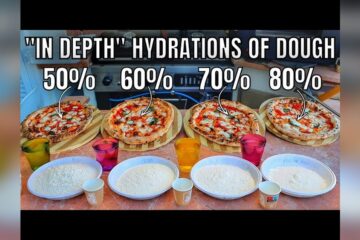
The Impact Of Yeast And Hydration Levels
Yeast is like the engine of proofing. Different types may change your timetable. Dry active yeast differs from instant yeast. More yeast equals a faster rise. But be careful; too much can cause off flavors.
Water also plays a huge role. Hydration levels affect texture and proof times. Higher water content leads to a looser dough, which can rise more quickly. Here’s a brief rundown:
| Hydration Level | Effect on Proofing |
| Low | Tight dough, slower rise |
| Medium | Balanced dough, standard rise |
| High | Loose dough, faster rise |
Remember, it’s about finding balance. The right combination of yeast and water leads to a delicious, airy crust.
Techniques For Mastering The Proof
Perfect pizza dough takes patience and a few smart techniques. Getting the proof right is crucial for flavor and texture. Use these methods to master the art of proofing pizza dough.
The Windowpane Test For Gluten Development
The windowpane test checks if the gluten in the dough is ready. This means the dough can trap air and give pizza its perfect chew. To do this:
- Take a small dough piece.
- Spread it with your fingers.
- Hold it up to the light.
If you can stretch it thin without tearing, and it’s somewhat transparent, the gluten is well-developed. If it breaks, it needs more kneading.
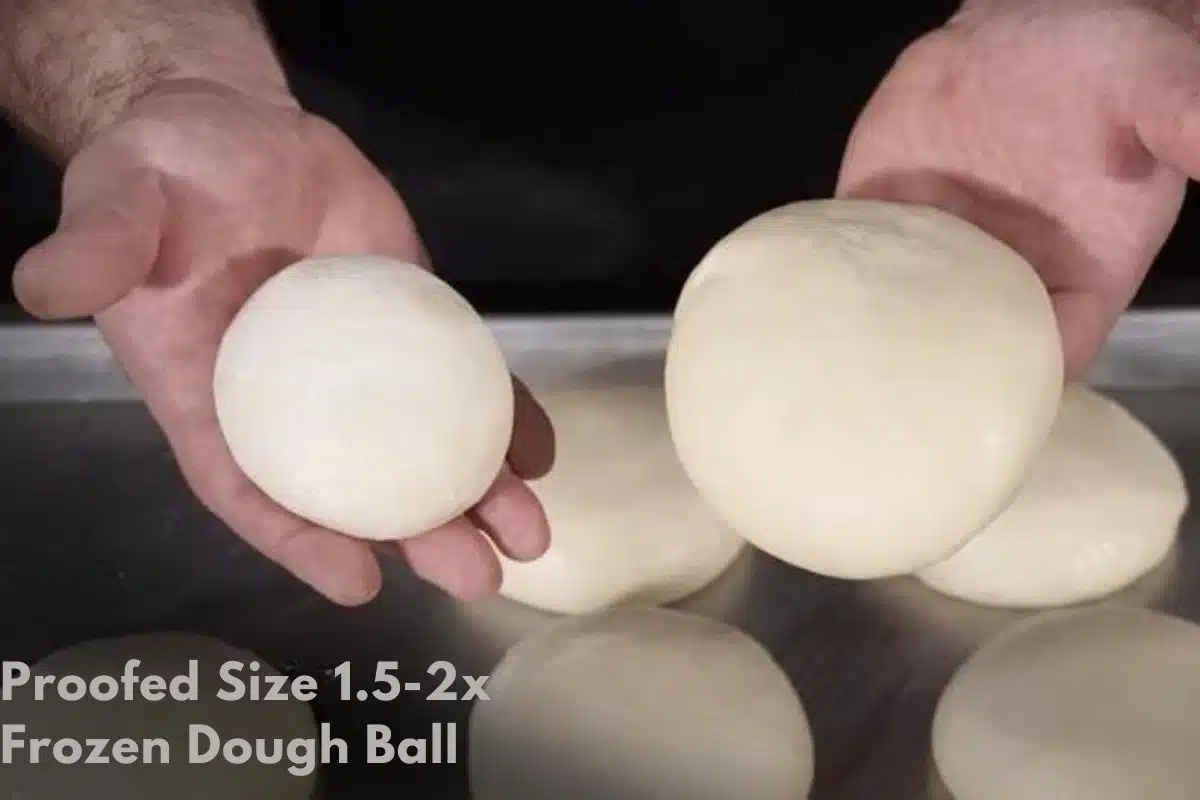
Assessing Dough Rise And Airiness
Seeing the dough rise shows yeast is working. Look for these signs:
- The dough size should double.
- Touch it gently. It should be soft and bounce back slightly.
- Cut a slice. You want lots of small air holes.
Note the dough’s rise every hour to see progress. This gives you control over flavor and texture. More rise equals more air pockets in your crust.
Cold Fermentation: The Slow Rise Advantage
The magic of making the perfect pizza dough often lies in the fermentation process. Cold fermentation is a technique that distinguishes amateur pizza-making from the expertise of a pizzeria pro. It involves letting the dough rise slowly in a cold environment over an extended period. This process not only enhances flavor complexity but also improves texture.
Benefits Of Retarding The Dough
Retarding, or cold-fermenting, pizza dough has a range of benefits:
- Improved Flavor: Cold fermentation allows for the development of subtle, tangy flavors that you can’t get from a quick rise.
- Better Texture: A slow rise creates a dough with a superior chew and airier crust.
- Ease of Handling: Chilled dough is less sticky and easier to shape.
- Extended Life: You can prepare the dough days in advance, which is perfect for planning.
How Long To Cold Proof Pizza Dough
For the ideal cold-proof, the length of time can vary based on the recipe and personal preference. Here’s a general guideline:
| Time | Result |
| 24 hours | A noticeable flavor and texture improvement over a quick rise. |
| 48 hours | Enhanced flavors and textures with a balanced, complex taste. |
| 72 hours | For the connoisseur, it provides a robust flavor profile and an impeccable crust. |
It is recommended that you do not exceed 72 hours, as the dough can overproof and begin to degrade, impacting the final product’s texture and taste.
Recipes And Variations In Proofing Times
The art of pizza dough proofing is as varied as the recipes themselves. Different styles demand unique proofing times to coax out their distinct flavors and textures. Whether you favor the snap of a thin crust or the chewy bite of a thick base, understanding these proofing intricacies is key to masterful pizza making.
Neapolitan Vs. New York-style Dough
Neapolitan pizza dough, hailing from Naples, Italy, is known for its quick cook time and blistered crust. A shorter proof, typically 1 to 2 hours at room temperature, is sufficient. In contrast, New York-style dough enjoys a slower fermentation, often requiring 24 to 48 hours in the fridge. The longer proof rewards bakers with a flavorful, slightly tangy base with just the right structure to hold generous toppings.
| Dough Type | Room Temperature Proof | Cold Fermentation |
| Neapolitan | 1-2 hours | Not typical |
| New York-Style | Optional short rest | 24-48 hours |
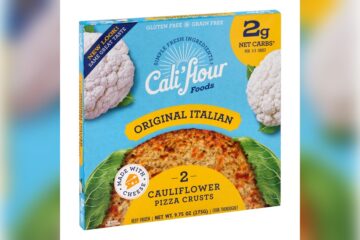
Adjusting Time For Whole Wheat And Gluten-free Options
Whole wheat dough is denser due to its higher fiber content. Its proofing time can extend beyond 2 hours at room temperature to allow the bran and germ more time to hydrate and soften. Gluten-free doughs, lacking in the traditional gluten structure, often require shorter proof times of about 30 minutes to an hour to prevent them from becoming too dense or crumbly.
- Whole Wheat Dough: typically >2 hours
- Gluten-Free Dough: 30 minutes – 1 hour
Common Proofing Pitfalls And How To Avoid Them
Getting your pizza dough just right is an art. The perfect proof produces that memorable crust. Avoid simple mistakes to ensure a delicious outcome.
Over-proofing: Recognizing The Signs
Over-proofed dough becomes a bane for pizza enthusiasts. It leads to dense and gummy pizzas. Know the signs:
- It lacks structure and needs to be bubblier.
- The dough spills out, failing to hold its shape.
- A simple poke test reveals the dough doesn’t spring back.
To sidestep over-proofing:
- Monitor temperature and timings keenly.
- Choose a consistent spot for proofing.
- Use a timer to track proof duration.
Rescuing An Under-proofed Dough
Under-proofed dough results in a tight, dense texture. It refuses to stretch and may result in a flat, hard crust.
Rescue tactics:
- Provide more time to rise, especially in a warm environment.
- Cover and let the gluten relax if the dough is tough.
- Press the dough gently with your fingers. It should leave a slight impression that slowly fills back in.
Good things come to those who wait. Patience with proofing pays off with the perfect pizza crust.
Expert Tips For The Perfect Proof
Expert Tips for the Perfect Proof can be the make-or-break factor in crafting the ideal pizza dough. It’s not just about the timing; it’s about the conditions under which the dough rises. Let’s dive into essential techniques and tools that can elevate your proofing game.
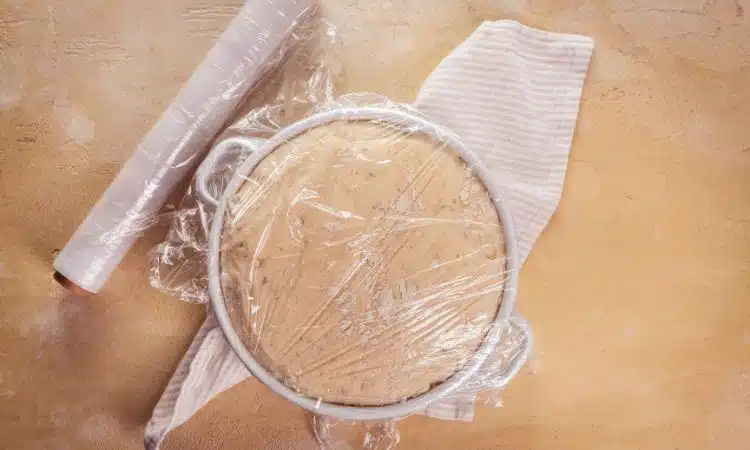
Ideal Proofing Containers And Techniques
The right container and technique are crucial for proofing pizza dough. A clear, airtight container helps you monitor the dough’s rise without exposing it to the dry air. Here’s what to consider:
- Size matters: Choose a container that gives dough room to double.
- Material: Glass or plastic are great; metal could be better.
- Marking progress: Use a dry-erase marker to note the dough’s size.
Within your ideal container, proofing techniques vary:
- Room temperature: Great for flavors, but it takes longer.
- Warmed oven: Quicker rise, ensure it’s not too hot.
- Cold fermentation: Slow and steady in the fridge for depth.
- Pre-shape your dough: Form balls for even proofing.
Making Consistency Your Ally In Proofing
Repetition and observation will make you a proofing pro. Keep these tips in mind:
- Temperature: Consistent warmth for predictable rises.
- Humidity: Mild humidity prevents drying.
- Timing: Record how long your best batches took to proof.
Remember, every batch of dough might act differently. Track changes and adjust accordingly. With consistent proofing methods, your pizza dough will hit the mark every time.
Frequently Asked Questions
How Long Should You Let Pizza Dough Proof?
Let pizza dough proof for at least 30 minutes or up to 24 hours. The ideal proofing time often depends on the recipe’s yeast amount and the kitchen temperature.
How To Tell If Pizza Dough Is Overproofed?
Check to see if the pizza dough has a sour smell, appears deflated, or has an overly bubbly surface. If the dough is sticky or collapses when poked instead of slowly springing back, it is likely over-proofed.
Should Pizza Dough Be Covered Or Uncovered When Proofing?
Pizza dough should be covered during proofing to prevent it from drying out. Use a damp cloth or plastic wrap for best results.
How Do You Know When Pizza Dough Has Risen Enough?
Check the size of the pizza dough after doubling it and performing the finger dent test. If an indent persists when poked, it has sufficiently risen and is ready for baking.
Conclusion
Finding the perfect proofing time for your pizza dough can elevate your baking game. Remember, factors like temperature and yeast type impact the duration of the rise. By tweaking proof times, aim for a flavor-rich, chewy crust. Get experimenting, and soon, your homemade pizza will rival the best pizzerias!

As the author of the “Ultimate Pizza Guide: Recipes, Tips & Secrets Revealed,” I’m dedicated to sharing my love for pizza and empowering others to create delicious homemade pizzas with ease. Join me on a journey to uncover the secrets to perfecting your pizza game!