You want your pizza dough to be perfectly chewy, airy, and full of flavor every time. But did you know that the way you mix your dough can make all the difference?
Whether you’re a beginner or a seasoned pizza maker, understanding the right pizza dough mixing techniques can transform your homemade pizza from good to unforgettable. You’ll discover simple, effective methods that will help you master your dough mixing skills—giving you that ideal texture and taste you crave.
Ready to elevate your pizza game? Let’s dive in!
Dough Ingredients
Creating perfect pizza dough starts with selecting the right ingredients. Each component plays a key role in texture, flavor, and dough behavior. Understanding these ingredients helps you make dough that is easy to work with and tastes great.
Choosing Flour Types
Flour is the foundation of pizza dough. High-protein flours like bread flour give dough strength and chewiness. All-purpose flour works well for softer dough. Some bakers prefer Italian “00” flour for a fine, silky texture. Experiment to find the flour that suits your style and oven.
Yeast Options
Yeast makes the dough rise by creating gas bubbles. Active dry yeast is common and easy to use. Instant yeast works faster and can mix directly with flour. Fresh yeast is less common but adds rich flavor. Always check the yeast’s freshness for best results.
Water Quality And Temperature
Water hydrates flour and activates yeast. Use clean, filtered water for better taste. The temperature affects yeast activity. Warm water, around 95°F (35°C), helps yeast grow quickly. Too hot water can kill yeast, too cold slows it down. Measure carefully for consistent dough.
Salt And Oil Roles
Salt controls yeast growth and strengthens gluten, improving dough texture. It also adds flavor. Oil, often olive oil, makes dough softer and easier to stretch. It adds richness and helps keep dough moist during baking. Balance these ingredients for the best dough feel and taste.
Credit: www.italianpizzasecrets.com
Mixing Methods
Mixing pizza dough correctly sets the stage for a great crust. Different methods affect dough texture and gluten development. Each method suits certain tools and skill levels. Understanding these methods helps achieve consistent, tasty pizza bases.
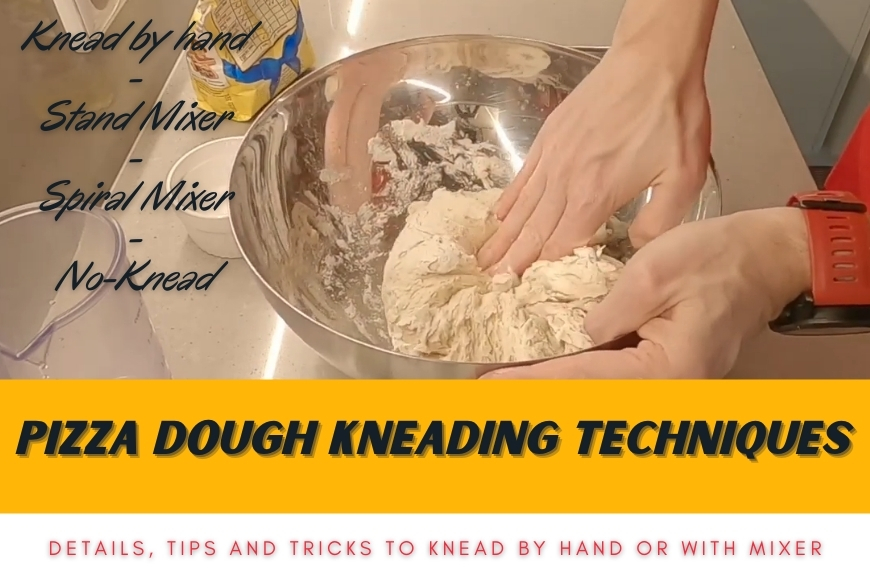
Hand Mixing Steps
Start by combining flour and salt in a bowl. Add yeast and warm water gradually. Use a spoon or your hands to mix until ingredients form a rough dough. Turn the dough onto a floured surface. Knead by folding and pressing for 8-10 minutes. The dough should become smooth and elastic. Hand mixing gives you control over dough feel and hydration.
Using Stand Mixers
Attach the dough hook to your stand mixer. Add all ingredients to the mixing bowl. Start mixing on low speed to combine. Increase speed to medium and mix for 6-8 minutes. The mixer develops gluten without tiring your hands. Watch the dough; it should pull away from the bowl sides. Stop mixing once dough is smooth and elastic.
Spiral Mixer Advantages
Spiral mixers work like giant hands, mixing and kneading dough. They keep dough cool while mixing, preventing overheating. This is important for yeast activity and dough texture. Spiral mixers handle large batches well, ideal for pizzerias. They reduce mixing time and produce consistent dough quality. The dough often requires less resting time after mixing.
Food Processor Technique
Use a food processor fitted with a dough blade. Add flour and yeast first, then pour water slowly. Pulse in short bursts to combine ingredients. Avoid over-processing to prevent overheating the dough. Process until dough forms a ball and cleans the bowl edges. This method is fast and good for small batches. Finish kneading by hand if needed for better texture.
Kneading Techniques
Kneading is a key step in making perfect pizza dough. It blends ingredients and builds texture. Proper kneading creates dough that is smooth and elastic. This section explains how to knead by hand and machine. It also covers how to avoid overmixing. Understanding gluten development helps improve your dough’s structure.
Hand Kneading Tips
Start with a clean, floured surface. Push the dough away using the heel of your hand. Fold it back toward you and turn it 90 degrees. Repeat this motion steadily for 8 to 10 minutes. Stop when the dough feels smooth and slightly tacky. Avoid adding too much flour during kneading. It can make the dough stiff and dry.
Machine Kneading Best Practices
Use a stand mixer with a dough hook for even kneading. Mix on low speed to avoid overheating. Knead for 5 to 7 minutes. Watch the dough closely for texture changes. It should pull away from the bowl and form a ball. Stop kneading as soon as the dough is elastic and smooth. Overworking can damage the dough’s structure.
Avoiding Overmixing
Overmixing stretches gluten too far. The dough becomes tough and hard to shape. It may snap back when stretched. Gas bubbles can escape, causing poor rise. Stop kneading once the dough is soft and elastic. Test by pressing your finger gently into the dough. If it springs back slowly, it is ready.
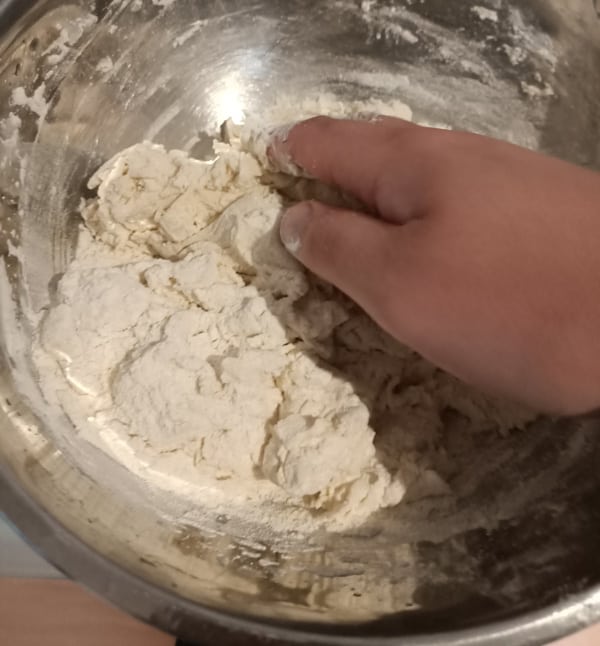
Gluten Development Process
Gluten forms when water meets flour proteins. Kneading aligns these proteins into long strands. This gives dough strength and stretchability. Proper gluten development traps gas during fermentation. It creates a light, airy pizza crust. Insufficient kneading results in dense dough. Too much kneading breaks gluten strands. Balance is key for ideal texture.
Credit: mypizzacorner.com
Dough Hydration
Dough hydration is the amount of water used in pizza dough compared to flour. It affects dough feel, rise, and crust texture. Proper hydration helps gluten form well and controls dough stickiness. Balancing water ratios is key to shaping and baking success.
Adjusting Water Ratios
Water ratio changes dough softness and elasticity. Low hydration makes stiff dough that is easy to shape. High hydration creates wetter dough that can be harder to handle. Typical hydration levels range from 55% to 70%. Experiment with small changes to find your dough’s best feel.
Effects On Crust Texture
Hydration affects crust inside and outside texture. Higher water levels produce airier, lighter crusts with big bubbles. Lower hydration yields denser, chewier crusts with a tight crumb. Moist dough often creates a crisp crust after baking. Choose hydration based on your preferred crust style.
Handling Sticky Dough
Sticky dough means higher hydration or less flour. Use wet hands or a bench scraper to manage it. Avoid adding too much flour, which can dry dough and toughen crust. Let sticky dough rest to relax gluten and become easier to shape. Practice helps gain confidence with sticky dough.
Fermentation And Proofing
Fermentation and proofing are vital steps in making great pizza dough. These processes develop flavor and texture. They help the dough rise and become airy. Proper fermentation and proofing improve the dough’s stretch and chewiness. Understanding these steps ensures better control over your pizza dough.
Bulk Fermentation Timing
Bulk fermentation is the first rise after mixing dough. It usually lasts 1 to 2 hours at room temperature. During this time, yeast eats sugar and releases gas. The dough grows and becomes lighter. Watch the dough double in size. Avoid fermenting too long to prevent over-proofing.
Cold Fermentation Benefits
Cold fermentation happens in the fridge for 12 to 72 hours. It slows yeast activity and improves flavor. The dough develops a rich, complex taste. Cold fermentation also strengthens gluten, making dough easier to shape. This method allows flexibility in baking time. It is ideal for deep flavor and better texture.
Signs Of Proper Proofing
Proper proofing means the dough has risen enough before baking. Look for dough that has doubled in size. The surface should be smooth and slightly puffy. Gently press your finger; the dough should bounce back slowly. If it springs back too fast, it needs more time. Over-proofed dough feels very soft and may collapse.
:max_bytes(150000):strip_icc()/20211115-OONI-PIZZA-ARMENIAN-ANDREW-JANJIGIAN-23-5447ecc61b12450d9a09f38cca67c19c.jpg "Pizza Dough Mixing Techniques: Master Perfect Crust Every Time 4")
Credit: www.seriouseats.com
Troubleshooting Dough Issues
Troubleshooting dough issues is key to making perfect pizza crusts. Problems can happen during mixing or rising. Understanding common dough problems helps fix them fast. Small changes can improve dough texture and rise. This guide covers sticky or dry dough, poor rising, and crust texture troubles.
Dough Too Sticky Or Dry
Sticky dough feels wet and sticks to hands and surfaces. It may have too much water or not enough flour. Add flour slowly while mixing to fix stickiness. Avoid adding too much flour or dough becomes dry.
Dry dough looks cracked and hard to knead. It means not enough water or too much flour. Add water little by little during mixing. Mix well to absorb water and get smooth dough.
Dough Not Rising
Dough that does not rise lacks yeast activity or warm environment. Check yeast expiration date before use. Use warm water around 100°F (38°C) to activate yeast. Keep dough covered and warm during rising. Cold or drafty places slow yeast growth.
Over-kneading also can stop dough from rising. Gluten gets too tight and traps gas. Knead dough just until smooth and elastic for best rise.
Crust Texture Problems
Crust can be tough or chewy if dough is overworked. Knead gently and avoid heavy mixing. Let dough rest to relax gluten for softer crust.
Too soft or soggy crust means dough has too much water or oil. Use correct ingredient amounts and bake at proper temperature. Bake pizza on hot surface for crispy crust.
Tips For Perfect Crust
Creating the perfect pizza crust starts with the right techniques. Small details during resting, shaping, and baking affect the final texture. These tips help you achieve a crust that is crispy on the outside and soft inside.
Resting And Shaping
Resting the dough allows gluten to relax. This makes shaping easier and prevents the dough from shrinking. Let the dough rest at room temperature for at least 30 minutes. Use your hands, not a rolling pin, to shape the dough gently. Stretch it evenly for a uniform crust thickness.
Using Cornmeal Or Flour
Sprinkling cornmeal or flour on your baking surface stops the dough from sticking. Cornmeal adds a slight crunch and a nice texture to the crust bottom. Flour helps with easy handling but may not add extra texture. Use a light layer to avoid burning or excess flour taste.
Baking Surface Choices
Choose the right baking surface for a crisp crust. A pizza stone or steel absorbs heat well and cooks the dough evenly. Preheat the surface in a hot oven before baking. Avoid baking on a cold metal sheet to prevent a soggy crust. Proper heat transfer is key for a golden, crispy base.
Frequently Asked Questions
What Is The Best Way To Mix Pizza Dough?
Mix pizza dough by combining water, yeast, and flour gradually. Mix until ingredients form a rough dough. Knead gently to develop gluten without overmixing.
What Is The 55 Rule For Pizza Dough?
The 55 rule for pizza dough means using 55% hydration—55 grams of water per 100 grams of flour. This creates a balanced, workable dough.
What Mixing Method Is Used For Pizza Dough?
Pizza dough is mixed using the straight dough method, combining water, yeast, flour, salt, and oil. Mixing continues until smooth and elastic. Hand mixing or a spiral dough mixer ensures proper gluten development for a chewy crust. Avoid overmixing to maintain dough structure and rise quality.
Can Pizza Dough Be Overmixed?
Yes, pizza dough can be overmixed. Overmixing tightens gluten, making dough tough and hard to rise properly.
Conclusion
Perfect pizza dough starts with the right mixing technique. Gentle kneading helps develop gluten without toughening the dough. Avoid overmixing to keep the dough soft and stretchy. Use your hands or a mixer, whichever feels best. Let the dough rest and rise well for better flavor and texture.
Practice brings confidence and better results each time. Enjoy the process and your delicious homemade pizza!

As the author of the “Ultimate Pizza Guide: Recipes, Tips & Secrets Revealed,” I’m dedicated to sharing my love for pizza and empowering others to create delicious homemade pizzas with ease. Join me on a journey to uncover the secrets to perfecting your pizza game!