
The aroma of perfectly blistered crust, the vibrant char on fresh toppings, and the satisfying crunch of a Neapolitan masterpiece, these are the hallmarks of pizza cooked in a high-temperature oven. Achieving this culinary nirvana, however, hinges on a crucial, often overlooked element: pizza oven flame modulation. It’s not just about having a roaring fire; it’s about controlling that fire to achieve precise cooking temperatures and unique textural outcomes. Whether you’re a seasoned pizzaiolo with a wood-fired behemoth or an enthusiast experimenting with a gas-powered countertop model, understanding how to manage your oven’s flame is the key to unlocking your pizza-making potential.
This mastery allows for incredible versatility, moving beyond just baking to achieving the coveted *cornicione*, the puffy, leopard-spotted crust, and ensuring delicate toppings aren’t scorched while the base cooks to perfection. It’s a delicate dance between intense heat for rapid cooking and a more controlled, ambient temperature for even baking.
Without proper flame modulation, pizzas can end up with a burnt exterior and a doughy interior, or a pale, undercooked crust with overcooked toppings. This guide will explore the science and art behind controlling your pizza oven’s flame, from understanding heat dynamics to practical techniques for achieving pizzeria-quality results at home.
Key Takeaways
- Flame modulation is essential for controlling pizza oven temperature and achieving optimal crust and topping doneness.
- Different pizza styles (Neapolitan, New York, Roman) require distinct temperature profiles and flame management techniques.
- Wood-fired ovens offer dynamic flame control through fuel management and airflow adjustments.
- Gas ovens provide more precise temperature control via burner settings and sometimes dedicated flame control knobs.
- Understanding heat zones within the oven is crucial for positioning pizzas effectively.
- Monitoring oven temperature with an infrared thermometer is vital for consistent results.
- Proper flame management enhances flavor, texture, and overall pizza quality.
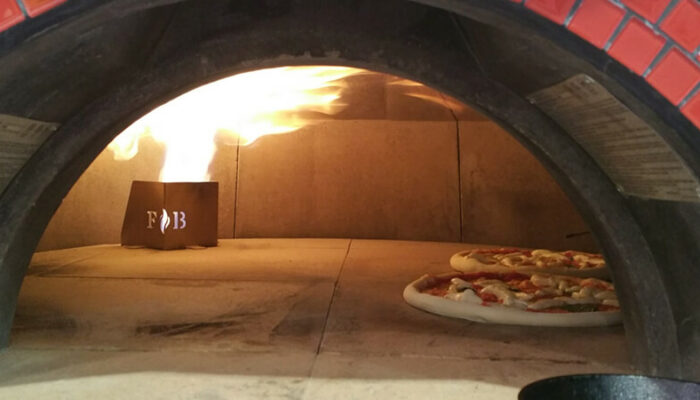
Credit: www.fornobravo.com
Understanding Pizza Oven Heat Dynamics
The magic of a pizza oven lies in its ability to generate and retain intense heat. This heat is transferred to the pizza through three primary mechanisms: conduction, convection, and radiation. Understanding how these work in conjunction with the flame is fundamental to effective modulation.
The Three Pillars Of Heat Transfer
- Conduction: This is the direct transfer of heat from a hot surface to the pizza dough. In a pizza oven, the primary source of conductive heat is the oven floor (or deck). A properly heated deck will cook the bottom of the pizza rapidly, creating a crisp base. The intensity of conduction is directly related to the deck’s temperature and its material (e.g., firebrick, cordierite).
- Convection: This involves the movement of hot air within the oven. The flame itself heats the air, which then circulates around the pizza, cooking the toppings and the top of the crust. In wood-fired ovens, the rising heat from the fire is a significant convective force. In gas ovens, the burner’s heat is distributed by air currents. Effective convection ensures even cooking of the entire pizza surface.
- Radiation: This is the emission of heat energy in the form of electromagnetic waves. The flame is the most potent source of radiant heat in a pizza oven. It directly bathes the pizza, especially the toppings and the *cornicione*, with intense heat, contributing to the characteristic charring and blistering. The dome of the oven also becomes superheated and radiates heat downwards onto the pizza.
The Role Of The Flame
The flame is the engine driving the entire process. Its intensity, position, and duration directly influence the oven’s temperature and the balance of heat transfer.
- Flame Intensity: A larger, more vigorous flame means higher overall oven temperature and more intense radiant heat. This is crucial for styles like Neapolitan pizza, which require very high temperatures (around 800-900°F or 430-480°C) for a quick 60-90 second cook. A lower, more subdued flame is necessary for styles that require longer cooking times or when you need to manage residual heat after the main fire has died down.
- Flame Position: Where the flame is located within the oven is critical. In traditional wood-fired ovens, the flame is typically at the back or side, and its movement is managed by pushing logs forward or adding fuel. In gas ovens, the burner is usually fixed, but its output can be adjusted. The goal is to have the flame interact with the dome and walls, heating them up to radiate heat effectively, and to direct some of that radiant heat onto the pizza without directly scorching it.
- Flame Duration: For wood-fired ovens, the duration of the active flame dictates the peak temperature and how long that intense heat is available. For gas ovens, the burner can be kept on for longer periods or cycled to maintain temperature.
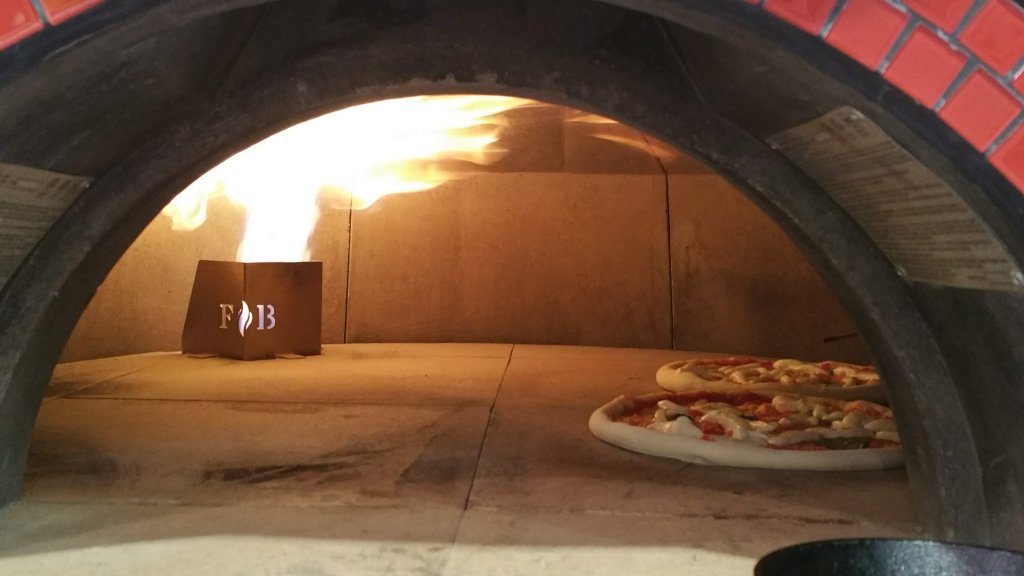
Credit: www.fornobravo.com
Mastering Flame Modulation In Wood-fired Pizza Ovens
Wood-fired ovens are renowned for their unique flavor profile and cooking characteristics, largely due to the dynamic nature of the flame. Mastering their modulation requires understanding fuel, airflow, and timing.
Fuel Management: The Heart Of The Fire
The type of wood used and how it’s added are paramount.
- Wood Choice: Hardwoods like oak, maple, or fruitwoods (apple, cherry) are preferred. They burn hotter, longer, and produce less creosote than softwoods like pine. Using seasoned, kiln-dried wood is ideal for consistent, clean burning. Avoid treated lumber or construction scraps.
- Log Size and Quantity: Smaller, split logs or kindling are used to start the fire. As the oven heats up, larger pieces are added to maintain a sustained burn. The amount of wood directly correlates to the heat output. For initial heating, a substantial amount is needed. For maintaining temperature, smaller additions are made periodically.
- Adding Fuel: The timing of adding fuel is crucial. For Neapolitan pizza, you want a roaring flame during the bake. For other styles, you might let the fire die down to embers and rely on the retained heat of the oven. A common technique involves pushing the burning logs to the side or back of the oven once the oven reaches temperature, creating a clean cooking area while the residual heat and the embers continue to provide consistent warmth.
Airflow: Feeding The Flames
The amount of oxygen reaching the fire dictates its intensity. Most wood-fired ovens have an adjustable air intake vent, often near the mouth of the oven or at the base of the chimney.
- Opening the Damper: A fully or mostly open damper allows maximum airflow, resulting in a hotter, more vigorous flame. This is used during the initial heating phase and for high-temperature cooks.
- Restricting Airflow: Partially closing the damper restricts oxygen, leading to a slower, cooler burn. This can be useful for maintaining a steady temperature over a longer period or when you want to reduce the flame intensity after the initial peak heat.
- Chimney Draft: The chimney also plays a vital role in airflow. A good draft pulls air through the oven and exhaust gases out, facilitating combustion. Ensuring the chimney is clear and properly designed is essential for consistent performance.
The Art Of The Burn Cycle
Achieving the desired temperature for different pizza styles involves a specific burn cycle.
- Preheating: This is the longest phase, often taking 1-2 hours depending on oven size and insulation. You start with kindling and gradually add larger pieces of wood, aiming to heat the oven dome and floor thoroughly. The goal is to get the dome to turn white, indicating it’s reached a high temperature and is free of soot.
- Establishing the Cooking Flame: Once preheated, you build a strong fire to create the active flame. For Neapolitan pizza, this means a vigorous fire that fills the dome. For other styles, you might let the fire burn down slightly.
- Cooking:
- Neapolitan: Cook with the active flame present, rotating the pizza frequently to ensure even cooking under the intense radiant heat.
- New York/Other Styles: Push the main fire to the side or back, creating a zone of intense heat from the floor and residual heat from the dome and walls. The flame might be reduced to embers or a low flicker.
- Managing Residual Heat: After the main fire subsides, the oven retains a significant amount of heat in its thermal mass (bricks, dome). This residual heat is perfect for longer bakes, allowing the crust to cook through without burning the toppings. You can continue to add small pieces of wood or even just embers to maintain a steady, moderate temperature.
Pro Tip: Use a good quality infrared thermometer to measure the temperature of the oven floor and the dome. This provides a much more accurate reading than relying solely on visual cues of the flame. For Neapolitan, aim for 800-900°F (430-480°C) on the deck. For New York style, 500-600°F (260-315°C) is often sufficient.
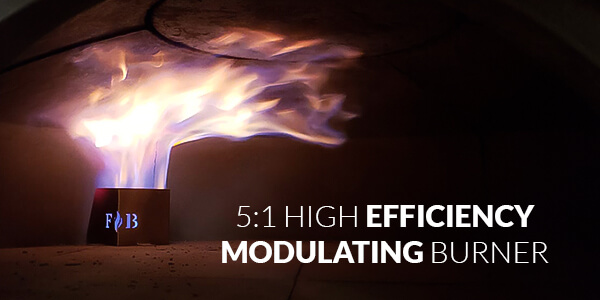
Credit: www.fornobravo.com
Optimizing Flame Control In Gas Pizza Ovens
Gas pizza ovens offer a more controlled and often more convenient experience, with flame modulation primarily managed through burner settings and design.
Burner Types And Placement
Gas ovens typically use either a U-shaped burner or multiple burners strategically placed to heat the oven cavity.
- U-Shaped Burners: These are common in countertop models and run along the back and sides of the oven chamber, providing a broad heat source.
- Single/Dual Burners: Some ovens might have a single burner at the rear or a combination of burners for the deck and the top.
- Burner Output (BTU): The British Thermal Unit (BTU) rating indicates the burner’s heat output. Higher BTU generally means faster heating and higher potential temperatures.
Control Knobs And Settings
The primary method of flame modulation in gas ovens is through the control knobs.
- Main Burner Control: This knob adjusts the gas flow to the primary burner(s), allowing you to increase or decrease the flame intensity. Turning it up creates a larger, hotter flame for rapid preheating and high-temperature cooking. Turning it down results in a smaller, cooler flame for maintaining temperature or for longer bakes.
- Deck/Bottom Burner Control (if applicable): Some ovens have a separate control for a burner dedicated to heating the pizza stone or deck. This allows for finer adjustment of the bottom heat, preventing the crust from burning while ensuring it’s cooked through.
- Ignition and Safety: Gas ovens have built-in ignition systems and safety valves that regulate gas flow. Understanding how these work ensures safe and effective operation.
Achieving Different Cooking Styles
While not as inherently dynamic as wood-fired ovens, gas ovens can be modulated to produce a variety of pizza styles.
- Neapolitan Style: Crank the main burner to its highest setting. Allow the oven and stone to preheat thoroughly to the maximum temperature (often 850-900°F or 450-480°C). Once hot, you might slightly reduce the flame to prevent overheating the toppings while the pizza cooks rapidly. Some ovens have a specific “pizza mode” that optimizes burner output.
- New York Style: Preheat the oven to a moderate temperature (around 550-600°F or 290-315°C). Once the deck is hot, you may need to cycle the burner or reduce its intensity to allow for a longer bake time (3-5 minutes) without burning the crust. Some ovens allow you to keep the deck burner on a low setting while the main burner cycles.
- Broiler/Top Heat: Many gas ovens utilize a top element or a high-flame setting on the main burner to mimic the radiant heat of a wood-fired oven’s flame. This is crucial for achieving oven spring and charring on the *cornicione*.
Example: A popular countertop gas pizza oven might have a main burner that reaches 950°F (510°C). To cook a Neapolitan pizza, you’d turn the dial to maximum for 10-15 minutes to fully heat the stone and dome. Then, you’d place the pizza and might slightly lower the flame to maintain intense heat without scorching the top. For a New York slice, you’d preheat to a lower temperature and potentially use a lower flame setting throughout the bake to achieve a crispier, chewier crust.
Understanding Oven Zones And Pizza Placement
Regardless of fuel type, a pizza oven develops distinct heat zones. Effective flame modulation means understanding these zones and using them to your advantage.
The Heat Map Of Your Oven
A pizza oven is rarely uniformly hot. The flame, the heated dome, and the deck create a dynamic environment.
- The Hot Spot: This is typically the area directly above or closest to the active flame. It experiences the most intense radiant heat and will cook the fastest.
- The Deck Temperature: The temperature of the oven floor is critical for the bottom crust. It’s influenced by the burner (gas) or embers/residual heat (wood). It needs to be hot enough to cook the base quickly but not so hot it burns before the top is done.
- The Dome Temperature: The superheated dome radiates heat downwards. Its temperature is a good indicator of the overall oven heat and is crucial for oven spring and cooking the top of the pizza.
- Cooler Zones: Areas further away from the flame or heat source will be cooler. These might be used for resting pizzas or for longer bakes where intense heat is not desired.
Strategic Pizza Placement And Rotation
Knowing where to place your pizza and when to rotate it is key to even cooking.
- Initial Placement: For most styles, you’ll place the pizza directly onto the hottest part of the deck. In a wood-fired oven, this might be the center or slightly away from the direct flame. In a gas oven, it’s typically the center of the stone.
- Rotation is Non-Negotiable: This is where flame modulation directly impacts your technique.
- Wood-Fired: As the flame licks the side of the pizza facing it, you’ll need to rotate it 180 degrees. As the *cornicione* puffs up and blisters, you might rotate it again to ensure even browning. This rotation might happen every 15-30 seconds for Neapolitan pizzas.
- Gas: Even with more even heat distribution, rotation is still beneficial. You might rotate the pizza 90 or 180 degrees midway through the cook to ensure the side closest to the burner doesn’t overcook.
- Adjusting for Flame: If the flame is too aggressive and charring one side, you might need to briefly move the pizza to a cooler part of the deck or reduce the flame intensity. Conversely, if the pizza isn’t cooking fast enough, you might need to move it closer to the heat source or increase the flame.
Pro Tip: For wood-fired ovens, consider the “dead zone”, the area opposite the fire. This zone relies more on radiant heat from the dome and ambient convection. It can be a good place to finish cooking a pizza if one side is getting too much direct flame.
Tools And Techniques For Precise Control
Beyond understanding the fundamentals, having the right tools and employing specific techniques can elevate your flame modulation skills.
Essential Gadgets
- Infrared Thermometer: As mentioned, this is indispensable. It allows you to accurately measure the surface temperature of the deck and dome, crucial for hitting target temperatures for different pizza styles. A good quality one can be purchased for around $20-$50.
- Oven Thermometer: While not as precise for the deck, a good oven thermometer (digital or analog) placed inside can give you a general idea of the ambient air temperature.
- Pizza Peel (Wood & Metal): A metal peel is essential for launching and retrieving pizzas from high-temperature ovens, especially wood-fired ones, as it slides easily under the cooked dough. A wooden peel is often used for assembling the pizza.
- Ash Rake/Brush (Wood-Fired): For wood-fired ovens, tools to manage embers and ash are helpful for maintaining a clean cooking surface and controlling the fire.
- Heat-Resistant Gloves: Essential for safely manipulating logs, moving embers, and reaching into a hot oven.
Practical Techniques
- The “Flame Dance”: In wood-fired ovens, this involves actively managing the fire during the bake. You might push embers forward, add a small split of wood to momentarily boost the flame if needed, or pull back burning pieces if the heat becomes too intense. It’s a dynamic process that requires constant attention.
- The “Cool Down Bake”: After the main fire has died down in a wood-fired oven, the retained heat is perfect for baking bread or cooking pizzas that require longer times at moderate temperatures (e.g., 400-500°F or 200-260°C). This leverages the oven’s thermal mass effectively.
- Gas Burner Cycling: In gas ovens, learn how your burner cycles. Some will maintain a constant flame, while others will cycle on and off to maintain temperature. Understanding this helps you anticipate heat fluctuations. If it cycles off, you might need to place the pizza strategically to benefit from residual heat.
- Using the Oven Door: Partially closing the oven door (especially on gas models designed for it) can help trap heat and increase the oven temperature, mimicking the effect of a smaller, more enclosed space. However, be cautious not to trap too much moisture, which can lead to a soggy crust.
Example Case Study: A home cook with a small backyard wood-fired oven struggled with burnt bottoms and undercooked tops. By investing in an infrared thermometer and learning to manage the fire, they discovered their oven was preheated unevenly. They started focusing on heating the entire dome and floor for a full hour before pushing the main fire to the side. They also learned to pull the pizza back slightly from the direct flame, relying more on the radiant heat from the dome. This resulted in perfectly cooked Neapolitan pizzas with a balanced crust and topping doneness.
Common Pitfalls And How To Avoid Them
Even with the best intentions, achieving perfect flame modulation can be challenging. Awareness of common mistakes can save you from burnt crusts and disappointed diners.
Overheating The Deck
This is a classic problem, especially with wood-fired ovens that can reach extreme temperatures.
- Cause: Insufficient preheating time for the dome and walls, leading to a disproportionately hot deck compared to the ambient air. Or, adding too much fuel too quickly.
- Solution: Ensure the entire oven, including the dome, is thoroughly preheated. Use an infrared thermometer to check deck temperature; it should be hot, but not scorching relative to the dome. In wood-fired ovens, let the main fire burn down slightly or push embers away from the cooking area before launching the pizza. For gas ovens, use the deck burner control (if available) to manage bottom heat independently.
Under-heating The Oven
The opposite extreme, resulting in pale, doughy pizzas that take too long to cook.
- Cause: Insufficient preheating time, not enough fuel (wood-fired), or burner set too low (gas).
- Solution: Extend preheating time. Use more fuel or a higher flame setting. Ensure the oven dome is hot (turning white in wood-fired ovens). For gas ovens, confirm the burner is functioning correctly and set to an adequate temperature.
Scorched Toppings, Undercooked Base
This often happens when the radiant heat from the flame is too intense and direct.
- Cause: Flame too close to the pizza, or oven dome not hot enough to radiate evenly.
- Solution: Move the pizza slightly away from the direct flame. Rotate the pizza more frequently. In wood-fired ovens, ensure the dome is fully heated to radiate heat effectively. In gas ovens, adjust the burner output or consider using a pizza screen for the initial part of the bake.
Inconsistent Cooking Temperature
Fluctuations in heat can lead to unpredictable results.
- Cause: Inconsistent fuel addition (wood-fired), burner cycling too aggressively (gas), or poor insulation.
- Solution: For wood-fired, maintain a steadier fire with regular, smaller additions of wood. For gas, understand your oven’s cycling behavior and adjust placement accordingly. Ensure your oven is well-insulated.
Ignoring The Oven’s Thermal Mass
Relying solely on the active flame without considering the heat stored in the bricks is a mistake.
- Cause: Not allowing the oven to fully absorb heat during preheating, or trying to cook too many pizzas back-to-back without managing the fire.
- Solution: Prioritize thorough preheating. Understand that the oven’s thermal mass continues to cook the pizza even after the flame dies down. For consecutive pizzas, you may need to add small amounts of fuel between bakes to maintain temperature.
Warning: Never use accelerants like lighter fluid to start your pizza oven fire. This can impart a chemical taste to your food and is a fire hazard. Always use proper fire-starting materials like natural fire starters or crumpled newspaper.
Comparing Wood-fired Vs. Gas Oven Flame Modulation
The fundamental principles of heat transfer apply to both, but the methods of modulation differ significantly.
| Feature | Wood-Fired Oven | Gas Oven |
|---|---|---|
| Heat Source | Burning wood | Natural gas or propane burner |
| Flame Control | Fuel addition, airflow (damper), log placement | Burner control knobs (gas flow), BTU output |
| Temperature Range | Highly variable, can reach 900°F+ (480°C+) | Controlled range, typically 400–950°F (200–510°C) |
| Heat-Up Time | 1–3 hours (depending on size and insulation) | 15–40 minutes |
| Temperature Stability | Requires active management; fluctuates with fuel and airflow | More stable; thermostat or manual control maintains consistency |
| Flavor Contribution | Smoky, wood-fired flavor imparted to crust and toppings | Neutral; no smoke flavor unless wood chips are added |
| Skill Level Required | High; requires understanding of fire dynamics, airflow, and timing | Moderate; easier to learn and control |
| Maintenance | Higher; ash removal, chimney cleaning, fuel sourcing | Lower; occasional burner cleaning, gas supply check |
| Best For | Traditional Neapolitan, artisan pizzas, high-heat baking | Convenience, consistent results, indoor/outdoor use |
| Environmental Impact | Renewable fuel (if sustainably sourced), but produces smoke and particulates | Fossil fuel use, CO2 emissions, but lower particulate matter |
| Cost | Moderate to high (wood, storage, maintenance) | Moderate (gas supply, initial oven cost) |
| Versatility | Can bake bread, roast, and slow-cook after pizza | Primarily pizza; some models can bake other foods |
Summary: Wood-fired ovens offer unmatched flavor and high-heat capability but demand active management. Gas ovens provide convenience, precision, and consistency but lack the smoky character of wood. Your choice depends on your priorities: tradition and flavor vs. ease and reliability.
Troubleshooting Common Flame Modulation Issues
| Symptom | Likely Cause | Solution |
|---|---|---|
| Burnt bottom, undercooked top | Deck too hot, dome not hot enough | Preheat longer; push fire to side; rotate pizza more often |
| Pale, doughy crust | Oven not hot enough; insufficient preheat | Extend preheat; add more fuel; increase burner output |
| Scorched toppings, raw center | Flame too intense and direct | Move pizza away from flame; reduce burner; use dome radiant heat |
| Uneven cooking | Hot spots on deck; poor rotation | Map deck with IR thermometer; rotate pizza every 15–30 seconds |
| Temperature drops between pizzas | Insufficient thermal mass; poor insulation | Add fuel between bakes; improve insulation; preheat longer |
| Excessive smoke | Wet wood; insufficient airflow | Use dry, seasoned wood; open damper; preheat chimney |
| Flame dies out | Lack of fuel; poor airflow; wet wood | Add dry kindling; check damper; ensure proper draft |
| Oven cools too quickly | Poor insulation; thin thermal mass | Add insulation; use higher-mass materials |
Preventive Maintenance for Flame Modulation Performance
| Frequency | Task |
|---|---|
| Before each use | Clear ash; inspect deck; check damper operation |
| After each use | Remove ash; check for cracks; clean chimney cap |
| Weekly | Inspect firebrick or cordierite for wear; check door seals |
| Monthly | Deep clean deck; inspect insulation for gaps |
| Quarterly | Professional inspection of oven structure and chimney |
| Annually | Replace worn deck materials; full system check |
Key Takeaways
- Flame Modulation is Essential: It controls temperature, crust development, and topping doneness.
- Understand Heat Transfer: Conduction, convection, and radiation all play roles; the flame drives all three.
- Wood-Fired Ovens Demand Active Management: Fuel choice, log placement, airflow, and timing all matter.
- Gas Ovens Offer Precision: Burner control knobs and BTU output allow for consistent, repeatable results.
- Know Your Oven’s Zones: Hot spots, cooler zones, and the dome’s radiant heat all influence cooking.
- Rotation is Non-Negotiable: Rotate pizzas frequently for even cooking, especially in wood-fired ovens.
- Use the Right Tools: An infrared thermometer is essential; a turning peel and heat-resistant gloves are also invaluable.
- Avoid Common Pitfalls: Overheating the deck, under-heating the oven, and scorching toppings are preventable with practice.
- Practice and Document: Every oven is unique. Keep notes on what works and refine your technique.
Frequently Asked Questions
What is the ideal temperature for Neapolitan pizza?
800–900°F (430–480°C) on the deck, with air temperature around 850–900°F (455–480°C). This allows a 60–90 second bake.
How do I know when my wood-fired oven is ready?
The dome should be clear of black soot (burned white), and the deck should read 750–800°F (400–425°C) with an IR thermometer.
Can I use a gas oven for Neapolitan-style pizza?
Yes, if the oven reaches high temperatures (850°F+). However, it may lack the smoky flavor and intense radiant heat of a wood-fired oven.
Why does my pizza burn on the bottom but not cook on top?
This usually means the deck is too hot while the dome is not hot enough. Preheat longer to saturate the dome, push the fire to the side, and rotate the pizza more frequently.
How often should I rotate my pizza?
For Neapolitan pizza in a wood-fired oven, rotate every 15–30 seconds. For gas ovens, rotate 90–180 degrees midway through the bake.
What’s the best wood for a wood-fired oven?
Dry, seasoned hardwood—oak, maple, ash, hickory, or fruitwoods. Moisture content should be below 20%.
Can I adjust the flame on a gas pizza oven?
Yes. Most gas ovens have control knobs that adjust gas flow and flame intensity. Some have separate controls for the deck and dome burners.
What should I do if my oven overheats?
Allow it to cool naturally for a few minutes. For wood-fired ovens, push embers aside or remove some fuel. For gas, reduce the burner setting.
How do I maintain consistent temperature between pizzas?
Add small amounts of fuel between bakes (wood-fired) or briefly increase the burner (gas). Minimize door-open time and monitor deck temperature with an IR thermometer.
Conclusion
Pizza oven flame modulation is the art and science of controlling fire to achieve perfect pizza. It’s not just about having a roaring flame—it’s about directing that heat, balancing conduction, convection, and radiation, and adapting to your oven’s unique dynamics. Wood-fired ovens offer unmatched flavor and high-heat capability but demand active management of fuel, airflow, and timing. Gas ovens provide precision and convenience, with burner controls that allow for consistent, repeatable results. Whether you’re chasing the leopard-spotted crust of a Neapolitan masterpiece or the crispy, chewy texture of a New York slice, mastering flame modulation is your key to success. Control the flame, and you control the pizza.

As the author of the “Ultimate Pizza Guide: Recipes, Tips & Secrets Revealed,” I’m dedicated to sharing my love for pizza and empowering others to create delicious homemade pizzas with ease. Join me on a journey to uncover the secrets to perfecting your pizza game!


