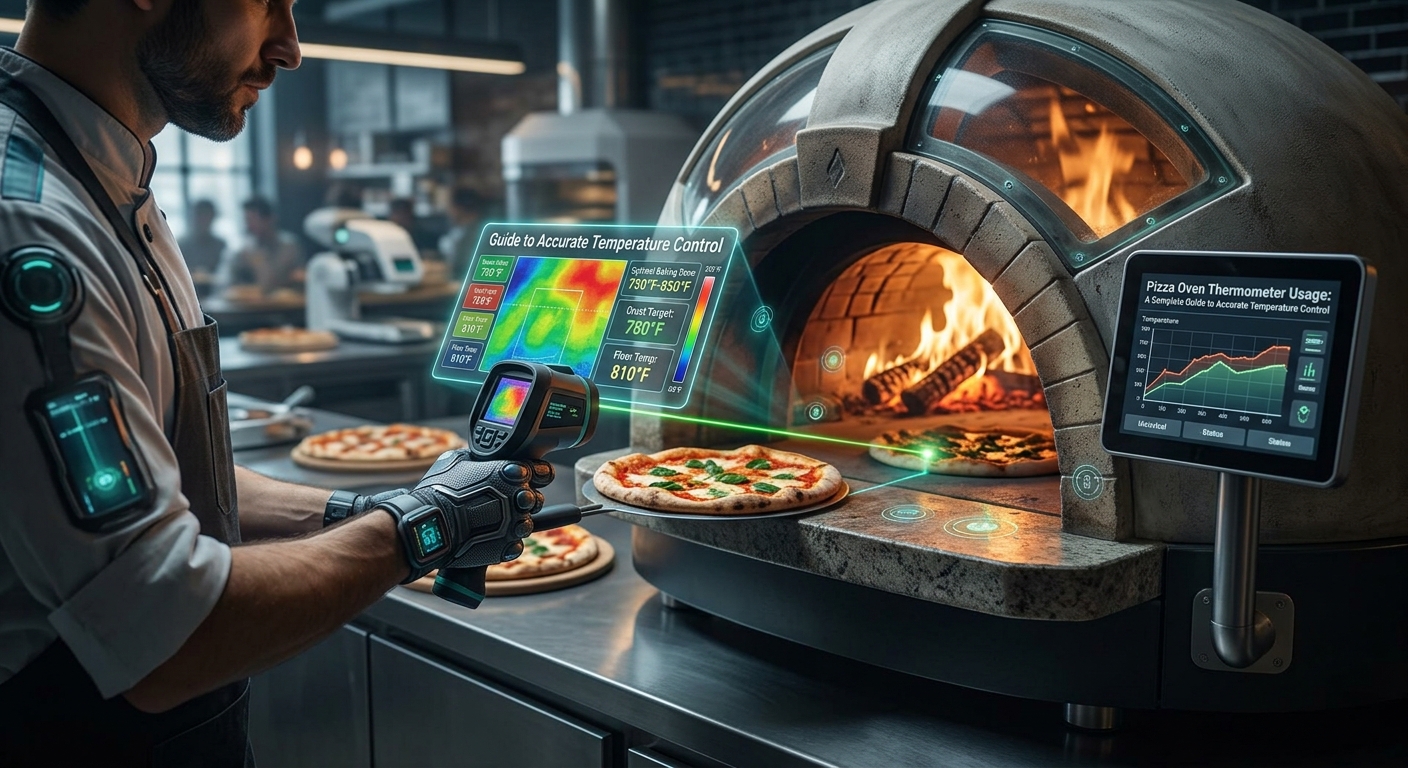
“Pizza Oven Thermometer Usage”
Mastering Your Pizza Oven With A Thermometer: A Comprehensive Guide
Achieving that perfect Neapolitan-style pizza, with its beautifully charred crust and rapidly cooked toppings, hinges on one crucial element: precise temperature control. While experienced pizzaiolos might develop an instinct for the heat of their oven, for most home cooks and even aspiring professionals, a pizza oven thermometer is not just a helpful tool; it’s an indispensable one. It bridges the gap between guesswork and consistent, delicious results, transforming your pizza-making from a gamble into a science. Understanding how to use this seemingly simple device effectively unlocks the full potential of your wood-fired, gas, or electric pizza oven, ensuring every pie is cooked to perfection.
This guide will equip you with everything you need to know about pizza oven thermometers, from choosing the right type to understanding the temperature zones within your oven and troubleshooting common issues. By mastering the use of your thermometer, you’ll gain the confidence to bake a wider variety of pizzas, breads, and other dishes, consistently impressing yourself and your guests with authentic, restaurant-quality results.

Credit: www.doordash.com
Key Takeaways
- Thermometer Types: Understand the differences between infrared, dial, and digital thermometers and their suitability for pizza ovens.
- Placement is Crucial: Learn where to position your thermometer for the most accurate readings of dome and cooking surface temperatures.
- Temperature Zones: Recognize that pizza ovens have distinct hot and cooler zones, and how thermometer placement affects readings.
- Preheating Protocol: Master the art of preheating your oven using the thermometer to achieve optimal cooking temperatures.
- Cooking Strategies: Adapt your pizza-making technique based on thermometer readings to ensure even cooking and perfect crust.
- Maintenance and Calibration: Keep your thermometer in good working order for reliable performance.
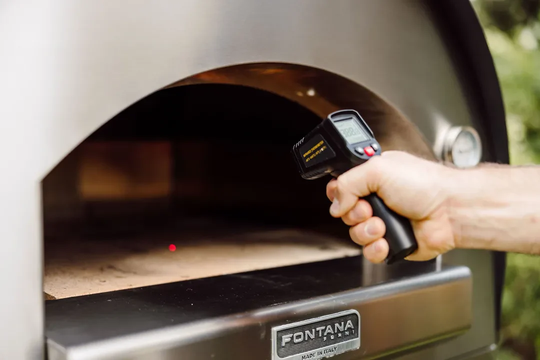
Credit: www.fontanaforniusa.com
Understanding Pizza Oven Thermometer Types
The market offers a variety of thermometers, each with its own strengths and weaknesses when it comes to pizza oven use. Selecting the right type is the first step towards accurate temperature management.
Infrared Thermometers (pyrometers)
Infrared thermometers are popular for their non-contact measurement capabilities. They work by detecting the infrared radiation emitted by a surface.
- How they work: Point the infrared thermometer at the surface you want to measure (e.g., the pizza stone or the oven dome). The device reads the emitted infrared energy and converts it into a temperature reading.
- Pros:
- Speed: Provide instant readings.
- Safety: No need to insert the thermometer into the hot oven.
- Versatility: Can measure various surfaces, including the pizza stone, dome, and even the flames.
- Cons:
- Surface Dependent: Readings are only accurate for the specific spot you aim at. They don’t give an average or internal temperature.
- Emissivity: Different materials emit infrared radiation differently. Most pizza oven surfaces (like refractory cement or stone) have a high emissivity, making them suitable for infrared readings, but it’s a factor to consider.
- Accuracy: Can be affected by steam, smoke, or debris on the surface. Readings can fluctuate.
- Best Use Case: Ideal for quickly checking the temperature of the pizza stone or the oven dome without direct contact. They are excellent for verifying if your cooking surface has reached the desired temperature before launching a pizza. For instance, aiming at the center of your pizza stone will give you a direct reading of its surface heat.
Dial Thermometers (bimetallic)
These are the classic, analog thermometers often seen attached to oven doors or as standalone probes.
- How they work: A bimetallic strip inside the thermometer expands or contracts with temperature changes, causing a needle to move across a calibrated dial.
- Pros:
- Durability: Generally robust and can withstand high temperatures.
- Simplicity: Easy to read and use.
- Constant Monitoring: Can be left in the oven to provide continuous readings.
- Cons:
- Accuracy: Can lose calibration over time and may not be as precise as digital models.
- Placement Limitations: Often designed to be mounted on the oven wall or door, giving you the temperature at that specific point, which might not represent the entire oven.
- Response Time: Slower to react to temperature changes compared to infrared or digital probe thermometers.
- Best Use Case: Useful for monitoring the ambient temperature within the oven dome, especially if designed to be mounted near the opening or on the ceiling. They provide a general sense of the oven’s heat. Many portable dial thermometers come with a probe you can insert into the oven.
Digital Probe Thermometers
These thermometers feature a digital display connected to a metal probe via a heat-resistant cable.
- How they work: The probe contains a sensor (like a thermocouple or thermistor) that measures temperature, transmitting the data to the digital display.
- Pros:
- High Accuracy: Generally more accurate than dial thermometers.
- Fast Response: Quick to register temperature changes.
- Versatility: Can be used to measure the cooking surface, ambient air temperature, or even the internal temperature of larger items cooked in the oven.
- Programmable Alarms: Many models allow you to set temperature alarms.
- Cons:
- Cable Management: The heat-resistant cable needs to be routed carefully to avoid damage or hindering oven door closure.
- Probe Durability: The probe itself can be susceptible to damage from extreme heat or physical impact if not handled with care.
- Power Source: Requires batteries.
- Best Use Case: Excellent for monitoring both the cooking surface and the dome temperature if you can position the probe strategically. Some users place the probe to rest on the oven floor near the pizza or suspend it from the dome. They are also fantastic for baking bread or roasting meats, allowing you to monitor internal temperatures.

Credit: www.amazon.com
The Importance Of Accurate Temperature Readings
Pizza ovens operate at significantly higher temperatures than conventional kitchen ovens. Achieving the ideal pizza-baking temperature is critical for several reasons, and your thermometer is the key to unlocking this precision.
Achieving The Perfect Crust
The hallmark of a great pizza is its crust, crispy on the outside, soft and airy on the inside, with characteristic charring or “leoparding. ” This transformation happens rapidly at high temperatures.
- Too Low: If the oven is not hot enough (typically below 700°F / 370°C for Neapolitan), the dough won’t cook quickly. The crust will be pale, dense, and potentially gummy. Moisture won’t evaporate fast enough for crisping.
- Too High: If the oven is excessively hot (over 900°F / 480°C for many home ovens), the crust can burn on the outside before the inside has a chance to cook through. This leads to a bitter taste and an unpleasant texture. The toppings might also scorch.
- Just Right: The ideal temperature range for most pizzas, especially Neapolitan, is between 750°F and 850°F (400°C – 450°C). At these temperatures, the crust cooks in 60-90 seconds, allowing the dough to puff up rapidly due to the intense heat from the floor and dome, creating that sought-after airy crumb and crispy exterior.
Cooking Toppings Evenly
High heat is essential for quickly cooking toppings without making them soggy or overcooked.
- Rapid Cooking: The intense heat radiates from the dome and the floor, cooking toppings like cheese, vegetables, and meats in the same short time it takes to cook the crust.
- Melting Cheese: Proper temperature ensures cheese melts beautifully and browns slightly, rather than becoming oily or burnt.
- Vegetable Crispness: Vegetables retain a pleasant bite and vibrant color when cooked quickly at high heat.
Understanding Oven Dynamics
Every pizza oven, whether wood-fired, gas, or electric, creates distinct temperature zones. Your thermometer helps you understand and utilize these zones.
- The Dome: The dome of the oven traps heat and reflects it down onto the pizza. A hotter dome ensures toppings cook quickly and evenly.
- The Floor (Hearth): The cooking surface directly beneath the pizza is crucial for cooking the crust from below. It needs to be sufficiently hot to achieve crispness and lift.
- The Mouth: The area around the oven opening can be cooler. Managing the heat here, often by adjusting the door or using a peel to block it momentarily, influences the overall cooking environment.
- Hot Spots: Ovens often develop localized hot spots. Knowing where these are, perhaps by observing how quickly different areas of a test pizza cook, is invaluable.
How To Use Your Pizza Oven Thermometer Effectively
Simply owning a thermometer isn’t enough; understanding how and when to use it is paramount. This involves strategic placement, consistent monitoring, and interpreting the readings.
Preheating Your Oven: The Thermometer’s Role
Preheating is arguably the most critical step in pizza oven cooking, and your thermometer is your guide.
- Initial Heat-Up: For wood-fired ovens, start your fire and allow it to burn intensely, clearing the dome of soot. For gas or electric ovens, turn them on to their highest setting.
- Dome Temperature: Use your infrared or a mounted dial/digital thermometer to monitor the oven dome. The dome needs to reach a high temperature (often 800°F – 900°F / 425°C – 480°C) to absorb enough heat. This process can take 45 minutes to over an hour, depending on the oven’s size and insulation.
- Floor Temperature: Once the dome is hot, the floor (cooking surface) needs time to absorb heat. Use an infrared thermometer to check the pizza stone or hearth. It should ideally be around 700°F – 750°F (370°C – 400°C) for Neapolitan-style pizzas. The floor temperature is often slightly lower than the dome temperature.
- Stabilization: Allow the oven to stabilize at temperature for 10-15 minutes after reaching the target dome and floor temperatures. This ensures the entire oven mass is saturated with heat.
- Adjusting for Different Pizzas: For thicker crust pizzas or other baked goods, you might aim for slightly lower temperatures (e.g., 500°F – 600°F / 260°C – 315°C) and longer cooking times. Your thermometer is essential for hitting these specific targets.
Strategic Placement For Accurate Readings
Where you place or aim your thermometer significantly impacts the reading you get.
- Infrared Thermometer:
- For Stone Temp: Aim directly at the cooking surface (pizza stone or hearth) where you intend to place the pizza. Scan different areas to identify hot spots.
- For Dome Temp: Aim at the inside roof of the oven dome. This reading indicates how much heat is being radiated down onto the pizza.
- Consistency: Try to aim at similar spots each time for comparable readings. Be aware that steam from cooking can temporarily affect readings.
- Dial/Digital Probe Thermometers:
- Mounted: If your oven has a built-in thermometer, it usually measures the ambient air temperature near the dome’s ceiling. This is a good general indicator but doesn’t reflect the floor temperature.
- Portable Probe:
- Resting on Floor: Place the probe on the cooking surface, ideally near where the pizza will go, but not directly under it. Ensure the cable is routed safely.
- Suspended: Some users rig a way to suspend the probe from the oven ceiling or near the opening to measure ambient dome temperature.
- During Cooking: A digital probe can be left in the oven to monitor temperature fluctuations as the pizza cooks.
Interpreting Readings And Making Adjustments
Your thermometer provides data; your experience turns it into action.
- Target Temperatures:
- Neapolitan Pizza: Dome 800°F-900°F (425°C-480°C), Floor 700°F-750°F (370°C-400°C). Cook time: 60-90 seconds.
- New York Style Pizza: Dome 600°F-700°F (315°C-370°C), Floor 500°F-600°F (260°C-315°C). Cook time: 3-5 minutes.
- Thicker Crust/Other Bakes: Typically 400°F-500°F (200°C-260°C). Cook time varies.
- Reading the Signs:
- If the floor is hot but the dome is lagging, toppings might cook slowly while the crust burns. Add more fuel or increase heat.
- If the dome is scorching hot but the floor is cool, the crust will be pale and doughy. Wait for the floor to heat up sufficiently.
- Use visual cues: Watch the flame (if applicable), the color of the dome, and how quickly a small piece of dough browns. The thermometer reading should correlate with these observations.
- Fuel Management (Wood-Fired Ovens):
- Too Hot: If readings exceed your target, allow the fire to die down slightly or push embers to the side. You can also briefly open the oven door (carefully! ).
- Too Cool: Add small pieces of seasoned hardwood to the fire. Ensure good airflow.
- Maintaining Temp: Regularly check and add small logs as needed to maintain a consistent temperature.
Cooking Strategies Based On Thermometer Readings
Once your oven is preheated and stabilized, the thermometer continues to be your guide throughout the cooking process.
Launching The Pizza
The moment of truth arrives when you launch your pizza.
- Confirm Floor Temp: Use your infrared thermometer to double-check the cooking surface temperature right before launching. A quick sweep can reveal if the heat has dropped significantly during the previous bake.
- Visual Check: Ensure the surface is clean and dry. A dusting of semolina or flour can help prevent sticking.
- Speed is Key: Work efficiently. The longer the pizza sits on the peel, the more heat it loses to the peel and the surrounding air.
During The Bake: Rotation And Monitoring
The short cooking time requires constant attention, aided by your thermometer.
- Rotation: Pizzas cook much faster on the side closer to the fire or the hottest part of the oven. Rotate the pizza 180 degrees halfway through the cooking time (or even more frequently for very fast cooks) to ensure even browning. Use your thermometer to gauge if one side is cooking significantly faster than the other, indicating a need for rotation.
- Monitoring Dome Temp: If using a digital probe thermometer, keep an eye on the dome temperature. If it drops too rapidly, it might be time to add a small piece of wood or adjust the gas burner. For infrared users, a quick check of the dome can confirm if radiant heat is still strong.
- Crust Development: Observe the crust’s edge. Is it puffing up? Is it starting to char? If the crust is browning too quickly but the toppings aren’t done, the dome might be too hot relative to the floor, or the overall temperature is too high for the desired cook time. If the crust is pale and the toppings are browning, the oven might be cooling down faster than anticipated.
Adapting For Different Doughs And Toppings
Not all pizzas are created equal, and your thermometer helps you adapt.
- Thicker Crusts: For styles like New York or pan pizzas, aim for a slightly lower oven temperature (around 500°F-600°F / 260°C-315°C). Your thermometer is crucial for hitting this range and maintaining it for the longer 3-5 minute bake time. You might use the infrared to check the floor and a probe to monitor the ambient temperature.
- Delicate Toppings: If using very delicate toppings that cook quickly (like fresh mozzarella or basil added post-bake), ensure your oven temperature is precise. A slightly lower temperature might be beneficial to prevent scorching.
- Bread and Roasts: When baking bread or roasting meats, the goal is often sustained, even heat. Use a digital probe thermometer to monitor the oven’s ambient temperature over a longer period (20-60 minutes or more), ensuring it stays within the target range (e.g., 400°F-500°F / 200°C-260°C).
Maintaining And Calibrating Your Thermometer
To ensure reliable and accurate temperature readings, proper maintenance is essential.
Cleaning Your Thermometer
- Infrared Thermometers: Keep the lens clean. Use a soft, lint-free cloth (like a microfiber cloth) and a lens cleaning solution if necessary. Avoid abrasive materials that could scratch the lens. Wipe the body of the unit with a damp cloth.
- Dial Thermometers: Clean the glass face and casing with a damp cloth. Avoid submerging the thermometer in water.
- Digital Probe Thermometers:
- Probe: Clean the metal probe after each use with warm, soapy water and a soft brush or cloth. Dry thoroughly. Avoid immersing the probe tip in water for extended periods, as moisture can affect its accuracy over time. Some probes are dishwasher safe, but handwashing is generally recommended for longevity.
- Cable and Display: Wipe the cable and the digital display unit with a damp cloth. Ensure these parts do not get excessively hot.
Calibration Checks
Over time, thermometers can lose their accuracy. Performing a simple calibration check can ensure reliability.
- Boiling Water Test (for probe/dial types):
- Bring a pot of water to a rolling boil.
- Place the probe or the sensing end of the dial thermometer into the boiling water, ensuring it doesn’t touch the sides or bottom of the pot.
- Allow it to stabilize for at least 30 seconds.
- A properly calibrated thermometer should read 212°F (100°C) at sea level. (Note: Boiling point decreases at higher altitudes).
- If the reading is significantly off, your thermometer may need recalibration (if possible) or replacement. Many digital thermometers have a calibration adjustment feature. Consult your thermometer’s manual.
- Infrared Thermometer Check: These are harder to calibrate at home. If you suspect inaccuracy, compare its readings with another known accurate thermometer on a stable surface. Look for consistency. If readings seem consistently off by a significant margin, professional recalibration or replacement might be necessary.
Storage And Handling
- Protect from Extreme Heat: Do not leave any type of thermometer inside a hot pizza oven when it’s not in use, unless it is specifically designed for constant mounting (like some built-in dial models). High, prolonged heat can damage sensors and electronics.
- Avoid Impacts: Handle thermometers gently. Dropping them can damage internal components, especially in digital models.
- Store Properly: Store thermometers in a cool, dry place, away from direct sunlight and moisture. Use protective cases if provided.
Common Pizza Oven Thermometer Issues And Solutions
Even with careful use, you might encounter problems. Here’s how to troubleshoot:
Inconsistent Readings
- Problem: The thermometer gives different readings each time you check, even under similar conditions.
- Possible Causes:
- Infrared: Aiming at different spots, surface debris (soot, flour), steam, or a dirty lens.
- Probe/Dial: Probe not making good contact with the surface, fluctuation in oven temperature, or the thermometer itself is faulty/uncalibrated.
- Solutions:
- Infrared: Clean the lens. Aim consistently at the same area. Ensure the surface is clear of debris. Wait for steam to dissipate.
- Probe/Dial: Ensure the probe is firmly on the cooking surface. Check oven fuel/heat source. Perform a calibration test. If consistently off, recalibrate or replace.
Readings Seem Too High Or Too Low
- Problem: The thermometer reads much higher or lower than expected, even during preheating.
- Possible Causes:
- Infrared: Emissivity mismatch (less common for pizza ovens), aiming at a cooler part of the oven (like the mouth), or the oven simply hasn’t reached temperature yet.
- Probe/Dial: Thermometer not fully heated/stabilized, probe not making contact, or significant calibration drift.
- Solutions:
- Infrared: Ensure you’re aiming at the dome or floor as intended. Allow ample preheating time. Cross-reference with visual cues (flame color, dome heat).
- Probe/Dial: Let the thermometer stabilize fully. Ensure good contact. Perform the boiling water calibration test.
Digital Display Not Working
- Problem: The screen on a digital thermometer is blank or showing errors.
- Possible Causes: Dead batteries, loose battery connection, internal damage from heat or impact.
- Solutions:
- Replace the batteries with fresh ones. Ensure they are inserted correctly.

As the author of the “Ultimate Pizza Guide: Recipes, Tips & Secrets Revealed,” I’m dedicated to sharing my love for pizza and empowering others to create delicious homemade pizzas with ease. Join me on a journey to uncover the secrets to perfecting your pizza game!


