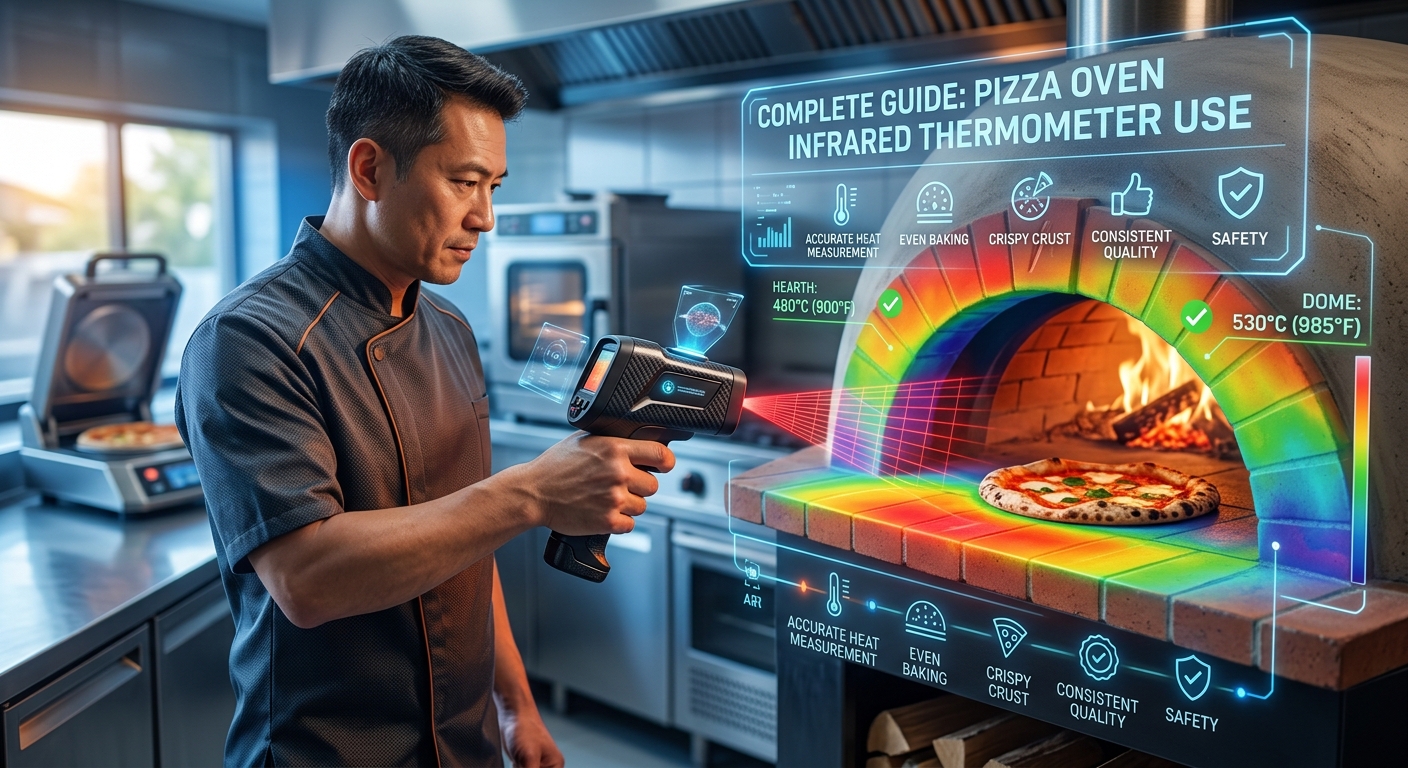
The tantalizing aroma of perfectly cooked pizza, with its crisp crust and bubbling toppings, is a culinary dream for many. Achieving this perfection, especially when using specialized pizza ovens, often hinges on precise temperature control. This is where a seemingly simple tool can become your most valuable ally: the pizza oven infrared thermometer. Unlike traditional contact thermometers, infrared thermometers offer a quick, non-contact way to gauge the surface temperature of your oven floor, crucial for understanding when it’s ready to bake and how it’s performing throughout the cooking process. Mastering its use can elevate your home pizza-making from good to truly exceptional, mimicking the results seen in professional pizzerias.
Understanding the nuances of pizza oven temperature, particularly the difference between ambient air temperature and the cooking surface temperature, is paramount. While an oven might read a high temperature on its built-in thermometer, the stone or steel deck where the pizza actually cooks might be significantly cooler.
This discrepancy can lead to undercooked bases or burnt crusts, regardless of how hot the oven *appears* to be. Infrared thermometers bridge this gap, providing the specific data you need to make informed decisions about preheating, pizza placement, and cooking times, ensuring that each pie emerges with that coveted Neapolitan-style char and perfectly cooked interior.
Key Takeaways
- Infrared thermometers provide rapid, non-contact surface temperature readings of pizza oven floors (stones/steels).
- Surface temperature is critical for achieving a perfectly cooked pizza crust, often differing significantly from ambient oven temperature.
- Proper preheating is essential, and infrared thermometers help determine when the oven floor has reached the optimal temperature range (typically 500-700°F or 260-370°C for most home ovens).
- Consistency is key: Use the thermometer to monitor temperature fluctuations during cooking and adjust as needed.
- Understanding emissivity is important for accurate readings, though most pizza oven surfaces have high emissivity.
- Regular cleaning and calibration ensure the longevity and accuracy of your infrared thermometer.
- Different pizza styles require different oven temperatures, and the thermometer helps tailor your approach.
Credit: www.fontanaforniusa.com
The Science Behind Pizza Oven Temperatures
Achieving the perfect pizza bake is a delicate dance between heat transfer methods. In a traditional wood-fired oven, heat is transferred through radiation from the dome, convection from the hot air circulating within, and conduction from the scorching hot oven floor. For home pizza ovens, especially those designed for outdoor use or countertop models, understanding these elements is crucial. The oven floor temperature is arguably the most critical factor for the pizza base. It’s responsible for the rapid puffing of the crust and the development of char, often referred to as “leoparding.”
When you place a pizza onto a hot surface, the moisture in the dough is instantly converted to steam, which causes the dough to expand rapidly. This is followed by the Maillard reaction and caramelization, which create the browning and complex flavors we associate with a well-baked pizza.
If the oven floor isn’t hot enough, this process is slow, leading to a pale, doughy base that lacks crispness and flavor. Conversely, an excessively hot floor can burn the bottom of the crust before the toppings are cooked or the dough is properly set.
This is why knowing the precise surface temperature is so vital.
Most home pizza ovens, whether gas, electric, or wood-fired, aim for surface temperatures in the range of 500°F to 700°F (260°C to 370°C) for Neapolitan-style pizzas. For New York-style or thicker crusts, slightly lower temperatures might be preferable. The built-in thermometers on many ovens measure the ambient air temperature within the oven dome, which can be considerably higher than the stone or steel deck temperature. This is where the infrared thermometer shines, giving you a direct reading of the surface you’re cooking on.
Conduction, Convection, And Radiation In Pizza Ovens
To truly appreciate the role of the infrared thermometer, it’s helpful to understand the primary modes of heat transfer at play:
- Conduction: This is heat transfer through direct contact. When you place your pizza on the hot stone or steel, heat is conducted directly from the surface into the dough. A hotter surface means faster and more efficient conduction.
- Convection: This is heat transfer through the movement of fluids (in this case, hot air). Hot air circulates around the pizza, cooking the toppings and the top of the crust. In wood-fired ovens, the dome’s design promotes strong convection currents.
- Radiation: This is heat transfer through electromagnetic waves. The hot dome and walls of the oven radiate heat downwards, cooking the toppings and contributing to the crust’s browning.
The infrared thermometer primarily measures the surface temperature responsible for conduction, which is the most immediate and often the most challenging aspect of pizza baking to get right.
How Infrared Thermometers Work
Infrared thermometers, also known as non-contact thermometers or pyrometers, operate on a simple principle: they detect the infrared radiation emitted by an object. Every object with a temperature above absolute zero emits infrared energy. The hotter an object, the more infrared energy it emits. An infrared thermometer has a lens that focuses this emitted infrared energy onto a detector (thermopile). This detector converts the energy into an electrical signal, which is then processed and displayed as a temperature reading.
Key Components And Features
- Lens: Focuses the infrared radiation onto the detector.
- Detector (Thermopile): Absorbs infrared energy and converts it into an electrical signal.
- Signal Processing Unit: Interprets the electrical signal and converts it into a temperature reading.
- Display: Shows the temperature measurement.
- Emissivity Setting: A crucial feature for accuracy.
Understanding Emissivity
Emissivity is a measure of how effectively a surface emits thermal radiation. It’s a value between 0 and 1, where 1 represents a perfect blackbody radiator. Most materials emit less radiation than a perfect blackbody, so their emissivity is less than 1. Different materials have different emissivity values. For example, polished metal has a low emissivity, while black paint has a high emissivity.
Most pizza oven stones and steels are made of ceramic, cordierite, or steel. These materials generally have a high emissivity, typically around 0.90-0.95. This means that most infrared thermometers will give very accurate readings on these surfaces without needing to adjust the emissivity setting. If your thermometer has an adjustable emissivity setting, setting it to 0.95 is usually a safe bet for pizza oven surfaces. If the emissivity is set too low, the thermometer will read a temperature lower than the actual temperature, and vice-versa.
Distance-to-spot Ratio (d:s)
Another important specification for infrared thermometers is the Distance-to-Spot Ratio (D:S). This tells you the size of the area the thermometer is measuring from a certain distance. For example, a D:S of 12:1 means that at 12 inches away, the thermometer is measuring a spot size of 1 inch in diameter. A higher D:S ratio means you can measure a smaller spot from further away, which can be useful for very hot surfaces or if you want to avoid getting too close to the oven. For pizza ovens, a D:S of 8:1 or 12:1 is generally sufficient, as you’ll likely be measuring a reasonably sized area of the oven floor.
Using Your Infrared Thermometer For Pizza Ovens
The true value of an infrared thermometer lies in its practical application for pizza making. It’s not just about getting a number; it’s about understanding what that number means and how to act on it.
Preheating Your Oven For Perfection
This is arguably the most critical stage where your infrared thermometer becomes indispensable. A common mistake is pulling the pizza out of the oven too early, or thinking the oven is ready just because the air temperature is high.
- Turn on your oven: Set it to its highest temperature setting.
- Place your pizza stone/steel: Ensure it’s properly positioned in the oven.
- Preheat: Allow ample time for the oven and the stone/steel to heat up. This can take anywhere from 30 minutes to over an hour, depending on the oven type and power.
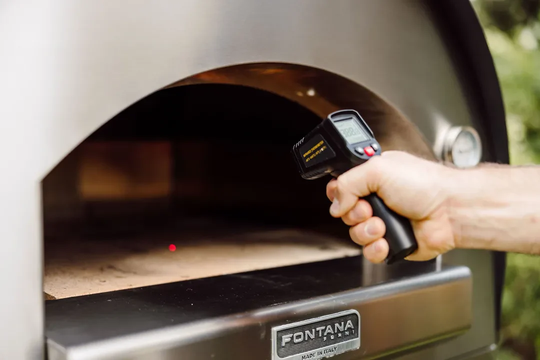
- Measure the surface temperature: Once you believe the oven is preheated, use your infrared thermometer to measure the temperature of the pizza stone or steel. Aim your thermometer at the center of the cooking surface. For Neapolitan-style pizza, you’re typically aiming for 650°F to 750°F (343°C to 399°C) on the stone/steel. Some home pizza ovens excel at reaching even higher, up to 900°F (482°C).
- Wait if necessary: If the reading is below your target, continue preheating and re-measure periodically. Don’t launch your pizza until the surface temperature is optimal.
- Monitor during cooking: Even after reaching temperature, the stone/steel will cool down as you cook pizzas. You may need to let the oven reheat between pies, especially if cooking multiple pizzas.
Pro Tip: For ovens that use a separate steel and stone, measure the steel as it typically conducts heat more rapidly and reaches higher temperatures than stone.
Launching The Pizza
Once your oven floor is at the correct temperature, you’ll use a pizza peel to launch your pizza onto the hot surface. A well-floured or semolina-dusted peel ensures the pizza slides off easily. The infrared thermometer helps confirm that the surface is hot enough for that immediate sizzle and crust lift.
Monitoring During Baking
As pizzas bake, the temperature of the oven floor will inevitably drop, especially with rapid-fire cooking. Use your infrared thermometer to check the surface temperature periodically, particularly if you notice your pizzas cooking slower than usual or the crust isn’t developing the desired char.
- First pizza: Note the temperature when you launch your first pizza and how long it takes to cook.
- Subsequent pizzas: After removing a pizza, check the surface temperature. If it has dropped significantly (e.g., by 50-100°F or more), you may need to let the oven recover its heat before launching the next one. This is especially true for ovens that don’t have massive thermal mass.
- Adjusting for temperature: If the oven floor is slightly cooler than ideal, you might need to rotate your pizza more frequently to ensure even cooking and browning.
Understanding Temperature Zones
In some ovens, particularly larger or more powerful ones, there can be slight temperature variations across the oven floor. You might find the area closest to the heat source is hotter than the edges. Using your infrared thermometer to scan different areas can help you understand these zones and position your pizza accordingly for the most even bake.
Choosing The Right Infrared Thermometer
With various models available, selecting the best infrared thermometer for your pizza oven needs is important. Consider these factors:
Key Features To Look For
- Temperature Range: Ensure the thermometer can accurately measure temperatures up to and potentially beyond the maximum your pizza oven can reach (e.g., up to 950°F or 500°C).
- Accuracy: Look for a thermometer with good accuracy specifications, typically within ±1.5% or ±3°F (±1.5°C).
- Emissivity Setting: While many pizza oven surfaces have high emissivity, an adjustable setting offers more versatility for other applications and fine-tuning accuracy.
- Distance-to-Spot Ratio (D: S): A higher D:S ratio (e.g., 12:1 or 16:1) allows for more precise measurements from a safer distance.
- Response Time: A quick response time (usually 500 milliseconds or less) means you get an accurate reading almost instantly.
- Durability and Build Quality: Choose a thermometer that feels robust and can withstand the heat and environment of an outdoor kitchen or garage.
- Ease of Use: A simple trigger mechanism and clear display are essential for quick measurements.
Popular Brands And Models
Several reputable brands offer excellent infrared thermometers suitable for pizza oven use. While specific models change, brands like ThermoWorks, Etekcity, Nubika, and Raytemp consistently receive good reviews for their accuracy and reliability in the home cooking space.
Example Comparison Table: Infrared Thermometer Features
| Feature | Basic Model (e.g., Etekcity) | Mid-Range Model (e.g., Raytemp) | High-End Model (e.g., ThermoWorks) |
|---|---|---|---|
| Temperature Range | Up to 750°F (400°C) | Up to 1000°F (538°C) | Up to 1100°F (593°C) |
| Accuracy | ±2% or ±4°F | ±1.5% or ±3°F | ±1% or ±2°F |
| Emissivity | Fixed (e.g., 0.95) | Adjustable | Adjustable |
| D:S Ratio | 8:1 | 12:1 | 16:1 |
| Response Time | ~500 ms | ~500 ms | ~300 ms |
| Build Quality | Standard | Good | Excellent |
| Price Point | $ | $$ | $$$ |
When making your choice, consider how often you’ll use it and the specific demands of your pizza oven setup. For most home pizza enthusiasts, a mid-range model offers the best balance of features and affordability.
Maintaining Your Infrared Thermometer
To ensure your infrared thermometer remains a reliable tool for years to come, proper maintenance is crucial.
Cleaning The Lens
The lens is the most critical part of the thermometer for accurate readings.
- Regular Wiping: After each use, gently wipe the lens with a soft, lint-free cloth (like a microfiber cloth).
- Stubborn Grime: For tougher spots, slightly dampen the cloth with water or a lens cleaning solution. Never spray liquid directly onto the lens, as it can seep inside the device.
- Avoid Abrasives: Do not use paper towels or abrasive cleaners, as they can scratch the lens.
Protecting The Thermometer
- Storage: Store your thermometer in a clean, dry place, ideally in its original packaging or a protective case to prevent dust and damage.
- Avoid Extreme Temperatures: Do not leave the thermometer in a very hot car or direct sunlight for extended periods, as this can damage the electronics.
- Drop Protection: While many are fairly robust, try to avoid dropping the thermometer, as this can misalign internal components and affect accuracy.
Calibration Checks
Most consumer-grade infrared thermometers do not require frequent recalibration. However, you can perform a simple check to ensure it’s reading accurately:
- Boiling Water Test: Fill a container with boiling water. Stir it well to ensure a uniform temperature. Place the thermometer about 6 inches away and aim it at the surface of the water. A reading close to 212°F (100°C) indicates good accuracy. Note that steam and reflections can affect readings, so aim for the water surface itself.
- Ice Water Test: Similarly, create a slurry of ice and water. The temperature should be very close to 32°F (0°C).
If your readings are consistently off by more than a few degrees, and you’ve confirmed the emissivity setting is correct, it might be time to consider professional recalibration or replacement.
Beyond The Pizza Oven: Other Uses
While your infrared thermometer is fantastic for pizza, its utility extends far beyond the pizza oven. This versatility makes it a valuable tool for any home cook or DIY enthusiast.
Kitchen Applications
- Cooking Surfaces: Beyond pizza stones, check the temperature of griddles, cast iron pans, and even candy-making syrups.
- Oven Hot Spots: Identify uneven heating in your conventional oven by measuring different areas of the oven rack or walls.
- Food Safety: Quickly check the surface temperature of meats during cooking or cooling to ensure they are within safe temperature zones. (Note: For internal food temperatures, a probe thermometer is necessary).
- Beverage Temperatures: Check the temperature of brewing liquids or chilled drinks.
Home Maintenance And Diy
- HVAC Systems: Measure supply and return air temperatures to check the efficiency of your heating and cooling systems. Locate drafts by identifying cooler spots on walls or around windows.
- Electrical Systems: Identify overheating components in electrical panels or appliances (use with extreme caution and only if qualified).
- Automotive: Check brake rotor temperatures, exhaust manifold heat, or radiator performance.
- Insulation Checks: Detect temperature differences across walls, ceilings, and floors to pinpoint areas of heat loss or gain, indicating potential insulation issues.
Example Use Case: The Weekend Pizza Warrior
Mark, a self-proclaimed pizza enthusiast, invested in a high-quality outdoor pizza oven. Initially, he relied on the oven’s built-in thermometer, which often showed temperatures exceeding 800°F. However, his pizzas were coming out with burnt bottoms and pale tops. Frustrated, he purchased an infrared thermometer.
He discovered that while the oven’s dome was scorching, his pizza stone was only reaching about 550°F. Armed with this knowledge, he extended his preheating time significantly. Now, using his infrared thermometer, he ensures the stone hits a consistent 700°F before launching his pies.
The result? Perfectly cooked crusts, a dramatic improvement that transformed his pizza nights.
Different Pizza Styles And Temperature Needs
The “perfect” pizza oven temperature isn’t a one-size-fits-all concept. Different pizza styles are designed to be cooked at varying temperatures, impacting crust texture, cooking time, and overall character. Your infrared thermometer is key to achieving these specific styles.
Neapolitan Pizza
The benchmark for many pizza lovers, Neapolitan pizza requires extremely high temperatures.
- Oven Floor Temp: 650°F – 750°F (343°C – 399°C), often higher in dedicated wood-fired ovens (up to 900°F / 482°C).
- Cook Time: 60-90 seconds.
- Characteristics: Soft, airy, slightly charred crust (“leoparding”), with a tender, moist interior. The rapid cooking from the high heat is essential.
New York-style Pizza
This popular style features a larger, foldable slice with a crispier, chewier crust than Neapolitan.
- Oven Floor Temp: 500°F – 550°F (260°C – 288°C).
- Cook Time: 4-6 minutes.
- Characteristics: A sturdy yet pliable crust that holds toppings well, with a noticeable crispness. Lower temperatures allow the dough to cook through more evenly without burning.
Sicilian/detroit-style Pizza
These thicker, pan-baked pizzas have a focaccia-like base and a crispy, cheesy crust.
- Oven Floor Temp: 400°F – 475°F (204°C – 246°C).
- Cook Time: 15-25 minutes.
- Characteristics: A thick, airy, and chewy interior with a distinctively crispy, almost fried bottom crust achieved through baking in a pan on a moderately hot surface.
Thin Crust / Bar Pizza
Often cooked in deck ovens, these pizzas prioritize a very crisp base.
- Oven Floor Temp: 550°F – 650°F (288°C – 343°C).
- Cook Time: 3-5 minutes.
- Characteristics: Extremely crispy and cracker-like base. The moderate-high heat ensures the thin dough cooks quickly and crisps up without becoming tough.
Using your infrared thermometer allows you to precisely set your oven floor temperature to match the desired pizza style, moving beyond guesswork to consistent, delicious results.
Frequently Asked Questions
What Is The Ideal Temperature For A Pizza Oven Stone Or Steel?
The ideal temperature depends heavily on the style of pizza you’re making. For Neapolitan-style pizza, aim for 650°F to 750°F (343°C to 399°C) on the surface, or even higher if your oven allows. For New York-style, 500°F to 550°F (260°C to 288°C) is more appropriate. Thicker crust styles like Sicilian or Detroit may require temperatures between 400°F and 475°F (204°C to 246°C). Always use your infrared thermometer to measure the cooking surface directly.
How Far Away Should I Hold The Infrared Thermometer From The Oven Floor?
This depends on the Distance-to-Spot (D:S) ratio of your thermometer. For a typical 12:1 D:S thermometer, you would hold it about 12 inches away to measure a 1-inch spot. You want to be close enough to get a precise reading of the cooking surface without being so close that the intense heat from the oven

As the author of the “Ultimate Pizza Guide: Recipes, Tips & Secrets Revealed,” I’m dedicated to sharing my love for pizza and empowering others to create delicious homemade pizzas with ease. Join me on a journey to uncover the secrets to perfecting your pizza game!


