
Maintaining a high-performing pizza oven requires diligent attention to its various components, and perhaps none are more critical to its efficiency and longevity than its insulation. Whether you own a professional wood-fired oven in a bustling restaurant or a backyard brick oven for weekend gatherings, understanding and inspecting the insulation is paramount.
Proper insulation ensures your oven reaches and maintains optimal cooking temperatures, conserves fuel, and protects the structural integrity of the oven itself. Neglecting this vital aspect can lead to uneven cooking, increased energy consumption, and costly repairs.
This comprehensive guide will equip you with the knowledge and practical steps needed for effective pizza oven insulation inspection. We’ll cover the types of insulation used, common signs of degradation, detailed inspection procedures, and best practices for maintenance and repair.
By dedicating time to this essential maintenance task, you’ll ensure your pizza oven continues to deliver perfectly cooked pizzas for years to come.
Key Takeaways
- Insulation is Crucial: Pizza oven insulation is vital for heat retention, fuel efficiency, and protecting the oven’s structure.
- Types Matter: Different insulation materials (ceramic fiber, vermiculite, perlite) have varying properties and lifespans.
- Inspect Regularly: Annual inspections are recommended, with more frequent checks if you notice performance issues.
- Signs of Degradation: Look for crumbling, cracking, discoloration, and declining heat retention.
- Inspection Process: Involves visual checks, temperature monitoring, and sometimes internal examination.
- Maintenance is Key: Prompt repairs and proper usage can extend insulation life.
- Professional Help: For significant damage or complex ovens, consult a professional.

Credit: crustifypizzaovens.com
Understanding Pizza Oven Insulation
The effectiveness of any pizza oven hinges on its ability to trap heat. This is primarily achieved through insulation, a layer of material designed to resist heat transfer. In the context of pizza ovens, insulation serves several critical functions: it allows the oven to reach very high temperatures quickly, maintains those temperatures with minimal fuel input, and protects the outer structure from extreme heat. Without adequate insulation, heat would dissipate rapidly, requiring constant and excessive fuel consumption to maintain cooking temperatures, leading to inefficient cooking and potential structural damage over time.
The Role Of Insulation In Heat Retention
At its core, pizza oven insulation is about thermal mass and heat retention. Wood-fired and high-temperature ovens rely on absorbing and storing heat within their dome and hearth. This stored heat is then radiated back onto the pizza, cooking it from all sides. Insulation acts as a barrier, preventing this precious stored heat from escaping. Think of it like a high-quality thermos; it keeps hot things hot and cold things cold by minimizing heat exchange with the surroundings. For a pizza oven, this means:
- Faster Heat-Up Times: Less heat escaping means the oven reaches its target temperature more quickly.
- Consistent Cooking Temperatures: Insulation helps maintain a stable temperature, crucial for achieving the perfect crust and toppings.
- Fuel Efficiency: Less heat loss translates directly to using less wood or gas to keep the oven hot.
- Reduced Thermal Shock: It buffers the oven structure from the extreme temperature fluctuations that occur during heating and cooling cycles, thus prolonging its life.
Common Insulation Materials And Their Properties
Pizza ovens utilize various insulation materials, each with its own characteristics, benefits, and drawbacks. Understanding these materials is key to identifying potential issues during inspection.
Ceramic Fiber Blankets
Ceramic fiber blankets are a popular choice for modern pizza ovens, especially for the dome insulation. They are lightweight, flexible, and offer excellent thermal resistance. Made from spun refractory ceramic fibers, these blankets can withstand extremely high temperatures, often exceeding 2000°F (1093°C). Their low thermal conductivity makes them highly effective at preventing heat loss. However, they can be prone to physical damage if not protected and may degrade over time with repeated extreme heating and cooling cycles or exposure to moisture.
Vermiculite And Perlite
Vermiculite and perlite are lightweight, granular insulating materials commonly used in the base or hearth of pizza ovens, often mixed with cement or refractory binders.
- Vermiculite: A naturally occurring mineral that expands when heated, creating a lightweight, porous material with good insulating properties. It’s relatively stable at high temperatures but can be susceptible to moisture absorption if not properly sealed.
- Perlite: A volcanic glass that expands when heated, similar to vermiculite. It offers good insulation and is lighter than vermiculite. Like vermiculite, it can absorb moisture.
These materials are typically applied in a thick layer, often several inches thick, to provide substantial thermal resistance. Their effectiveness can be compromised if they become saturated with water or if the binding agent degrades.
Refractory Mortars And Castables
While not solely insulation, refractory mortars and castables play a role. They are used to bind bricks, create seamless surfaces, and can themselves offer some degree of thermal resistance, especially specialized insulating castables. The integrity of these materials is crucial, as cracks or crumbling can indicate underlying insulation problems or structural weaknesses.
Signs Of Insulation Degradation
Recognizing the symptoms of failing insulation is the first step in addressing potential problems. These signs can manifest in various ways, affecting both the oven’s performance and its physical appearance. Early detection allows for timely intervention, preventing minor issues from escalating into major repairs.
Performance Indicators
Changes in how your oven heats and retains heat are often the most telling signs of insulation problems.
- Longer Heat-Up Times: If your oven is taking significantly longer than usual to reach your desired cooking temperature, the insulation may be failing to retain heat effectively. This means more fuel is needed to compensate for heat loss.
- Temperature Fluctuations: Difficulty maintaining a steady temperature, with noticeable drops during cooking, indicates poor heat retention. This can lead to unevenly cooked pizzas.
- Increased Fuel Consumption: A sudden spike in the amount of wood or gas required to keep the oven hot is a strong indicator that insulation is no longer doing its job efficiently.
- Cooler Exterior Surfaces: While some heat transfer to the exterior is normal, if the outer shell of your oven becomes excessively hot to the touch, it suggests that the insulation layer is insufficient or compromised.
Visual Clues
Physical changes to the oven’s structure can directly point to insulation issues.
- Cracking and Spalling: Cracks in the refractory dome or hearth, especially larger or expanding ones, can be a sign that the underlying insulation is degrading, causing stress on the outer layers. Spalling, where small pieces of the refractory material chip or flake off, can occur due to moisture trapped within the insulation or extreme thermal cycling.
- Crumbling or Dusting: If you notice powdery material or small debris accumulating inside or around the oven, particularly after heating or cooling cycles, it suggests that the insulation material itself (like vermiculite or ceramic fiber) is breaking down.
- Discoloration: While some discoloration is normal due to soot and high temperatures, unusual or extensive blackening or white powdery patches on the exterior can sometimes indicate moisture ingress or chemical reactions occurring within the insulation.
- Moisture Issues: Persistent dampness, mold growth, or efflorescence (white, powdery salt deposits) on the oven’s exterior or interior can signal that moisture is trapped within the insulation. This is particularly problematic as moisture can freeze and expand, causing significant damage, and it severely reduces the insulation’s effectiveness.

Credit: stuccochampions.com
Conducting A Thorough Insulation Inspection
A systematic approach to inspecting your pizza oven’s insulation will help you identify issues accurately. This process should be performed when the oven is completely cool to avoid burns and allow for a thorough examination of all materials.
External Visual Inspection
Start by examining the oven’s exterior surfaces.
- Dome and Walls: Carefully inspect the entire exterior surface of the dome and walls for any visible cracks, chips, or signs of material breakdown. Pay close attention to areas where different materials meet or where the oven has been subject to the most direct heat.
- Hearth and Base: Examine the base and hearth area for similar signs of damage. If your oven has an insulated base, check for cracks or crumbling in the surrounding structure that might indicate internal insulation failure.
- Joints and Seams: Inspect any joints or seams where the dome meets the hearth, or where different refractory materials are joined. These are common areas for cracks to form if the insulation is not performing correctly.
- Moisture Check: Look for any signs of water staining, efflorescence, or unusual dampness on the exterior. This is critical, as trapped moisture can severely damage insulation, especially during freezing temperatures.
Internal Visual Inspection
Once the external check is complete, move to the oven’s interior.
- Dome Interior: Inspect the interior surface of the dome for cracks, spalling, or areas where the insulation material might be exposed or degrading. Look for any loose pieces or significant crumbling.
- Hearth Interior: Examine the cooking surface (hearth) for cracks that may extend deeper than the surface layer. Check the edges and corners where the hearth meets the oven walls.
- Ancillary Components: If your oven has additional components like a chimney flue or access panels, inspect these areas for sealant degradation or structural issues that could impact the overall insulation system.
Temperature Monitoring
Using tools to monitor temperature can provide objective data about insulation performance.
- Infrared Thermometer: An infrared thermometer is invaluable for checking surface temperatures. After the oven has reached a stable cooking temperature, take readings at various points on the dome and walls. Significantly cooler spots compared to hotter areas can indicate localized insulation failure or uneven heating. Comparing these readings to previous measurements can highlight a decline in performance.
- Probe Thermometer (for Hearth): For ovens with a separate hearth insulation layer beneath the cooking surface, a probe thermometer inserted into the base (if possible and safe) can help assess heat retention at lower levels.
Using Tools For Deeper Inspection
For more advanced or suspected issues, certain tools can aid inspection.
- Moisture Meter: If you suspect trapped moisture, a moisture meter can help quantify the level of dampness within the refractory materials or insulation layers.
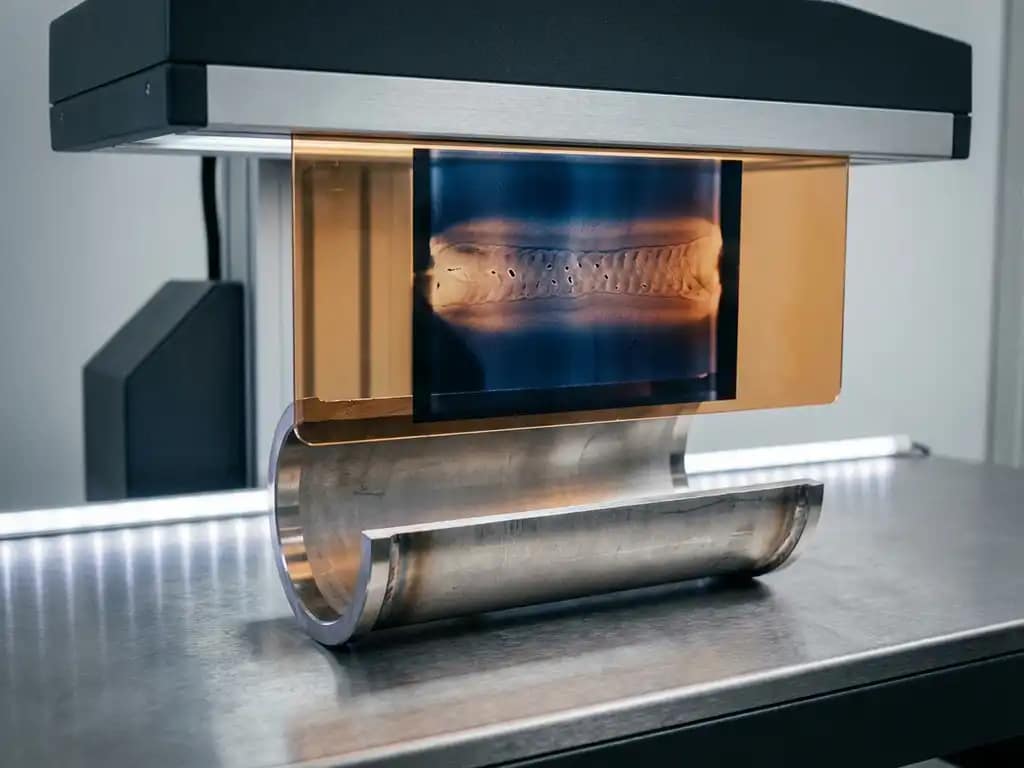
- Borescope/Endoscope Camera: In some cases, a small borescope camera might be used to inspect internal cavities or hard-to-reach areas for hidden damage, though this is less common for standard pizza ovens.
Credit: www.vareximaging.com
Common Issues And Troubleshooting
Identifying specific problems allows for targeted troubleshooting and repair strategies. Each type of insulation and oven construction presents unique challenges.
Ceramic Fiber Insulation Issues
- Delamination: Over time, the layers of ceramic fiber blankets can separate. This reduces their insulating effectiveness and can lead to structural weakness.
- Troubleshooting: If minor delamination is observed, it might be possible to re-compress and secure the layers with high-temperature adhesive or by ensuring external protective layers are firmly in place. Significant delamination often requires replacement of the affected blanket sections.
- Physical Damage: Impact from tools, falling objects, or even improper cleaning can tear or compress ceramic fiber blankets.
- Troubleshooting: Small tears can sometimes be patched with new ceramic fiber material and high-temperature adhesive. Larger damaged areas will need to be cut out and replaced. Ensure protective layers (like render or brickwork) are robust.
- Contamination: Exposure to moisture or certain chemicals can degrade ceramic fiber.
- Troubleshooting: If contamination is minor and localized, the affected material might be removed and replaced. Preventing future contamination through proper sealing and weather protection is key.
Vermiculite/perlite Insulation Issues
- Moisture Absorption: These granular materials can act like sponges, absorbing significant amounts of water if not properly sealed or if cracks allow ingress.
- Troubleshooting: The most effective solution is to thoroughly dry the insulation. This can take days or weeks, often involving gentle heating with a small heat source or simply allowing ample time in dry weather. Once dry, the material must be sealed with a high-temperature resistant sealant or render to prevent future absorption. If the material has become saturated and then frozen, it may have significantly degraded and require removal and replacement.
- Binder Degradation: The cement or refractory binder holding vermiculite or perlite together can degrade over time, leading to crumbling.
- Troubleshooting: If the binder is failing, the loose material may need to be carefully removed and replaced with a fresh mix of vermiculite/perlite and a suitable refractory binder. Re-rendering the area with a high-temperature mortar can provide additional protection.
- Settling: Over many years, granular insulation can settle, creating gaps, particularly at the top of the insulated layer.
- Troubleshooting: This often requires adding more insulating material to fill the gaps or re-packing the existing material. Ensuring the outer shell maintains its integrity helps prevent settling.
Structural Cracking And Spalling
- Cause: Often a result of thermal expansion/contraction, moisture damage, or impact.
- Troubleshooting:
- Hairline Cracks: Minor cracks in render or plaster are often cosmetic and can be filled with flexible, high-temperature sealant.
- Deeper Cracks: Cracks that penetrate deeper into the refractory layers may indicate underlying insulation issues. These should be carefully cleaned out and filled with a suitable refractory mortar or patching compound. If the crack is wide, it may be necessary to investigate the insulation behind it.
- Spalling: This requires removing the loose material and patching the area with refractory mortar. If spalling is extensive, it may indicate a more significant problem with the underlying structure or insulation.
Maintenance And Repair Strategies
Proactive maintenance and timely repairs are essential for preserving your pizza oven’s insulation and ensuring its optimal performance.
Routine Maintenance Practices
Regular care can prevent minor issues from becoming major problems.
- Proper Firing Procedures: Avoid excessively rapid heating or cooling cycles. Gradually increase the temperature when firing up, and allow the oven to cool down slowly. This minimizes thermal stress on the insulation.
- Weather Protection: Protect your oven from the elements, especially rain and snow. A good quality cover or a purpose-built enclosure can prevent moisture ingress, which is a primary enemy of insulation. Ensure ventilation to prevent condensation buildup.
- Regular Cleaning: Keep the oven clean, both inside and out. Remove ash and debris regularly. Avoid using harsh chemicals that could damage refractory materials or insulation.
- Surface Sealing: Periodically inspect and re-seal the exterior render or protective coating, especially if you notice small cracks or areas where moisture might penetrate. Use products specifically designed for high-temperature applications.
Repairing Damaged Insulation
When repairs are necessary, using the correct materials and techniques is crucial.
Minor Repairs
For small cracks, chips, or slightly degraded areas:
- Clean the Area: Thoroughly clean the damaged area, removing any loose debris, dust, or crumbling material.
- Apply Patch: Use a high-quality refractory patching compound or high-temperature mortar suitable for pizza ovens. For ceramic fiber, use a specialized ceramic fiber adhesive or a patch made from similar material.
- Follow Manufacturer Instructions: Adhere strictly to the product’s application and curing instructions. Many refractory materials require a specific curing process involving slow, low-temperature heating to achieve full strength and avoid cracking.
Major Repairs And Replacement
For extensive damage, significant delamination of ceramic fiber, or widespread degradation of granular insulation:
- Assessment: A thorough assessment is needed to determine the extent of the damage and the best course of action. This might involve carefully removing outer layers to expose the insulation.
- Removal of Damaged Material: Carefully remove all degraded or damaged insulation. This can be a messy process, especially with granular materials. Wear appropriate personal protective equipment (PPE), including gloves, eye protection, and a dust mask, as insulation fibers can be irritants.
- Replacement:
- Ceramic Fiber: Cut and fit new sections of ceramic fiber blanket of the same type and thickness. Secure them firmly, ensuring minimal gaps. Overlap seams slightly if recommended by the manufacturer.
- Vermiculite/Perlite: Mix the granular material with a suitable refractory binder (e.g., refractory cement) according to the manufacturer’s ratio. Apply the mixture in layers, compacting gently to ensure good density and fill all voids.
- Reconstruction: Once the new insulation is in place, rebuild any protective outer layers (e.g., render, brickwork).
- Curing: Crucially, allow the repaired area to cure fully according to the instructions for the materials used. This typically involves a slow, staged heating process over several days to drive out all moisture and allow the binders to set properly. Rushing this step can lead to new cracks and further damage.
When To Call A Professional
While many minor repairs can be handled by a DIY enthusiast, certain situations warrant professional expertise.
- Extensive Structural Damage: If the oven’s main structure appears compromised or if repairs involve significant rebuilding.
- Complex Oven Designs: Professional ovens or those with intricate multi-layer insulation systems may require specialized knowledge.
- Persistent Issues: If you’ve attempted repairs and the problem recurs, a professional can diagnose the underlying cause.
- Lack of Confidence or Time: If you are uncomfortable undertaking the repair or lack the necessary time and tools.
A professional oven builder or repair specialist has the experience and tools to diagnose complex issues, source appropriate materials, and perform repairs correctly, ensuring the longevity and performance of your pizza oven.
Case Study: Restaurant Oven Insulation Failure
“The Hearthstone Pizzeria” is a popular establishment known for its authentic Neapolitan pizzas, cooked in a large, custom-built wood-fired oven. For years, the oven performed exceptionally, reaching temperatures of 900°F (482°C) within an hour and maintaining them throughout busy service.
However, over the past six months, head chef Marco noticed a significant decline in performance.
The Problem: Marco observed that the oven was taking nearly two hours to reach temperature, requiring considerably more wood than before. During peak hours, the temperature fluctuated wildly, leading to inconsistent pizza quality, some pizzas were perfectly charred, while others were undercooked. Visually, he noticed small hairline cracks appearing on the exterior render of the dome, which seemed to be growing.
The Inspection: Marco decided to conduct a thorough inspection during a scheduled day off. With the oven completely cool, he examined the interior dome and found areas where the white ceramic fiber insulation appeared discolored and slightly compressed. He also noticed a fine, powdery dust accumulating on the hearth in a few spots, suggesting material breakdown. Using an infrared thermometer, he mapped the dome’s surface temperature and found several “cold spots”, areas significantly cooler than the rest of the dome, indicating compromised insulation.
The Diagnosis: Marco concluded that the ceramic fiber insulation beneath the dome’s inner refractory layer had likely degraded and compressed over years of intense use, leading to delamination and reduced thermal resistance. The increased heat loss caused the longer heat-up times, higher fuel consumption, and temperature instability. The external cracks were a symptom of the underlying structural stress caused by the failing insulation.
The Solution: Marco contacted a specialist pizza oven repair company. They carefully removed the outer render and the inner refractory dome layer in the affected sections. They discovered that sections of the ceramic fiber blanket had indeed delaminated and were crumbling. The repair team removed the damaged insulation, replaced it with new, high-density ceramic fiber blankets of the same specification, and then meticulously rebuilt the inner refractory dome and exterior render. The crucial step was the slow curing process, which took several days of carefully controlled heating cycles.
The Outcome: After the repairs and proper curing, “The Hearthstone Pizzeria” oven returned to its former glory. Heat-up times were back to under an hour, fuel consumption normalized, and temperature stability during service was excellent. Marco learned the importance of regular, albeit basic, visual checks and understood that even the most robust ovens require periodic maintenance to their critical insulation components.
Frequently Asked Questions
How Often Should I Inspect My Pizza Oven’s Insulation?
For a commercial or heavily used home pizza oven, an annual inspection is highly recommended. If you notice any performance changes, such as longer heat-up times, increased fuel consumption, or temperature fluctuations, conduct an inspection immediately, regardless of the time of year.
For ovens used only occasionally, a visual inspection every two years might suffice, provided no performance issues arise.
Can I Repair Damaged Insulation Myself?
Yes, minor repairs to insulation can often be done yourself. This typically involves patching small cracks in the exterior render with refractory mortar or repairing small tears in ceramic fiber blankets with specialized adhesives and patches. However, for extensive damage, widespread crumbling, or significant structural issues, it is best to consult a professional oven builder or repair specialist.
Always use materials specifically designed for high-temperature pizza oven applications.
What Is The Biggest Threat To Pizza Oven Insulation?
Moisture is arguably the biggest threat to most types of pizza oven insulation. Water trapped within insulation materials can severely reduce their effectiveness. Worse, when heated, trapped water turns to steam, expanding rapidly and potentially causing significant cracking, spalling, and even structural failure, especially in freezing temperatures. Proper weather protection and ensuring the oven is thoroughly dried out after exposure to moisture are critical.
How Does Insulation Affect Cooking Performance?
Good insulation is fundamental to optimal cooking performance. It allows the oven to reach and maintain the extremely high temperatures required for authentic pizza making (often 700-900°F or 370-482°C). Effective insulation ensures that heat is retained efficiently, leading to consistent cooking temperatures, rapid cooking times (90 seconds to a few minutes for Neapolitan-style pizzas), and the characteristic crispy, charred crust.
Poor insulation leads to longer cooking times, uneven cooking, and requires excessive fuel to compensate for heat loss.
What Is The Lifespan Of Pizza Oven Insulation?
The lifespan of pizza oven insulation depends on the material, oven design, usage frequency, and maintenance:
- Ceramic Fiber Blanket: 10–20 years if protected from moisture and physical damage.
- Vermiculite/Perlite Concrete: 10–15 years if kept dry and sealed properly.
- Refractory Mortar/Castable: 15–25 years with proper curing and firing practices.
- Mineral Wool: 10–15 years, depending on exposure to heat and moisture.
Heavy commercial use, frequent thermal cycling, and moisture exposure will shorten lifespan. Regular inspections and prompt repairs extend it significantly.
Can I Add More Insulation to an Existing Oven?
Yes, in some cases. If the oven’s outer shell is accessible, you can add a layer of ceramic fiber blanket or pour additional vermiculite/perlite concrete around the existing insulation. However, this requires removing the outer render or brickwork and rebuilding it afterward. For ovens with sealed outer shells, retrofitting is difficult and may require professional assessment.
What Are the Signs That Insulation Needs Immediate Replacement?
- Widespread crumbling or powdery debris inside the oven
- Significant delamination of ceramic fiber blankets
- Persistent moisture or efflorescence on exterior surfaces
- Large, expanding cracks in the dome or hearth
- Severe temperature drops during cooking that cannot be corrected with fuel adjustment
- Visible cold spots on the dome (confirmed with IR thermometer)
If you notice any of these, stop using the oven and consult a professional.
Is It Normal for the Oven’s Exterior to Be Warm?
A slight warmth on the exterior is normal, especially during extended use. However, if the outer shell becomes hot to the touch or too warm to place your hand on comfortably, it indicates that insulation is insufficient or compromised. This is a sign of heat loss and potential safety risk.
How Do I Dry Out Wet Insulation?
If insulation has absorbed moisture:
- Stop using the oven immediately.
- Remove any covers or enclosures to allow airflow.
- Allow the oven to air-dry naturally for several days or weeks, depending on saturation.
- Gradually heat the oven with small fires, increasing temperature slowly over several days. This drives out moisture without causing steam damage.
- Once fully dry, seal any cracks or gaps in the outer shell to prevent future moisture ingress.
Can I Use a Pressure Washer to Clean My Oven’s Exterior?
No. Pressure washing can force water into cracks and seams, saturating the insulation. It can also damage refractory materials and protective coatings. Clean the exterior with a damp cloth, soft brush, and mild detergent only.
Does Insulation Affect the Flavor of the Pizza?
Indirectly, yes. Proper insulation ensures consistent high temperatures, which are essential for achieving the characteristic charred, smoky flavor of wood-fired pizza. Poor insulation leads to longer cooking times, which can dry out the dough and prevent proper charring, resulting in a less flavorful crust.
How Do I Know If My Oven Has a Thermal Bridge?
A thermal bridge is a path where heat escapes through the oven structure, often at joints, seams, or where materials meet. Signs include:
- Localized hot spots on the exterior
- Cold spots on the interior dome or hearth (detected with IR thermometer)
- Uneven cooking results
To fix, inspect joints and seams, fill gaps with refractory mortar or insulation, and ensure continuous insulation coverage.
Preventive Maintenance Schedule
| Frequency | Task |
|---|---|
| Before each use | Visual check for cracks, debris, or moisture on exterior |
| After each use | Remove ash; check for new cracks or dust accumulation |
| Monthly | Inspect dome and hearth for spalling; check door seals |
| Quarterly | Use IR thermometer to map temperature distribution; check for cold spots |
| Annually | Professional inspection; re-seal exterior render; check insulation integrity |
| After storms | Inspect for water damage, cracks, or efflorescence |
Key Takeaways
- Insulation is Critical: It ensures heat retention, fuel efficiency, and structural protection.
- Know Your Materials: Ceramic fiber, vermiculite, perlite, and refractory castables each have unique properties and lifespans.
- Inspect Regularly: Annual inspections are essential; immediate checks if performance declines.
- Watch for Signs: Longer heat-up times, temperature fluctuations, cracks, dust, and moisture are key indicators of insulation failure.
- Moisture is the Enemy: Trapped water degrades insulation and can cause structural damage.
- Repair Promptly: Minor cracks and tears can be fixed with refractory mortar or ceramic fiber patches; major damage requires professional help.
- Maintain Proactively: Proper firing, weather protection, and surface sealing extend insulation life.
- Know When to Call a Pro: Extensive damage, complex ovens, or recurring issues warrant professional repair.
Conclusion
Pizza oven insulation is the silent guardian of performance, efficiency, and longevity. It keeps the heat where it belongs—inside the oven—so every pizza bakes evenly and consistently. From ceramic fiber blankets to vermiculite concrete, each material has its role and its lifespan. Regular inspection, prompt repair, and proactive maintenance are the keys to preserving this critical component. Watch for the warning signs—longer heat-up times, temperature swings, cracks, dust, and moisture—and act quickly. Protect your insulation, and your oven will reward you with years of perfect pizzas.

As the author of the “Ultimate Pizza Guide: Recipes, Tips & Secrets Revealed,” I’m dedicated to sharing my love for pizza and empowering others to create delicious homemade pizzas with ease. Join me on a journey to uncover the secrets to perfecting your pizza game!


