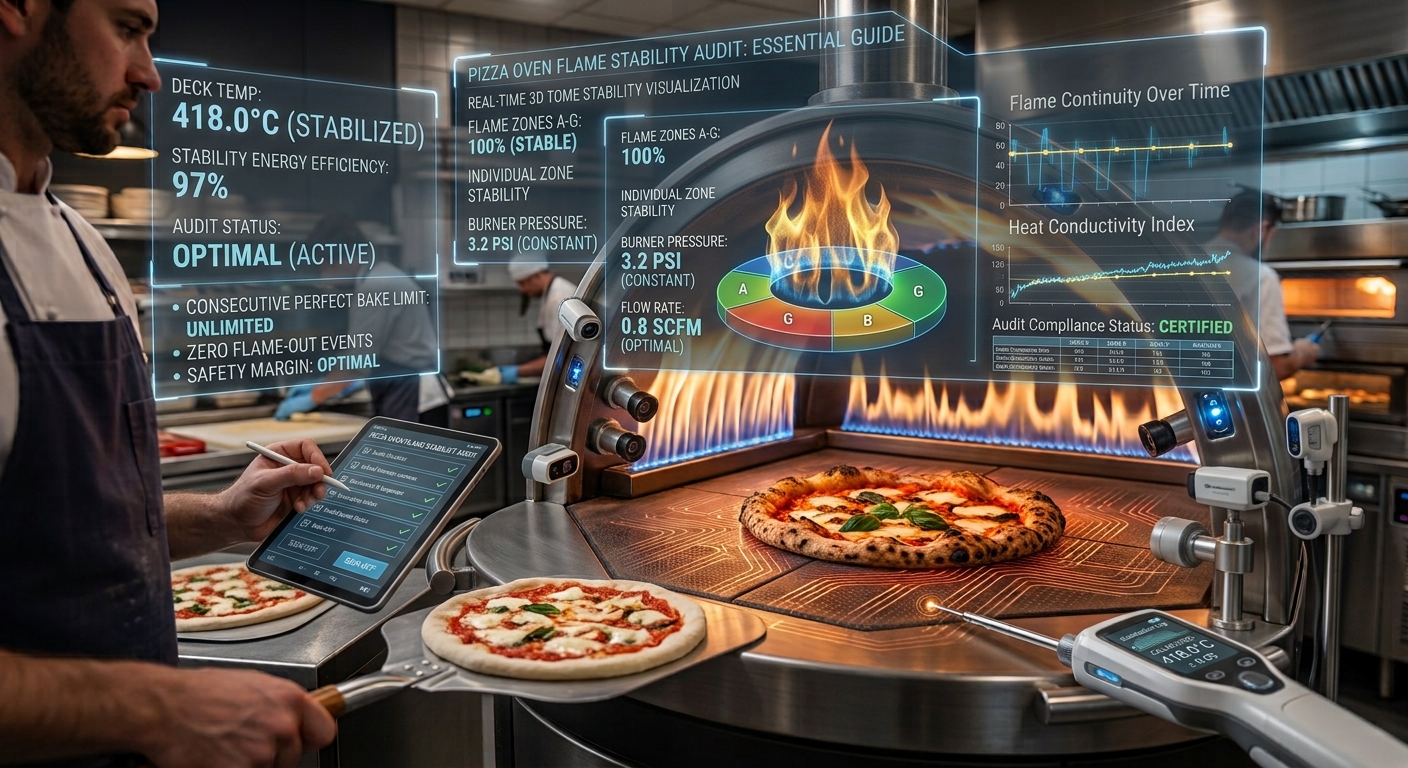
The consistent, vibrant flame is the heart of any high-performance pizza oven. Whether you’re operating a commercial kitchen churning out hundreds of pizzas daily or a passionate home cook perfecting Neapolitan pies, a stable flame is paramount. It dictates cooking temperature, evenness of heat distribution, and ultimately, the quality of the finished product. A flickering, inconsistent, or weak flame can lead to undercooked bases, burnt toppings, and an inefficient use of fuel. Understanding the factors that contribute to pizza oven flame stability and how to audit them is crucial for anyone serious about achieving consistent, delicious results.
This audit goes beyond simply observing the flame; it involves a systematic examination of the oven’s components, fuel supply, and operating environment. By identifying potential issues before they impact your cooking, you can prevent costly downtime, wasted ingredients, and customer dissatisfaction.
A well-maintained oven with a stable flame is not just a tool; it’s a partner in culinary excellence, ensuring that every pizza emerges from the heat with that characteristic char, perfectly melted cheese, and a crispy crust.
Key Takeaways
- Flame stability is critical for consistent pizza cooking temperatures, even heat distribution, and optimal fuel efficiency.
- A pizza oven flame audit involves inspecting fuel supply, burner components, airflow, and environmental factors.
- Gas ovens require checks on regulators, hoses, manifolds, and burner ports for issues like leaks, blockages, and proper gas pressure.
- Wood-fired ovens need attention to wood quality, firebox management, chimney draft, and ash buildup.
- Regular maintenance and cleaning are preventative measures to ensure sustained flame performance.
- Understanding common flame issues like yellowing, sputtering, or lifting can help diagnose problems quickly.
- Safety protocols are non-negotiable during any audit, especially when dealing with gas or high temperatures.
Credit: cpaver.com
Understanding The Fundamentals Of Pizza Oven Flames
The ideal flame in a pizza oven is characterized by its color, height, and consistency. For gas ovens, this typically translates to a vibrant blue flame with possibly some yellow tips, indicating complete combustion. In wood-fired ovens, the flame should be bright orange and lively, feeding the radiant heat necessary for cooking. The stability of this flame is directly linked to the consistent delivery of fuel and oxygen in the correct proportions. Any disruption to this delicate balance can result in a compromised flame.
For gas-fired ovens, the combustion process relies heavily on precise gas pressure and an unobstructed path for the gas to mix with air. The burner assembly, including the ports where the flame emerges, is a critical component. Blockages from food debris, carbon buildup, or even minor physical damage can alter the flame’s shape and intensity. Similarly, the air intake vents must be clear to allow sufficient oxygen for efficient burning. If these vents are partially or fully obstructed, the flame may become lazy, yellow, and produce soot, indicating incomplete combustion.
In wood-fired ovens, the dynamics are more organic but equally dependent on controlled conditions. The quality and dryness of the wood are paramount; wet or green wood will smolder, produce excessive smoke, and fail to generate the sustained high heat required. The firebox management, how the wood is arranged and how the fire is coaxed into a steady burn, is an art form, but one that relies on fundamental principles of airflow and fuel consumption. The chimney’s draft plays a vital role in drawing air into the firebox and expelling combustion byproducts, influencing the flame’s vigor and the oven’s overall heating efficiency.

Credit: www.restaurantindia.in
Gas Pizza Oven Flame Stability Audit
Auditing the flame stability in a gas pizza oven requires a methodical approach, focusing on the entire fuel delivery and combustion system. This process is crucial for both performance and safety.
Fuel Supply And Pressure
The journey of the gas flame begins long before it reaches the burner. The gas supply itself is the first point of inspection.
Regulator And Hose Inspection
The regulator is responsible for reducing the high pressure from the gas tank or mains supply to a safe and usable level for the oven. A faulty regulator can lead to inconsistent pressure, causing the flame to fluctuate.
- Check for damage: Inspect the regulator for any visible cracks, corrosion, or damage to the adjustment knob.
- Listen for leaks: With the gas supply on (but the oven off), use a soapy water solution applied to connections. Bubbles indicate a leak. Never use a naked flame to check for gas leaks.
- Verify pressure: If you have a pressure gauge, connect it to the appropriate port (consult your oven’s manual) to ensure the pressure is within the manufacturer’s specified range. Typical pressures for natural gas might be around 4 inches of water column, while propane could be around 11 inches.
- Hose integrity: Examine the gas hose for any signs of wear, cracking, kinking, or abrasions. A damaged hose is a significant safety hazard. Ensure all connections are tight and secure.
Manifold And Gas Valves
The manifold distributes the gas to the individual burners. Blockages or leaks here can significantly impact flame consistency.
- Visual inspection: Look for any signs of corrosion or damage on the manifold.
- Listen for leaks: Apply soapy water to all connection points on the manifold and at the valve inlets.
- Valve operation: Ensure all gas valves open and close smoothly and completely. Sticking valves can lead to partial gas flow.
Burner Assembly Examination
The burner is where the gas and air meet to create the flame. Its condition directly influences flame quality.
Burner Ports
The small holes or slots on the burner where the gas exits are critical.
- Cleanliness: Debris, carbonized food particles, or rust can clog these ports, leading to uneven flame distribution, sputtering, or a weak flame. Use a fine wire brush or a specialized port cleaning tool to gently clear any obstructions. Avoid using sharp objects that could enlarge the ports.
- Damage: Inspect for any physical damage to the burner head or ports. Bent metal or enlarged holes can disrupt the gas flow and air mixing.
Ignition System
While not directly related to flame *stability* during operation, a faulty ignition system (spark igniter or pilot light) can prevent the oven from lighting correctly, indirectly affecting your ability to achieve a stable flame.
- Spark gap: Ensure the spark electrode is clean and the gap is set according to the manufacturer’s specifications.
- Pilot light: If your oven uses a pilot light, ensure it is strong, steady, and consistently ignites the main burner. A weak pilot light may not reliably ignite the burner, leading to ignition failures or an unstable initial flame.
Air Shutter Adjustment
Most gas burners have an air shutter or vent that controls the amount of primary air mixed with the gas before ignition. This is crucial for achieving complete combustion.
- Yellow or lazy flame: If the flame is predominantly yellow, smoky, and lacks vigor, it indicates insufficient air. Opening the air shutter slightly will allow more air in, creating a hotter, bluer flame.
- Lifting or noisy flame: If the flame appears to be lifting off the burner ports, is very noisy, or makes a “roaring” sound, it may indicate too much air. In this case, you would need to close the air shutter slightly.
- Adjustment: Make small adjustments to the shutter while the burner is on, observing the flame’s color and behavior. The goal is a stable, mostly blue flame with possibly faint yellow tips, indicating complete combustion.
Airflow And Ventilation
Adequate airflow is essential for combustion. In a pizza oven, this applies to both the burner’s air intake and the oven’s overall ventilation.
Primary Air Intake
This refers to the air drawn in by the burner itself. Ensure the primary air intake vents on the burner assembly are not blocked by grease, debris, or surrounding oven components.
Secondary Airflow And Oven Ventilation
The oven cavity needs proper ventilation to allow combustion byproducts to escape and fresh air to be drawn in.
- Flue/Chimney: Ensure the oven’s flue or chimney is clear of obstructions like bird nests, debris, or creosote buildup. A blocked flue will impede airflow, leading to poor combustion and potentially dangerous carbon monoxide buildup.
- Oven door seal: While not directly related to the burner flame, a compromised oven door seal can affect internal temperature and airflow dynamics, indirectly influencing the flame’s behavior.
Wood-fired Pizza Oven Flame Stability Audit
Wood-fired ovens present a different set of challenges and require a different approach to flame stability auditing. Here, the focus shifts from mechanical components to the combustion process itself and the fuel.
Fuel Quality And Preparation
The foundation of a good flame in a wood-fired oven is the fuel.
Wood Type And Dryness
- Hardwoods are best: Oak, maple, ash, and fruitwoods are ideal. They burn hotter and longer than softwoods like pine, which tend to burn too quickly and produce more creosote.
- Seasoning is key: Wood must be properly seasoned (dried) for at least 6-12 months. Wet or green wood will smolder, produce excessive smoke, and struggle to reach high temperatures. You can test dryness by looking for radial cracks in the ends of the logs and by listening for a clear “clack” when two pieces are hit together, rather than a dull “thud.”
- Log size: Use appropriately sized logs. Small kindling is needed to start, followed by slightly larger pieces, and then cooking-sized logs. Overcrowding the firebox with large logs can smother the flames.
Wood Storage
- Dry environment: Store wood off the ground and protected from rain and snow. A dedicated wood shed or a covered, well-ventilated stack is ideal.
Firebox Management
The way you build and manage the fire directly impacts flame stability.
Starting The Fire
- Gradual build-up: Start with a small amount of dry kindling and gradually add larger pieces as the fire establishes. Rushing this process can lead to a weak, smoky fire.
- Airflow during ignition: Ensure adequate airflow is provided initially to help the wood ignite properly.
Maintaining The Fire
- Log placement: Arrange logs loosely to allow air circulation. Avoid packing them too tightly.
- Adding fuel: Add new logs strategically, typically to the front or side of the main coal bed, to avoid smothering the existing flames.
- Coal bed: A good bed of glowing embers (coals) is crucial for sustained heat and reigniting new logs. Regularly rake coals forward to maintain this bed.
Chimney And Draft Control
The chimney is the engine of airflow for a wood-fired oven.
Chimney Blockages
- Regular inspection: Periodically check the chimney flue for obstructions like soot buildup, creosote, animal nests, or foreign objects. A partially blocked chimney will reduce draft, leading to a weaker flame and smoke backing up into the oven.
- Cleaning: Regular chimney cleaning is essential, especially if you notice a significant reduction in draft or increased smoke spillage.
Draft Regulation
- Damper control (if applicable): Some ovens have a damper to control airflow. Ensure it is adjusted correctly, typically more open during firing and potentially slightly closed once the desired temperature is reached, but never fully closed while the fire is active.
- External factors: Wind can affect chimney draft. Strong winds blowing directly down the chimney can sometimes cause downdrafts, while other conditions can enhance the draft. Understanding how your specific oven reacts to weather is part of mastering its operation.
Ash Management
Ash buildup can significantly hinder airflow and heat transfer.
- Regular removal: Ash should be removed regularly, especially from the oven floor. A buildup of ash can insulate the floor, preventing heat from reaching the cooking surface, and can also impede airflow to the base of the fire.
- Tooling: Use appropriate tools like ash rakes and shovels designed for pizza ovens.
Common Flame Issues And Troubleshooting
Identifying and rectifying common flame problems is a key part of the audit. These issues often point directly to underlying causes.
Yellow Or Smoky Flame
- Cause: Incomplete combustion due to insufficient oxygen.
- Gas Ovens: Check and adjust the air shutter. Ensure primary air intake vents are clear.
- Wood Ovens: Use drier wood. Improve airflow by arranging wood less densely or opening the door slightly if safe to do so. Check chimney for blockages.
Lifting Or Detached Flame
- Cause: Too much air, or gas pressure too high.
- Gas Ovens: Adjust the air shutter to reduce air intake. Verify gas pressure is within the manufacturer’s specifications. Check for leaks around burner ports that might be drawing in excess air.
- Wood Ovens: This is less common in wood ovens but could indicate overly aggressive airflow. Ensure the chimney isn’t drawing too strongly, or that fuel isn’t being consumed excessively fast.
Sputtering Or Uneven Flame
- Cause: Blocked burner ports, inconsistent gas flow, or debris on the flame.
- Gas Ovens: Clean burner ports meticulously. Check manifold and gas lines for blockages or debris. Ensure gas valves are fully open.
- Wood Ovens: Remove any debris or ash that might be interfering with the flame pattern. Ensure logs are not positioned in a way that disrupts the main burn.
Weak Or Low Flame
- Cause: Insufficient fuel supply or poor airflow.
- Gas Ovens: Check gas tank level (for propane). Verify regulator is functioning correctly and providing adequate pressure. Ensure all gas valves are fully open.
- Wood Ovens: Add more fuel. Ensure logs are burning properly and not smoldering. Check chimney draft, if it’s weak, address potential blockages.
Flame Extinguishing Itself
- Cause: Interruption of fuel or air supply, or safety shut-off.
- Gas Ovens: Check for gas supply issues (empty tank, kinked hose, faulty regulator). Ensure the thermocouple or flame sensor is clean and functioning correctly (these safety devices shut off gas if they don’t detect a flame). Check for drafts that might be blowing the flame out.
- Wood Ovens: This is usually due to lack of fuel, poor airflow, or a blocked chimney. Ensure there’s a consistent fuel source and adequate draft.
Maintenance And Cleaning Schedule
Preventative maintenance is key to ensuring long-term flame stability and oven longevity. A consistent schedule minimizes the chances of unexpected issues.
Daily Checks (during Operation)
- Visual flame observation: At the start of each cooking session, observe the flame for any immediate signs of abnormality (color, height, consistency).
- Listen for unusual noises: Gas ovens should have a smooth, consistent sound. Hissing or roaring might indicate issues.
- Check for smoke spillage: In both gas and wood ovens, excessive smoke leaking from the door or oven seams indicates airflow problems.
Weekly/bi-weekly Cleaning
- Burner Ports (Gas Ovens): Clean any visible debris. A deeper clean might be needed monthly.
- Oven Floor: Sweep out ash and debris. For wood ovens, ensure the floor is clear for optimal heat reflection.
- Exterior: Wipe down the oven exterior.
Monthly Maintenance
- Gas System (Gas Ovens):
- Perform the soapy water leak test on all connections.
- Inspect gas hoses for wear.
- Check regulator function.
- Burner Assembly (Gas Ovens): Remove and thoroughly clean the burner assembly if performance is subpar. Check for corrosion or damage.
- Chimney (Wood Ovens): Check for significant creosote buildup or blockages.
Annual Deep Cleaning And Inspection
- Full Gas System Check (Gas Ovens): This may involve professional servicing to check internal regulator components, manifold pressure, and ignition system integrity.
- Chimney Cleaning (Wood Ovens): A professional chimney sweep is recommended to remove stubborn creosote and ensure the flue is clear and safe.
- Oven Insulation: Check for any signs of damage or degradation to the oven’s insulation, which can affect heat retention and flame behavior.
- Door and Seals: Inspect the oven door and seals for wear or damage.
Safety Considerations During An Audit
Working with high temperatures and potentially flammable fuels necessitates strict adherence to safety protocols.
Gas Safety
- Know your gas: Be aware of whether you are using natural gas or propane, as they have different pressure requirements and handling considerations.
- Leak detection: Always use soapy water to detect gas leaks. Never use a flame.
- Ventilation: Ensure adequate ventilation when working with gas appliances, especially during leak checks. Operate in a well-aired space.
- Professional help: If you are unsure about any aspect of the gas system, consult a qualified gas technician. Improper handling can lead to explosions or fires.
Fire Safety (wood Ovens)
- Protective Gear: Wear heat-resistant gloves and eye protection when working near a hot oven or fire.
- Cooling Down: Allow the oven to cool completely before performing detailed cleaning or maintenance, especially when removing ash or inspecting components.
- Fire Extinguisher: Keep a suitable fire extinguisher (Class ABC) readily accessible.
- Clearance: Ensure there is adequate clearance around the oven, free from flammable materials.
General Safety
- Manufacturer’s Manual: Always refer to your specific pizza oven’s manufacturer’s manual for detailed instructions and safety warnings.
- Turn off fuel supply: Before starting any inspection or cleaning, ensure the gas supply is turned off at the source (tank valve or main supply valve) or that the wood fire is completely extinguished and cooled.
- Electrical Components: If your oven has electrical components (e.g., for ignition or controls), ensure the power is disconnected before performing any work.
Data-driven Insights: Flame Characteristics Comparison
To illustrate the differences and ideal conditions, consider this comparison of flame characteristics:
| Characteristic | Ideal Gas Oven Flame | Ideal Wood-Fired Oven Flame | Potential Issues Indicated |
|---|---|---|---|
| Color | Bright blue, possibly with faint yellow tips | Bright orange, lively, sometimes with white-hot embers | Yellow/smoky = incomplete combustion (gas/wood); Dark/lazy = poor draft (wood) |
| Height | Consistent, hugging burner ports (typically 1-3 inches) | Variable, but energetic and reaching upwards into the dome | Too low = low fuel/pressure (gas) or poor fire management (wood); Too high/lifting = excess air (gas) |
| Sound | Steady, quiet hum or “whoosh” | Crackling, popping, steady roar | Hissing/roaring = excess air or high pressure (gas); Smoldering/popping = wet wood or poor draft (wood) |
| Consistency | Uniform around all burner ports | Steady burn, not sputtering or dying | Uneven = clogged ports (gas) or poor wood arrangement (wood); Sputtering = debris or inconsistent fuel (both) |
| Soot Production | Minimal to none | Some soot is natural, but excessive indicates incomplete combustion | Excess soot = insufficient air (gas) or wet fuel/poor draft (wood) |
This table highlights that while the *goal* is a stable, efficient flame in both types of ovens, the *indicators* and *causes* of instability can differ significantly. For instance, a yellow flame in a gas oven is a clear sign of an air-fuel mixture problem, whereas in a wood oven, a yellow-orange hue is expected, and excessive, dark smoke is the primary indicator of poor combustion.
Real-world Example: The Pizzeria’s Flame Problem
“Luigi’s Pizzeria,” a popular local spot known for its authentic Neapolitan pizzas, started experiencing inconsistent cooking times. Pizzas that usually took 90 seconds were sometimes taking over two minutes, and others were burning unevenly. The flames on their commercial-grade gas pizza ovens, usually a vibrant blue, had become noticeably more yellow and flickered erratically.
An audit revealed several issues. Firstly, the weekly cleaning schedule for the burner ports had been neglected for several weeks due to staff shortages. Carbonized food debris and grease had built up, partially blocking the ports on two of the four burners.
Secondly, the gas pressure regulator on one of the ovens was showing signs of wear; a soapy water test revealed a very slow leak at the connection, and a pressure gauge test indicated slightly lower than optimal pressure.
Following the audit:
- The burner ports were thoroughly cleaned using specialized brushes.
- The faulty gas regulator and hose assembly were replaced.
- The air shutters were readjusted to optimize the blue flame on all burners.
After these adjustments, the flames returned to their strong, consistent blue hue, and cooking times normalized. The issue was resolved by addressing both component maintenance (ports) and fuel delivery consistency (regulator). This highlights how multiple factors can contribute to flame instability and the importance of a comprehensive audit.

As the author of the “Ultimate Pizza Guide: Recipes, Tips & Secrets Revealed,” I’m dedicated to sharing my love for pizza and empowering others to create delicious homemade pizzas with ease. Join me on a journey to uncover the secrets to perfecting your pizza game!


