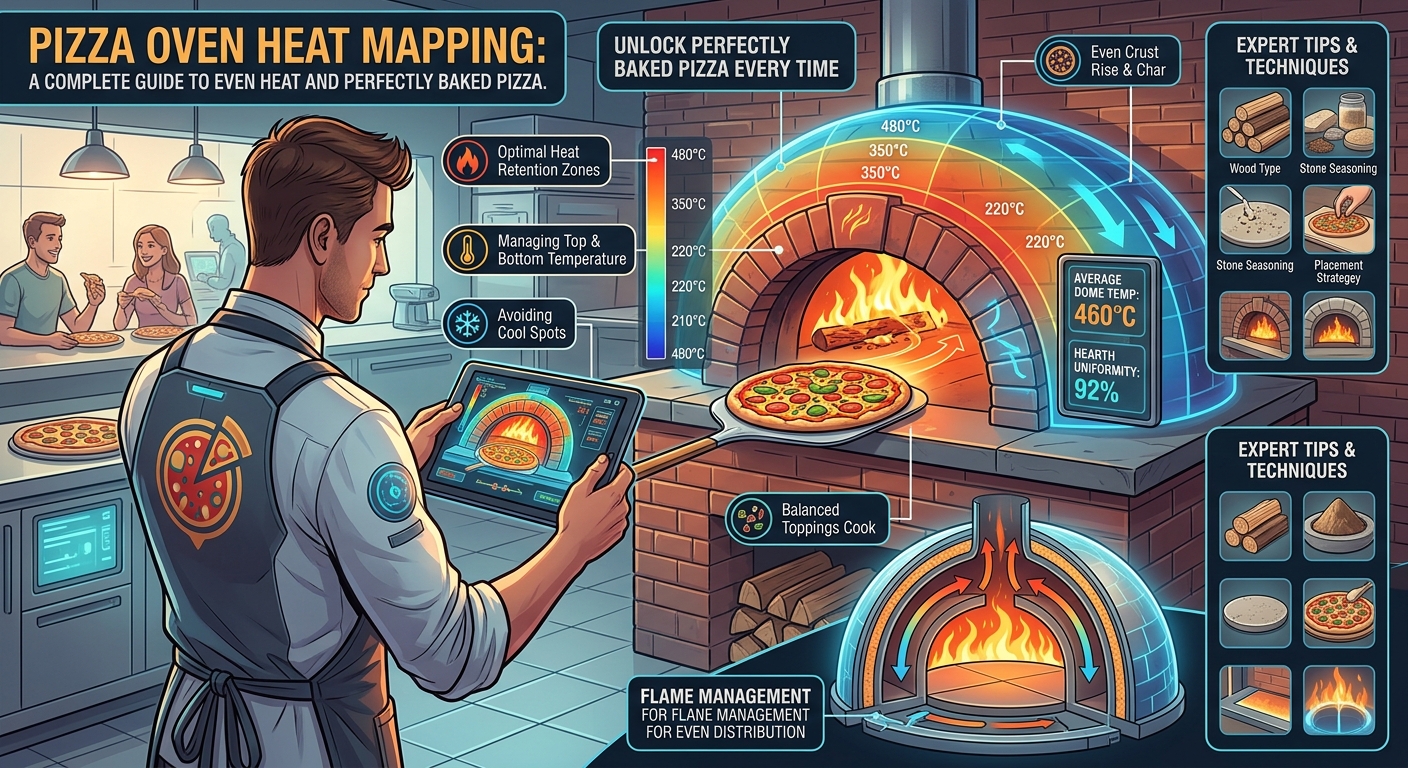
The aroma of perfectly blistered crust, the smoky char on a Neapolitan pizza, the crispy edges of a Roman-style pie, these are the hallmarks of pizza cooked in a truly exceptional oven. But achieving that elusive perfection isn’t just about the oven’s design; it’s intimately tied to its internal temperature distribution. Understanding and mastering this is where pizza oven heat mapping becomes not just useful, but essential. For both the home pizza enthusiast and the professional pizzaiolo, knowing where the hot spots and cooler zones reside within your oven is the key to consistent, delicious results.
Without a clear understanding of your oven’s thermal landscape, you’re essentially guessing. You might achieve a great pizza by chance, but replicating that success becomes a challenge. This is particularly true for wood-fired and gas-fired ovens, which are known for their dynamic and often uneven heat patterns.
Heat mapping provides the data-driven insights needed to control these variables, allowing you to strategically place your pizza for optimal cooking and to understand how to manage your fire or burner for the most consistent temperatures. It’s the difference between a good pizza and a truly unforgettable one, born from a deep understanding of the cooking environment.
Key Takeaways
- Heat mapping reveals the precise temperature distribution within your pizza oven, identifying hot and cool spots.
- Understanding these patterns is crucial for achieving consistent cooking results, especially in wood-fired and gas ovens.
- Temperature variations can significantly impact crust texture, topping doneness, and overall pizza quality.
- Methods for heat mapping range from simple visual cues to advanced thermal imaging.
- Effective heat management based on mapping allows for strategic pizza placement and fire/burner control.
- Oven type, fuel source, and operational techniques all influence heat distribution patterns.
- Regular heat mapping and adjustment are key to mastering your pizza oven and elevating your pizza-making.

Credit: www.nytimes.com
The Science Behind Pizza Oven Heat Dynamics
Pizza ovens, especially those designed for high temperatures like wood-fired or gas-fired brick ovens, are complex thermal environments. Their performance relies on a delicate balance of radiant, convective, and conductive heat transfer. Radiant heat emanates directly from the heat source (flames, embers, or heating elements) and the hot oven dome, cooking the top of the pizza. Convective heat is the movement of hot air within the oven cavity, circulating heat around the pizza. Conductive heat is transferred directly from the hot oven floor to the base of the pizza.
The interplay of these three heat transfer methods is what creates the unique cooking environment. However, achieving a perfectly uniform temperature across the entire oven floor and dome is incredibly difficult. Factors such as:
- Oven shape and size: Domes, particularly, can create natural convection currents that are not uniform.
- Material of construction: Brick, refractory cement, and stone all absorb and radiate heat differently.
- Heat source location and intensity: A wood fire’s flame will be hottest in one area, while a gas burner might have a specific pattern.
- Insulation: Inconsistent insulation can lead to heat escaping unevenly.
- Door opening frequency: Each time the door is opened, hot air escapes, and cooler air enters, disrupting the thermal equilibrium.
These factors inevitably lead to temperature gradients, areas within the oven that are consistently hotter or cooler than others. Recognizing and mapping these gradients is the first step to mastering your oven.
Radiant Vs. Convective Vs. Conductive Heat In Pizza Ovens
To truly understand heat mapping, it’s important to distinguish the primary modes of heat transfer at play:
- Radiant Heat: This is the direct energy emitted from a hot surface or flame. In a pizza oven, the glowing embers, flames, and the hot dome itself are major sources of radiant heat. It cooks from the top down and is responsible for the characteristic charring and blistering on pizza toppings and crust. A strong radiant heat source can cook a pizza very quickly, often in 60-90 seconds in a Neapolitan oven.
- Convective Heat: This is heat transferred by the movement of air or gases. Hot air rises, cooler air sinks, creating currents within the oven. In wood-fired ovens, the rising column of flame and smoke creates powerful convection. This heat circulates around the pizza, cooking the sides and helping to ensure even cooking of toppings. Inefficient convection can lead to “cold spots” where air doesn’t circulate effectively.
- Conductive Heat: This is heat transferred through direct contact. The oven floor is the primary source of conductive heat for the pizza base. A well-heated, dense oven floor transfers heat efficiently to the dough, creating a crispy, well-cooked crust without burning. Uneven floor temperatures will result in a pizza with one side more cooked than the other.
The ideal pizza oven achieves a harmonious balance of these three, but the reality is often an uneven distribution. Heat mapping helps us visualize and quantify this unevenness.
Why Pizza Oven Heat Mapping Matters
The direct impact of uneven oven temperatures on your pizza can be significant, leading to frustration and inconsistent results. When you don’t know where your oven is hottest, you might:
- Burn one side of the pizza while the other remains undercooked: This is a common issue when the oven floor has distinct hot and cool zones.
- Have toppings cook too quickly or not at all: If the dome temperature is far hotter than the floor, the top might char before the base is ready, or vice-versa.
- Struggle with crust consistency: A pizza may have a pale, floppy base on one side and a burnt bottom on the other.
- Waste fuel and time: Constantly rotating the pizza or adjusting the fire without understanding the thermal map is inefficient.
By mapping your oven’s heat, you gain the ability to:
- Optimize pizza placement: Knowing the hot spots allows you to place the pizza in the ideal location for even cooking, or to rotate it strategically as needed.
- Manage your heat source effectively: Whether it’s stoking a wood fire, adjusting a gas burner, or preheating your oven, heat mapping informs your decisions for achieving the desired temperature profile.
- Troubleshoot cooking issues: If your pizzas consistently have a particular problem (e.g., a pale spot on the crust), heat mapping can help diagnose whether it’s an oven temperature issue.
- Achieve predictable results: Consistency is king in cooking. Heat mapping brings a scientific approach to an art form, making your pizza-making more reliable.
- Understand your oven’s unique characteristics: Every oven is different. Heat mapping helps you learn the specific quirks and strengths of your particular unit.
Case Study: The Pizzeria’s Hot Spot Problem
“Antonio’s Artisan Pies,” a popular local pizzeria, was experiencing a recurring issue with their 6-month-old wood-fired oven. Pizzas ordered for dine-in, which were cooked closest to the rear of the oven where the fire was managed, consistently came out with a darker, more charred crust on the left side.
Takeaway orders, often cooked further forward, were generally more consistent. Head pizzaiolo, Maria, suspected a specific hot spot but couldn’t quantify it.
Using a combination of infrared thermometer readings and a simple flour test (explained later), she mapped the oven floor. The readings confirmed a significantly hotter zone, approximately 50°F (28°C) hotter, on the left rear quadrant of the oven floor. This was due to the natural flame pattern of their wood fire and the slight thermal mass variations in that specific brick section.
With this knowledge, Maria adjusted her cooking strategy. She now places pizzas intended for immediate service slightly more towards the center-left, allowing for the intense heat to contribute to the desired char without overcooking. For pizzas that require slightly longer cooking or for larger batches, she places them further forward or rotates them more frequently.
This simple heat map intervention drastically reduced complaints about unevenly cooked crusts and improved overall pizza quality, leading to a measurable increase in customer satisfaction.

Credit: www.reddit.com
Methods For Pizza Oven Heat Mapping
There are several approaches to mapping the heat within your pizza oven, ranging from simple observational techniques to more sophisticated technological solutions. The best method for you will depend on your oven type, your budget, and the level of detail you require.
1. The Flour Test (simple & Visual)
This is a classic, low-tech method that provides a good visual representation of your oven floor’s temperature distribution.
How to do it:
- Preheat your oven to your typical pizza-making temperature and let it stabilize for at least 30-45 minutes.
- Lightly sprinkle a thin, even layer of flour across the entire oven floor.
- Observe the changes:
- White flour: Indicates a cooler area.
- Lightly browned flour: Indicates a moderate temperature.
- Dark brown or scorched flour: Indicates a very hot spot.
- Document the pattern: Take photos or sketch the oven floor, noting where the flour changes color. This will give you a clear visual map of hot and cool zones.
Pros: Extremely simple, no special equipment needed, provides a direct visual.
Cons: Only maps the floor, not the dome; results are temporary; requires some interpretation.
2. Infrared Thermometer (targeted Readings)
An infrared (IR) thermometer is a handheld device that measures surface temperature from a distance without contact. It’s excellent for taking precise temperature readings at specific points.
How to do it:
- Preheat your oven to temperature and let it stabilize.
- Using the IR thermometer, point it at various locations on the oven floor and dome. Take readings systematically across the entire cooking surface.
- Record the temperatures: Note down the temperature for each location. You can create a grid on paper or a digital spreadsheet to record these readings corresponding to specific areas of your oven.
- Visualize the data: You can then create a simple heat map by coloring in areas on a diagram of your oven floor based on the temperature ranges (e.g., blue for cooler, red for hotter).
Pros: Provides precise numerical data; can be used for both floor and dome; relatively affordable.
Cons: Requires taking many individual readings; doesn’t show continuous gradients as well as thermal imaging.
3. Thermal Imaging Camera (advanced & Comprehensive)
A thermal imaging camera (or infrared camera) is the most advanced and comprehensive method. It captures infrared radiation and displays it as a visual image, showing temperature variations as different colors.
How to do it:
- Preheat your oven to temperature and let it stabilize.
- Point the thermal imaging camera into the oven (ensure the camera is designed to handle the heat or use a protective shield if necessary).
- Capture the image: The camera will display a real-time image showing the temperature distribution across the entire oven surface (floor and dome). Different colors represent different temperature ranges, creating an instant heat map.
- Analyze the image: This provides a detailed, high-resolution overview of your oven’s thermal profile.
Pros: Most comprehensive and detailed map; immediate visual representation; shows gradients clearly; can map floor and dome simultaneously.
Cons: Most expensive option; requires specialized equipment; camera might need protection from extreme heat.
4. Baking Soda Test (alternative Visual)
Similar to the flour test, but uses baking soda, which turns brown more rapidly than flour at high temperatures.
How to do it:
- Preheat your oven to temperature and stabilize.
- Sprinkle a thin, even layer of baking soda across the oven floor.
- Observe: The areas where the baking soda turns brown fastest are the hottest spots. The areas that remain white are cooler.
- Document: Note the pattern of browning.
Pros: Can be more sensitive than flour for detecting very hot spots; simple.
Cons: Only maps the floor; results are temporary.

Credit: www.twineagles.dometic.com
Analyzing And Interpreting Your Heat Map
Once you have gathered your data, whether through visual cues from flour, numerical readings from an IR thermometer, or a full thermal image, the next crucial step is to interpret what it means for your pizza cooking. A heat map isn’t just a pretty picture; it’s a practical guide.
Understanding Temperature Gradients
The most important aspect to look for is the temperature gradient. This refers to how much the temperature changes across different areas of your oven.
- Steep Gradients: If there’s a large difference (e.g., 100°F / 55°C or more) between the hottest and coolest spots, you’ll need to be very strategic with pizza placement and rotation. This is common in ovens with a direct flame impingement or where the heat source is concentrated in one area.
- Gentle Gradients: A smaller temperature difference means your oven is more forgiving and easier to manage.
Identifying Hot Spots And Cool Spots
Your heat map will clearly delineate:
- Hot Spots: These are areas significantly hotter than the desired cooking temperature. They are often directly in the path of the flame or near the heat source. While useful for quick cooking, they can easily burn your pizza if not managed.
- Cool Spots: These are areas that don’t reach or maintain the optimal temperature. They might be further from the heat source, in areas with less insulation, or where convection currents are weak. Pizzas placed here will cook slower and may result in a pale, undercooked base.
Using Data For Strategic Cooking
With your heat map in hand, you can make informed decisions:
- Optimal Placement: For a quick-cook Neapolitan pizza, you might place it in a zone that is slightly hotter than your target temperature, knowing it will cook in 90 seconds. For a thicker crust pizza that needs more time, you might choose a cooler spot on the floor or ensure it’s not directly under the most intense radiant heat.
- Rotation Strategy: If you have a distinct hot spot, you’ll need to rotate your pizza regularly to ensure even cooking. Knowing the hot spot helps you time these rotations. For instance, if the rear-left is hottest, you might rotate the pizza 90 degrees every 20-30 seconds.
- Fire Management: If your heat map shows a significant cool zone, you might adjust your fire management. For wood-fired ovens, this could mean pushing embers further into that area or ensuring the flame licks across it more effectively. For gas ovens, it might involve checking burner settings or vent configurations.
- Preheating Adjustments: Understanding your oven’s thermal behavior during preheating can help you optimize the time it takes to reach an even cooking temperature.
Example: The “sweet Spot” And The “danger Zone”
In my experience testing various pizza ovens, most develop a “sweet spot”, a region on the oven floor that is consistently at or just above the ideal cooking temperature, with good radiant heat from the dome. This is often slightly off-center, away from the direct flame impingement but close enough to benefit from the heat.
Conversely, there’s often a “danger zone”, usually directly under the most intense part of the flame or closest to the fuel source, where temperatures can spike dramatically, leading to rapid burning. A heat map helps you identify these zones precisely for your specific oven.
Factors Influencing Pizza Oven Heat Distribution
The thermal behavior of your pizza oven isn’t static. Several factors can influence its heat distribution patterns, meaning your heat map might change slightly depending on how you’re using it. Understanding these variables allows for more dynamic heat management.
1. Fuel Type And Management
The type of fuel and how you manage it are primary drivers of heat distribution.
- Wood-Fired Ovens:
- Flame position: Where you build your fire directly dictates the hottest areas. Pushing embers to the side or rear creates radiant heat from the dome and floor in those zones.
- Burn rate: A roaring fire generates more intense heat than dying embers.
- Log size and type: Larger logs burn longer and hotter, while smaller, drier wood burns faster and produces more immediate heat.
- Airflow: Proper airflow is crucial for a hot, efficient fire. Blocked vents can lead to uneven combustion and cooler spots.
- Gas-Fired Ovens:
- Burner design: Different burner designs (e.g., U-shaped, ring, infrared) create distinct heat patterns.
- Flame height/intensity: Adjusting the gas knob directly controls the heat output and can influence where the hottest parts of the oven are.
- Ventilation: Gas ovens also rely on proper ventilation to ensure efficient combustion and heat circulation.
- Electric Ovens:
- Element placement: The location of heating elements (top, bottom, or both) will determine the primary heat sources.
- Thermostat accuracy: While generally more stable, electric ovens can still have localized hot or cool spots depending on element design and insulation.
2. Oven Construction And Materials
The materials used to build your oven play a significant role in how heat is absorbed, stored, and radiated.
- Refractory Materials: High-quality refractory bricks and cement are designed to absorb and retain heat efficiently, providing a stable cooking surface. Variations in density or thickness can lead to uneven heat.
- Insulation: Proper insulation is critical for maintaining high temperatures and preventing heat loss. Poorly insulated areas will cool down faster and remain cooler. This is especially true for the oven dome and base.
- Oven Floor Thickness: A thicker oven floor will retain more heat and provide a more stable cooking temperature. A thinner floor might heat up faster but also cool down more quickly, especially when launching multiple pizzas.
- Dome Shape: The curvature of the dome influences convection currents. A perfectly spherical dome might offer more even convection than an oval or rectangular one.
3. Oven Usage And Habits
Your own practices can inadvertently create or exacerbate temperature imbalances.
- Door Opening Frequency: Each time the oven door is opened, hot air escapes, and cooler air rushes in. Frequent opening, especially for extended periods, can significantly disrupt the thermal equilibrium and cool down specific areas.
- Pizza Launching Technique: How you launch the pizza can also affect floor temperature. If you consistently launch pizzas from one side, you might be cooling that area more frequently.
- Cleaning and Maintenance: Accumulation of ash or debris in a wood-fired oven can affect airflow and heat distribution. Regular cleaning is important.
- Preheating Time: Insufficient preheating means the oven hasn’t reached a stable, even temperature throughout its structure, leading to predictable hot and cool zones.
Comparison Table: Factors Affecting Heat Distribution
| Factor | Description | Impact on Heat Distribution | Mitigation Strategies |
|---|---|---|---|
| **Fuel Type** | Wood, Gas, Electric | Dictates primary heat source location and intensity. | Understand flame patterns (wood/gas); element placement (electric). |
| **Fire Management** | How fire is built, maintained, and fed (wood); burner settings (gas) | Creates localized intense heat or broader warming. | Strategic ember placement; consistent fuel addition; precise burner adjustments. |
| **Materials** | Refractory brick, cement, insulation, floor thickness | Affects heat absorption, retention, and loss. | Use high-quality materials; ensure even thickness; check insulation integrity. |
| **Oven Shape** | Dome curvature, oven size | Influences convection currents and radiant heat reflection. | Design considerations for new ovens; understand natural airflow patterns in existing ovens. |
| **Insulation** | Layer thickness and quality around oven body | Prevents heat loss, maintaining internal temperature stability. | Ensure adequate, well-maintained insulation; check for gaps or damage. |
| **Usage Habits** | Door opening frequency, pizza launching, cleaning | Can cause localized cooling or uneven heat buildup. | Minimize door openings; consistent launching technique; regular cleaning; adequate preheating. |
| **Ambient Temp.** | Outside temperature and wind | Can affect how quickly the oven cools or heats up, especially if insulation is compromised. | Shield oven from strong winds; consider ambient temperature during preheating. |
Optimizing Your Pizza For Different Oven Zones
Once you’ve mapped your oven and understand its thermal characteristics, you can begin to optimize your pizza-making process to leverage these zones effectively. This involves not just placing the pizza correctly, but also considering the type of pizza you’re making.
1. The “hot Zone” Strategy: High-heat, Quick Cooks
The hottest areas of your oven are ideal for pizzas that require very high temperatures and short cooking times. This is the domain of the Neapolitan pizza, aiming for a 60-90 second cook.
- Pizza Type: Neapolitan, Roman Tonda, or any pizza with a thin crust and minimal toppings that needs to cook rapidly.
- Placement: Position the pizza in the hottest part of the oven floor, but not directly under the most intense flame, to benefit from intense radiant and conductive heat.
- Technique: Launch the pizza swiftly. Be prepared to rotate it frequently (every 15-20 seconds) to ensure even cooking and prevent burning. Monitor the crust for blistering and charring.
- Fire Management

As the author of the “Ultimate Pizza Guide: Recipes, Tips & Secrets Revealed,” I’m dedicated to sharing my love for pizza and empowering others to create delicious homemade pizzas with ease. Join me on a journey to uncover the secrets to perfecting your pizza game!