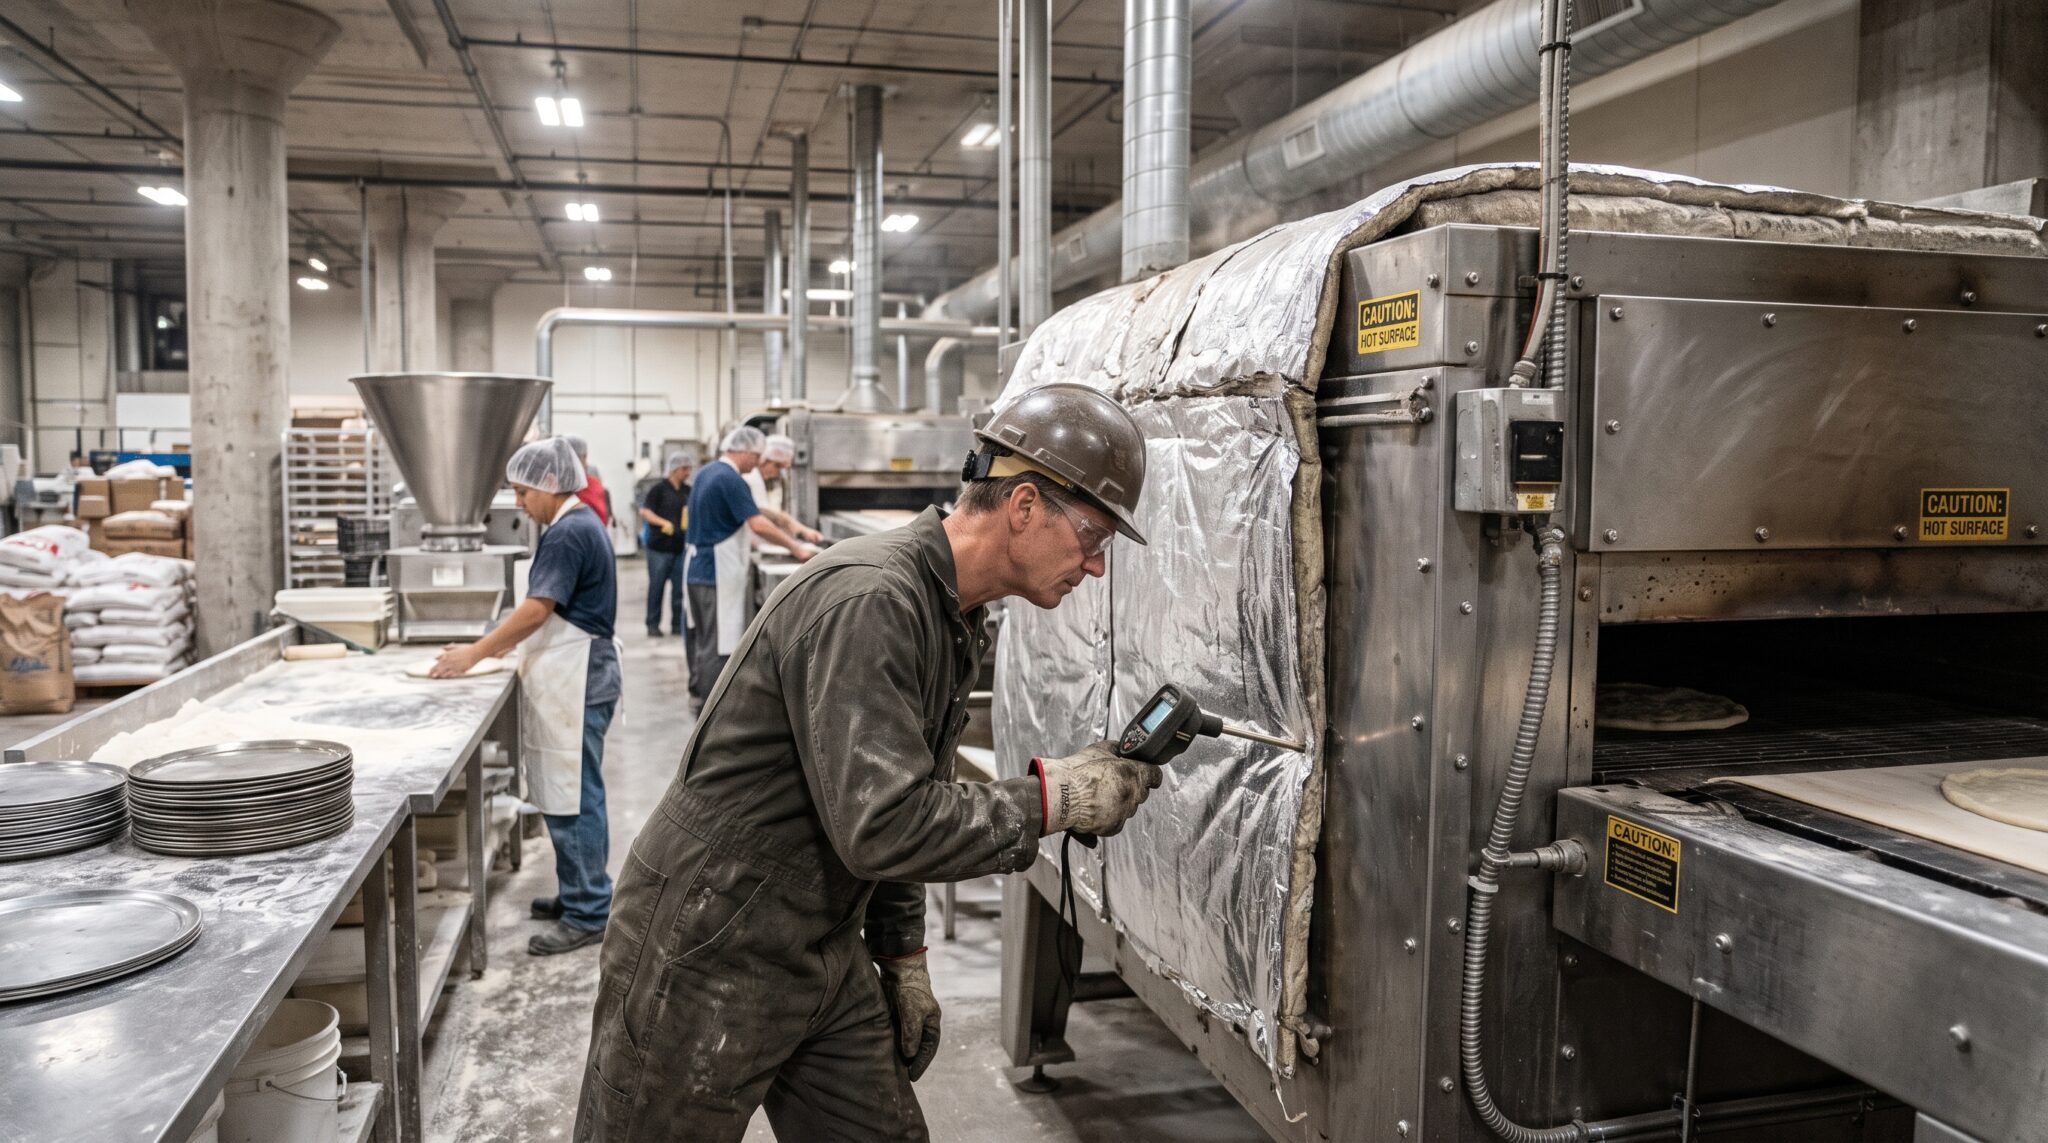
“Pizza Oven Insulation Efficiency Checks”
The heart of any great pizza lies not just in its toppings or dough, but in the intense, consistent heat of a well-built pizza oven. For those who cherish the smoky char of Neapolitan or the perfectly crisp crust of a New York slice, a pizza oven is an investment. However, the efficiency and longevity of this culinary centerpiece hinge critically on one often-overlooked component: insulation. Proper insulation is the unsung hero, ensuring that scorching temperatures are retained where they matter most, inside the oven, rather than escaping into the surrounding environment. This not only leads to faster cooking times and superior pizza quality but also dramatically impacts fuel consumption and operational costs.
Understanding and maintaining the efficiency of your pizza oven’s insulation is paramount. Whether you’ve invested in a commercial-grade wood-fired behemoth or a more compact backyard model, the principles remain the same. Inefficient insulation means wasted heat, longer preheat times, more fuel burned, and ultimately, a less satisfying cooking experience.
This guide will explore the critical aspects of pizza oven insulation efficiency, from understanding the materials involved to performing essential checks and maintenance that will keep your oven performing at its peak for years to come.
Key Takeaways
- Insulation is Crucial: High-quality insulation is vital for retaining heat, ensuring faster cooking, fuel efficiency, and optimal pizza crust development.
- Material Matters: Different insulation materials (ceramic fiber, calcium silicate, vermiculite, perlite) offer varying thermal resistance, durability, and cost.
- Regular Checks are Essential: Periodic inspection for cracks, gaps, and degradation of insulation is necessary to identify and address potential heat loss.
- Moisture is the Enemy: Water can degrade insulation materials, reducing their effectiveness and potentially causing damage. Proper waterproofing and drying are critical.
- Performance Metrics: Monitoring preheat times, temperature stability, and fuel consumption can indicate insulation efficiency issues.
- Maintenance is Key: Simple maintenance like sealing cracks and ensuring proper ventilation can significantly extend the life and efficiency of your oven’s insulation.
Understanding Pizza Oven Insulation
The primary role of insulation in a pizza oven is to act as a thermal barrier. It prevents the immense heat generated within the oven dome and hearth from dissipating into the surrounding air. This is crucial for several reasons, all contributing to the overall efficiency and performance of the oven.
The Science Of Heat Retention
Pizza ovens operate at extremely high temperatures, often exceeding 700°F (370°C) and sometimes reaching over 900°F (480°C) for Neapolitan-style pizzas. To achieve these temperatures and maintain them consistently, the oven must be designed to trap and reflect heat effectively. Insulation plays a pivotal role in this process by:
- Reducing Heat Transfer: Insulation materials have low thermal conductivity, meaning they resist the flow of heat. This slows down the rate at which heat escapes the oven chamber.
- Enhancing Thermal Mass: While not strictly insulation, the materials surrounding the insulation (like refractory bricks) absorb and store heat. Good insulation ensures this stored heat is retained within the oven’s cooking chamber, contributing to consistent temperatures and rapid recovery after opening the door.
- Improving Fuel Efficiency: When an oven retains heat effectively, it requires less fuel (wood, gas) to reach and maintain the desired cooking temperature. This translates directly into lower operational costs and a more sustainable cooking process.
- Ensuring Even Cooking: Consistent heat distribution is key to baking perfect pizzas. Insulation helps prevent hot spots and cold spots by maintaining a uniform temperature throughout the oven dome and hearth.
Common Insulation Materials And Their Properties
The choice of insulation material significantly impacts the oven’s performance, cost, and longevity. Different materials offer varying levels of thermal resistance (R-value), temperature rating, density, and durability.
- Ceramic Fiber Blankets: These are a popular choice for high-temperature applications due to their excellent thermal insulation properties, low thermal conductivity, and resistance to thermal shock. They are lightweight and flexible, making them easy to install. Common types include alumina-silica fibers, which can withstand temperatures up to 2300°F (1260°C).
- Pros: Excellent insulation, lightweight, flexible, good thermal shock resistance.
- Cons: Can be more expensive, requires careful handling as fibers can be irritating.
- Calcium Silicate Boards: These rigid boards offer good insulation and structural support. They are non-combustible and can handle high temperatures, though typically lower than ceramic fiber (around 1800-2000°F or 980-1090°C).
- Pros: Rigid, good structural integrity, good insulation.
- Cons: Less flexible than blankets, can be brittle.
- Vermiculite and Perlite: These are lightweight, granular materials derived from expanded minerals. They are often mixed with cement or binders to create insulating concrete or board forms. They offer moderate insulation properties and are cost-effective.
- Pros: Lightweight, cost-effective, good for filling cavities.
- Cons: Lower R-value per inch compared to ceramic fiber, can absorb moisture if not properly sealed.
- Rockwool (Mineral Wool): While commonly used in building insulation, standard rockwool is generally not suitable for the extreme direct heat inside a pizza oven. However, specialized high-temperature mineral wools might be used in the outer layers of some oven designs, further from the direct heat source.
- Pros: Good fire resistance, readily available.
- Cons: Lower temperature limits for direct heat applications, can absorb moisture.
The Importance Of Layering Insulation
Most high-performance pizza ovens utilize a multi-layer insulation system. This approach optimizes thermal performance by combining materials with different properties. A typical system might include:
- Primary Insulation Layer: Directly against the oven dome and hearth, usually a high-temperature ceramic fiber blanket. This layer handles the most intense heat and provides the highest R-value per inch.
- Secondary Insulation Layer: A thicker layer, potentially using materials like calcium silicate boards or a vermiculite/perlite concrete mix. This layer adds bulk insulation and further reduces heat transfer, protecting the outer shell from extreme temperatures.
- Outer Shell/Weatherproofing: The final layer, often a rendered finish, protects the insulation from the elements and provides a durable exterior. This layer must be breathable to allow any trapped moisture to escape.
This layered approach ensures that heat is effectively trapped, while the insulation itself is protected from degradation due to extreme temperatures and external factors.

Credit: www.supremeperlite.com
Performing Insulation Efficiency Checks
Regularly checking your pizza oven’s insulation is crucial for maintaining its performance and preventing costly repairs. These checks don’t require specialized equipment but rather a keen eye and a systematic approach.
Visual Inspection: What To Look For
The most straightforward way to assess insulation efficiency is through a thorough visual inspection. Before and after firing up your oven, take the time to examine its exterior and, if accessible, its interior.
- Cracks and Gaps: Look for any visible cracks in the outer render or dome. These can be entry points for moisture and exit points for heat. Pay close attention to areas around the door opening, chimney, and any structural joints.
- Spalling or Deterioration: Check for areas where the render is crumbling, flaking, or showing signs of significant wear. This can indicate that the insulation beneath is degrading or that the outer shell is not adequately protected.
- Discoloration: While some discoloration is normal due to soot and high heat, unusual dark patches or areas that appear significantly hotter than others on the exterior (when the oven is cold or cooling) can sometimes indicate a breakdown in the insulation layer.
- Moisture Stains: Any persistent damp patches or staining on the exterior, especially after rain, could suggest that the waterproofing is compromised or that moisture is trapped within the insulation layers.
Thermal Imaging: A Deeper Dive
For a more precise assessment, thermal imaging can be an invaluable tool. A thermal camera (or infrared thermometer for spot checks) can visualize temperature differences across the oven’s surface, highlighting areas where heat is escaping.
- How it Works: Thermal cameras detect infrared radiation emitted by objects. Hotter surfaces emit more radiation and appear brighter (often in red/yellow hues), while cooler surfaces appear darker (blue/purple).
- Identifying Heat Loss: By scanning the oven’s exterior while it’s hot or cooling down, you can easily spot areas that are significantly hotter than their surroundings. These “hot spots” directly indicate areas of compromised insulation.
- Benefits: Thermal imaging provides a non-destructive way to pinpoint the exact location and severity of insulation issues, allowing for targeted repairs. It can reveal hidden problems that are not visible to the naked eye.
Monitoring Preheat And Recovery Times
A significant indicator of insulation efficiency is how long it takes for your oven to reach its target cooking temperature (preheat time) and how quickly it recovers its temperature after being opened or loaded with food.
- Baseline Measurement: Before any potential issues arise, establish a baseline for your oven’s typical preheat and recovery times. Note the ambient temperature, the type and amount of fuel used, and the target temperature.
- Tracking Changes: If you notice that your oven is taking noticeably longer to preheat than it used to, or if the temperature drops drastically and struggles to recover, it’s a strong sign that the insulation is no longer performing optimally.
- Example: If your oven typically preheats to 800°F (425°C) in 90 minutes, but now takes 2 hours or more, this is a red flag. Similarly, if opening the door causes a 100°F (55°C) drop that takes much longer to recover, insulation is likely the culprit.
Fuel Consumption Analysis
Changes in fuel consumption can also point to insulation problems. An efficiently insulated oven requires less fuel to maintain high temperatures.
- Increased Fuel Usage: If you find yourself needing to add more wood more frequently, or if your gas oven seems to be running on a higher setting for longer periods to maintain temperature, this suggests increased heat loss.
- Data Logging: For gas ovens, monitoring the gas meter or thermostat settings over time can provide quantifiable data. For wood-fired ovens, keeping a rough log of how much wood is consumed per cooking session can highlight trends.

Credit: myoutdoorplans.com
Addressing Insulation Degradation And Moisture Issues
Insulation materials, particularly those exposed to high temperatures and the elements, are susceptible to degradation. Moisture is often the primary enemy of insulation in pizza ovens.
The Impact Of Moisture
Water and pizza oven insulation are a bad combination. Moisture can enter the insulation in several ways:
- Rain and Snow: If the oven’s outer shell is not properly waterproofed or if there are cracks, precipitation can seep in.
- Condensation: Rapid temperature fluctuations can cause condensation to form within the insulation layers.
- Improper Curing: For ovens built with cementitious materials, insufficient curing can leave residual moisture trapped within the structure.
Once moisture penetrates the insulation, it can lead to:
- Reduced Thermal Efficiency: Water has a much higher thermal conductivity than most insulating materials, meaning it conducts heat away from the oven core far more effectively, drastically reducing the insulation’s R-value.
- Material Degradation: Repeated cycles of wetting and drying, combined with high temperatures, can break down the binders and fibers within insulation materials, leading to crumbling and loss of structural integrity.
- Cracking and Spalling: When moisture trapped within the insulation turns to steam during firing, its rapid expansion can cause the outer layers of the oven to crack or spall (break off in pieces). This is particularly dangerous as it can compromise the oven’s structure.
Drying Out A Wet Oven
If you suspect your oven’s insulation has absorbed moisture, it needs to be dried out slowly and carefully to prevent damage.
- Slow Firing: Begin with a series of very small, low-temperature fires over several days. The goal is to gently evaporate the moisture without causing it to turn to steam too rapidly.
- Day 1: Build a very small fire (just a few pieces of wood) and let it burn for only 30-60 minutes. Keep the oven door ajar to allow moisture to escape.
- Subsequent Days: Gradually increase the size and duration of the fires, slowly raising the temperature. Monitor the oven for any signs of cracking or spalling.
- Extended Drying: This process can take anywhere from a few days to a couple of weeks, depending on how much moisture is present. Patience is key.
- Ventilation: Ensure good airflow around and through the oven during the drying process. If your oven has a dedicated vent or chimney, keep it open.
Repairing Cracks And Gaps
Once the oven is thoroughly dry, you can address any visible damage.
- Minor Cracks: Small hairline cracks in the render can often be repaired using a flexible, high-temperature sealant or a specialized refractory mortar.
- Larger Cracks: For larger cracks, you may need to remove loose material, dampen the area, and then fill the void with a suitable refractory patching material. Some repairs might involve re-rendering sections of the oven.
- Re-insulating: In cases of severe degradation where insulation material has fallen away, a more involved repair might be necessary. This could involve carefully removing damaged insulation, installing new insulation (e.g., ceramic fiber blanket), and then re-rendering the exterior. Always ensure any new insulation is compatible with the existing materials and the oven’s operating temperatures.
Waterproofing The Exterior
Preventing moisture ingress in the first place is the best strategy.
- Breathable Render: The outer render should be breathable, allowing moisture vapor from within the oven to escape. Avoid using non-breathable paints or sealants on the main oven body.
- Water-Resistant Coatings: For added protection against rain and snow, consider applying a breathable, water-repellent treatment designed for masonry or refractory materials. These coatings repel liquid water but still allow water vapor to pass through.
- Protective Cover: When the oven is not in use, especially during periods of heavy rain or snow, using a waterproof cover can provide an additional layer of protection. Ensure the cover allows for some air circulation to prevent condensation buildup underneath.
Optimizing Insulation For Different Oven Types
While the principles of insulation are universal, the specific application and materials might vary slightly depending on the type of pizza oven.
Wood-fired Brick Ovens
These are the classic pizza ovens, often built with a substantial brick dome and hearth.
- Construction: Typically feature a thick refractory dome, a layer of insulation (often ceramic fiber blanket or vermiculite/perlite concrete), and an outer protective shell. The hearth might also have an insulation layer beneath it.
- Insulation Focus: The primary focus is on insulating the dome thoroughly, as this is where the most intense heat is concentrated. Ensuring adequate insulation under the hearth is also crucial for maintaining floor temperature and preventing heat loss downwards.
- Checks: Visual inspection for cracks in the brickwork and render, monitoring heat radiating from the base of the oven, and tracking preheat times are key.
Portable / Pre-fabricated Ovens
These ovens, often made of stainless steel or composite materials, come with built-in insulation.
- Construction: Usually feature a metal or composite outer shell, a layer of high-temperature insulation (often ceramic fiber), and an inner cooking chamber.
- Insulation Focus: The manufacturer has pre-selected and installed the insulation. Efficiency checks focus on identifying any signs of damage to the outer casing that could expose the insulation, or any degradation of the internal insulation if visible.
- Checks: Less about physical repair and more about observing performance. Noticeable degradation in preheat time or temperature stability is the main indicator of potential insulation issues, which may be difficult or impossible to repair on these models.
Gas-fired Ovens
Similar in construction to wood-fired ovens but with a gas burner system.
- Construction: Can be brick or metal construction, with insulation critical for maintaining consistent temperatures generated by the burner.
- Insulation Focus: Crucial for efficiency and consistent heat. Poor insulation means the gas burner has to work harder and longer, increasing fuel costs.
- Checks: Similar to wood-fired ovens, but also monitor gas consumption. Thermal imaging is particularly useful for identifying uneven heating patterns caused by insulation gaps, which can affect cooking consistency from the gas flame.
Maintenance Schedule For Optimal Efficiency
A proactive maintenance schedule is the best way to ensure your pizza oven’s insulation remains efficient and its lifespan is maximized.
Pre-season And Post-season Checks
- Pre-Season (Beginning of Cooking Season):
- Perform a thorough visual inspection for any damage that may have occurred over the off-season (cracks, water ingress).
- Check the condition of the outer render and apply any necessary repairs or waterproofing treatments.
- If the oven has been stored uncovered or in damp conditions, perform a slow drying fire protocol.
- Post-Season (End of Cooking Season):
- Clean out any accumulated ash and debris from the oven chamber and chimney.
- Perform a final visual inspection.
- Ensure the oven is thoroughly dry before the off-season begins.
- Apply a protective cover and consider any measures to protect it from harsh weather during storage.
During The Cooking Season
- After Each Use:
- Allow the oven to cool completely before performing a quick visual check for any new, significant cracks that may have appeared during firing.
- Address any minor cracks or chips immediately to prevent them from worsening.
- Monthly Checks:
- Perform a more detailed visual inspection, paying attention to areas around the door and chimney.
- If you notice any subtle changes in preheat time or temperature stability, investigate further, perhaps using a spot check with an infrared thermometer.
Example Maintenance Log
Keeping a simple log can help track maintenance activities and identify trends.
| Date | Oven Status | Activity Performed | Observations | Action Required |
|---|---|---|---|---|
| 2026-03-15 | Cold, Pre-Season | Visual inspection, exterior render check | Minor crack near chimney base (approx. 2 inches). Exterior dry. | Repair crack with refractory mortar. |
| 2026-03-16 | Cold, Pre-Season | Repaired crack, applied breathable water repellent | Repair successful. Water repellent applied evenly. | None. |
| 2026-03-18 | Heating (small fire) | Slow drying fire (1 hour, low temp) | No visible issues. | None. |
| 2026-03-20 | Heating (medium fire) | Slow drying fire (1.5 hours, medium temp) | No visible issues. | None. |
| 2026-07-22 | Cooling down | Visual inspection post-use | No new cracks. | None. |
| 2026-09-30 | Cold, Post-Season | Cleaned out ash, visual inspection | Oven appears sound. Chimney clear. | Apply protective cover for winter. |
When To Call A Professional
While many insulation checks and minor repairs can be done yourself, some situations warrant professional attention:
- Extensive Cracking: If the oven dome or structure has numerous large cracks, or if there are signs of structural instability.
- Significant Spalling: If large pieces of the oven’s outer layer are breaking off.
- Persistent Moisture Issues: If you’ve tried drying the oven multiple times without success, there might be a deeper issue with the structure or its placement.
- Uncertainty: If you’re unsure about the extent of the damage or the correct repair methods, consulting a professional oven builder or repair specialist is advisable.
Frequently Asked Questions
How Often Should I Check My Pizza Oven’s Insulation?
It’s recommended to perform a visual inspection of your pizza oven’s insulation at least twice a year: once before the start of the cooking season (pre-season check) and once after the season ends (post-season check). During the active cooking season, a quick visual check after each use is advisable, with a more thorough inspection done monthly. Monitoring preheat times and fuel consumption should be an ongoing practice.
Can I Use Regular Home Insulation In My Pizza Oven?
No, absolutely not. Standard home insulation materials (like fiberglass batts or typical foam boards) are not designed to withstand the extreme temperatures found inside a pizza oven (often exceeding 700°F/370°C). Using them would be incredibly dangerous, posing a significant fire risk and leading to rapid degradation of the insulation and potentially the oven structure. Always use materials specifically rated for high-temperature refractory applications, such as ceramic fiber blankets or specialized insulating boards.
What Is The Best Insulation Material For A Pizza Oven?
The “best” material often depends on the specific oven design, budget, and desired performance. However, ceramic fiber blankets are widely considered excellent for the primary insulation layer directly against the oven dome due to their high thermal resistance, low thermal conductivity, flexibility, and resistance to thermal shock. For secondary layers or hearth insulation, materials like calcium silicate boards or vermiculite/perlite concrete mixes are also effective and commonly used. A multi-layer insulation system is often the best approach—combining ceramic fiber blanket as the primary layer against the dome, calcium silicate board or vermiculite/perlite concrete as secondary insulation, and a breathable outer render for weather protection. This combination maximizes thermal resistance, durability, and moisture resistance while remaining cost-effective.
How Can I Tell If My Oven’s Insulation Has Absorbed Moisture?
Signs include persistent damp patches or staining on the exterior, efflorescence (white powdery deposits), crumbling or spalling of the outer render, and declining performance (longer preheat times, difficulty maintaining temperature). If you suspect moisture, dry the oven slowly with small fires over several days and inspect for damage before resuming normal use.
Can I Repair Damaged Insulation Myself?
Minor repairs—filling hairline cracks with refractory sealant, patching small tears in ceramic fiber, replacing door gaskets—can often be done by homeowners with basic DIY skills. However, extensive damage, structural cracks, or significant insulation replacement should be handled by a professional oven builder or repair specialist.
How Long Does Pizza Oven Insulation Last?
With proper installation and maintenance, high-quality insulation can last 5–10 years or more. Poorly maintained ovens or those exposed to moisture and thermal shock may need insulation replacement in as little as 1–3 years. Regular monitoring and prompt repairs extend lifespan significantly.
Does Insulation Affect Fuel Consumption?
Yes, significantly. Poor insulation allows heat to escape, forcing the oven to consume more fuel (wood, gas, or electricity) to maintain target temperatures. A well-insulated oven retains heat efficiently, reducing fuel costs by as much as 20–30% and lowering your environmental footprint.
Conclusion
Pizza oven insulation is the silent guardian of performance, efficiency, and longevity. It traps heat where it belongs, reduces fuel consumption, ensures even cooking, and protects the oven’s structure from thermal stress. Regular visual inspections, thermal imaging, and performance monitoring—preheat times, temperature stability, fuel usage—catch problems early. Moisture is the enemy: waterproof the exterior, dry wet insulation slowly, and repair cracks promptly. Know when to call a professional for extensive damage or persistent issues. Protect your insulation, and your oven will reward you with perfect pizzas—bake after bake, year after year.

As the author of the “Ultimate Pizza Guide: Recipes, Tips & Secrets Revealed,” I’m dedicated to sharing my love for pizza and empowering others to create delicious homemade pizzas with ease. Join me on a journey to uncover the secrets to perfecting your pizza game!


