
Mastering the heat of your pizza oven is the secret ingredient that separates a decent pie from an unforgettable culinary masterpiece. Whether you’re wielding a professional wood-fired behemoth or a compact countertop model, understanding and managing its thermal behavior is paramount. This isn’t just about achieving the perfect crispy crust and evenly cooked toppings; it’s about consistency, efficiency, and unlocking the full potential of your oven. A well-executed pizza oven heat management plan ensures that every bake is as successful as the last, transforming a potentially intimidating piece of equipment into a reliable partner in your pizza-making journey.
Key Takeaways
- Preheating is Crucial: Allowing sufficient time for the oven and its cooking surface to reach the target temperature is non-negotiable for optimal pizza baking.
- Temperature Zones are Your Friend: Understanding how heat distributes within your oven allows for strategic placement of pizzas and ingredients.
- Fuel Management is Key: For wood-fired ovens, mastering the art of adding fuel, managing flames, and maintaining embers is vital for consistent heat.
- Insulation Matters: Proper insulation in oven construction and maintenance significantly impacts heat retention and fuel efficiency.
- Monitoring Tools are Essential: Thermometers and infrared guns are invaluable for accurate temperature readings and adjustments.
- Resting and Recovery: Allowing the oven to reheat between bakes is critical for maintaining consistent cooking conditions.
- Practice Makes Perfect: Regular use and experimentation are the best ways to develop an intuitive understanding of your specific oven’s thermal dynamics.
Understanding Your Pizza Oven’s Thermal Dynamics
Before you can effectively manage heat, you need to understand how your specific pizza oven behaves. Ovens vary significantly in their design, fuel source, and materials, all of which influence their thermal characteristics. A wood-fired brick oven will have a much slower heat-up and cool-down time compared to a gas-fired stainless steel oven. Similarly, the dome shape, insulation thickness, and the type of cooking surface (cordierite, steel, or brick) play a significant role.
Types Of Pizza Ovens And Their Heat Characteristics
The fundamental principle of pizza oven operation is thermal mass and heat transfer. Different oven types achieve this in distinct ways:
- Wood-Fired Brick/Clay Ovens: These ovens rely heavily on thermal mass. The thick refractory materials absorb a tremendous amount of heat from the fire, which is then slowly radiated back onto the pizza. They take a long time to heat up (often 2-4 hours) but retain heat exceptionally well, allowing for multiple bakes and extended cooking sessions. Managing the fire is a dynamic process, requiring constant attention to fuel addition and flame control.
- Gas-Fired Ovens: These offer convenience and faster heat-up times (typically 20-40 minutes). They use burners to directly heat the oven chamber and cooking surface. Heat management often involves adjusting gas flow to maintain a set temperature. While less reliant on thermal mass, many still incorporate some refractory material for better heat retention.
- Electric Ovens: Similar to gas ovens in terms of speed and ease of use, electric ovens heat up quickly and offer precise temperature control via heating elements. They are often more energy-efficient for smaller batches but may lack the intense radiant heat that wood-fired ovens provide.
- Portable/Outdoor Ovens: Many modern portable ovens (often running on wood pellets or propane) are designed for rapid heating and quick pizzas. They typically have less thermal mass and may require more frequent adjustments to maintain temperature, especially in cooler or windy conditions.
The Role Of Thermal Mass
Thermal mass is the ability of a material to absorb, store, and release heat. In pizza ovens, materials like firebricks, refractory cement, and thick ceramic are crucial.
- Absorption: During preheating, the thermal mass absorbs heat from the fire or heating element.
- Storage: It holds this heat, acting as a thermal battery.
- Radiation & Conduction: The stored heat is then radiated from the dome and walls onto the pizza and conducted through the cooking surface, cooking the base.
Ovens with high thermal mass will maintain higher, more stable temperatures for longer periods, even after the direct heat source is removed or reduced. This is why a well-established wood-fired oven can produce excellent pizzas for hours.

Credit: sherwood.coffee
The Art Of Preheating: Building The Foundation
Preheating is arguably the most critical step in pizza oven heat management. Skipping or rushing this phase guarantees suboptimal results, from a soggy bottom to unevenly cooked toppings. The goal is to saturate the oven’s thermal mass with heat and bring the cooking surface to the precise temperature required for your pizza style.
Achieving Target Temperatures
Different pizza styles require different oven temperatures. A Neapolitan pizza, for example, needs extremely high heat (around 800-900°F or 425-480°C) to cook in 60-90 seconds, resulting in a characteristic puffed crust (cornicione) and leopard spotting. Other styles, like New York or Roman pizza, might be baked at slightly lower temperatures (600-750°F or 315-400°C) for a slightly longer cook time.
- Wood-fired ovens: This involves building a robust fire that burns intensely for a significant period. The flames should lick the dome to heat it thoroughly. Once the dome turns white (indicating soot has burned off) and the oven reaches the desired temperature, the main fire is often pushed to the side or reduced to embers to create a stable, radiant heat environment.
- Gas/Electric ovens: These typically have a thermostat. You set the desired temperature and allow the oven to preheat fully. However, it’s often recommended to preheat for at least 30-45 minutes, even after the thermostat indicates the target temperature, to ensure the cooking deck itself is thoroughly heated.
Cooking Surface Temperature Vs. Air Temperature
It’s crucial to distinguish between the air temperature inside the oven and the temperature of the cooking surface (deck). While both are important, the deck temperature directly impacts the pizza base.
- Deck Temperature: For Neapolitan pizza, the deck should ideally be around 750-800°F (400-425°C).
- Air Temperature: The air temperature within the dome can be significantly higher, driving the cooking of the toppings and crust.
Using an infrared thermometer is the best way to accurately measure the deck temperature. An oven thermometer measuring air temperature is also useful, but the infrared gun provides the critical deck reading.
How Long Is Long Enough?
The preheating time depends heavily on the oven type and size:
- Small Portable Ovens: 15-30 minutes.
- Medium Gas/Electric Ovens: 30-45 minutes.
- Large Wood-Fired Brick Ovens: 2-4 hours.
Pro Tip: For wood-fired ovens, a good indicator of readiness is when the black soot on the inside of the dome has burned away, leaving it white or clear. This signifies the oven has reached a high enough temperature to combust the soot.
Credit: bestburnfirewood.com
Creating And Managing Temperature Zones
Once your oven is preheated, understanding and utilizing temperature zones is key to efficient and versatile cooking. Heat doesn’t distribute uniformly within an oven; there are naturally hotter and cooler areas.
The Hot Zone And Cooler Zones
In a typical wood-fired oven, the area closest to the active fire or embers is the hottest. This is where pizzas needing the shortest, highest-heat cooks should be placed. As you move away from the fire, the temperature gradually decreases.
- Hot Zone: Directly adjacent to the fire/embers. Ideal for quick-cooking Neapolitan pizzas.
- Medium Zone: A few inches away from the fire. Suitable for pizzas with more toppings or slightly longer cook times.
- Cooler Zone: The furthest point from the fire, often near the oven opening. This area can be used for holding cooked pizzas, gently warming ingredients, or for slower-baking items.
Gas and electric ovens can also develop hot spots, often directly above or below heating elements, or due to uneven insulation. Regular monitoring with an infrared thermometer can help you identify these areas.
Strategic Pizza Placement
Placing your pizza correctly within these zones is crucial:
- Identify your zones: Use your infrared thermometer to map the temperature distribution across the deck.
- Assess your pizza: Consider the type of pizza, the thickness of the dough, and the amount of toppings.
- Place accordingly: A thin-crust Neapolitan goes in the hottest zone. A thicker, more loaded pizza might fare better in a slightly cooler area to prevent the crust from burning before the inside cooks.
Using The Oven Door And Damper
The oven door and, in some wood-fired ovens, the damper, act as crucial tools for heat regulation.
- Oven Door: Partially closing the door can trap heat, increasing the oven’s temperature and affecting the cooking environment. Fully closing it can slow down cooking and change the heat dynamics. For wood-fired ovens, the door is often used intermittently to manage heat and prevent excessive burning.
- Damper: This controls airflow. Opening the damper allows more air in, fueling the fire and potentially increasing temperature, but also allows heat to escape more rapidly. Closing it restricts airflow, reducing the fire’s intensity and helping to retain heat, but can also lead to a buildup of smoke if not managed correctly.

Credit: myoutdoorplans.com
Fuel Management For Wood-fired Ovens
For those using wood-fired ovens, fuel management is an ongoing, dynamic process that directly dictates heat consistency. It’s less about setting a temperature and more about actively controlling the fire.
Selecting And Preparing Your Fuel
The type and dryness of your wood significantly impact the fire’s performance.
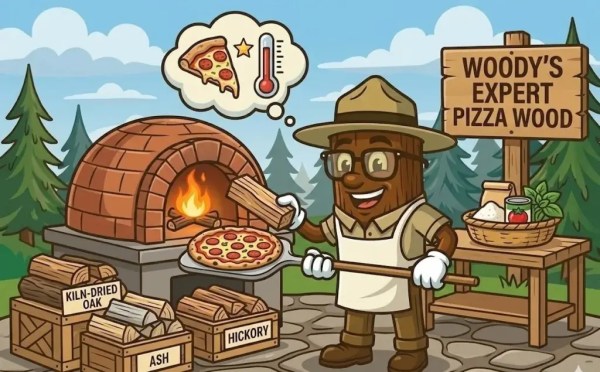
- Best Woods: Hardwoods like oak, maple, ash, and fruitwoods (apple, cherry) are ideal. They burn hotter, longer, and produce fewer sparks and less creosote than softwoods.
- Seasoning is Key: Wood must be well-seasoned (dried for at least 6-12 months). Wet or unseasoned wood smolders, produces excessive smoke, and provides very little useful heat. Look for wood with cracks at the ends and a hollow sound when knocked.
- Size Matters: Use a mix of smaller kindling, medium-sized logs, and larger fuel wood. This allows for controlled fire building and maintenance.
Building And Maintaining The Fire
The process typically involves several stages:
- Kindling and Ignition: Start with a small amount of dry kindling and a reliable ignition source.
- Building the Fire: Gradually add larger pieces of seasoned hardwood as the kindling catches, building a robust fire in the center or back of the oven.
- Heating the Dome: Allow the fire to burn intensely for an extended period (1-3 hours, depending on the oven). The flames should actively lick the inside of the dome. You’re not just heating the air; you’re heating the refractory materials.
- Managing the Burn: Once the oven is preheated and the dome is clear of soot, you’ll transition from an active fire to a management phase. This usually involves:
- Pushing Embers: Moving the main burning logs to one side or the back of the oven.
- Adding Fuel Sparingly: Adding small pieces of wood periodically to maintain a bed of hot embers and occasional flames, rather than a roaring fire.
- Controlling Airflow: Adjusting the damper (if present) and oven opening to regulate the burn rate.
Understanding Flame Vs. Embers
- Active Flames: Provide intense, direct heat and are crucial for initial preheating and bringing the dome up to temperature. They also contribute to the aesthetic charring on pizzas.
- Hot Embers: Provide a more stable, consistent radiant heat. A good bed of embers is the foundation for maintaining temperature between active firing and for longer, slower bakes.
Example: The Neapolitan Pizza Bake
For a classic Neapolitan pizza, the process might look like this:
- Burn a large fire for 2-3 hours until the dome is clear and the oven is thoroughly saturated with heat.
- Push the main logs to the side, leaving a bed of glowing embers.
- Check the deck temperature with an infrared thermometer, aim for 750-800°F (400-425°C). Adjust by adding a small log if necessary, or by moving embers.
- Place the pizza in the hottest part of the oven, closest to the embers/fire.
- Rotate the pizza frequently (every 15-20 seconds) to ensure even cooking.
- The pizza should cook in 60-90 seconds.
- Remove the pizza and immediately prepare the next one, adding a small piece of wood to the embers if the temperature drops too much.
Insulation And Heat Retention
The effectiveness of your pizza oven heat management plan is significantly enhanced by proper insulation. Insulation prevents heat from escaping, meaning less fuel is required to reach and maintain high temperatures, and the oven stays hotter for longer.
Materials And Their Properties
Different oven designs utilize various insulating materials:
- Refractory Mortar/Cement: Used to bind firebricks and form the oven structure. High-quality refractory materials have good thermal resistance.
- Ceramic Fiber Blanket: A highly effective insulating material that can withstand very high temperatures. It’s often used in layers beneath the dome and hearth in high-performance ovens.
- Perlite/Vermiculite: Lightweight aggregates mixed with cement to create insulating concrete. These are often used for insulating the outer shell or dome of brick ovens.
- Air Gap: While not a material, a strategically placed air gap can also provide a degree of insulation.
Impact On Performance
- Faster Heat-Up: Better insulation means the oven reaches target temperatures more quickly.
- Sustained Heat: The oven retains heat for longer periods, allowing for more pizzas or longer cooking sessions without constant refueling.
- Fuel Efficiency: Less fuel is needed to maintain temperature, making the oven more economical to run, especially for wood-fired models.
- Consistent Temperatures: Reduced heat loss leads to more stable and predictable internal temperatures.
Maintaining Your Oven’s Insulation
Over time, insulation can degrade.
- Brick Ovens: Check for cracks in the refractory mortar or damage to the outer insulating layers. Repairing these promptly is crucial.
- All Ovens: Ensure the door seals properly. A leaky door is a major source of heat loss. Inspect any external insulation blankets or casings for damage.
Example: A well-insulated wood-fired oven might only require a few small logs every hour to maintain baking temperature after the initial 3-hour preheat. A poorly insulated oven might need constant feeding with larger logs, struggling to maintain consistent heat and potentially burning through significantly more fuel.
Essential Tools For Heat Management
To effectively implement your heat management plan, having the right tools is indispensable. These instruments provide the objective data needed to make informed adjustments.
Temperature Measurement Tools
- Oven Thermometer: Typically measures the air temperature inside the oven dome. Useful for general monitoring, but doesn’t tell you the deck temperature.
- Infrared (IR) Thermometer: A handheld device that measures the surface temperature of the cooking deck remotely. This is arguably the most critical tool for pizza oven users, as it directly indicates the temperature at which the pizza base will cook. Look for one with a suitable temperature range (up to 1000°F / 540°C or higher).
- Infrared Temperature Gun (Integrated): Some high-end pizza ovens have built-in IR sensors that display the deck temperature on a digital readout.
Other Useful Tools
- Pizza Peel: Essential for launching and retrieving pizzas. Having a good quality peel allows for precise placement and quick removal.
- Turning Peel: A smaller, round peel used for rotating pizzas inside the oven without having to fully remove them.
- Heat-Resistant Gloves: Necessary for handling tools and adjusting fuel in a hot oven.
- Fuel Rake/Poker: For manipulating logs and embers in wood-fired ovens.
Using Your Tools Effectively
- Calibrate: If possible, check your IR thermometer against a known surface temperature (e.g., boiling water for 212°F/100°C, though this is a very low temperature for pizza ovens).
- Consistent Measurement: Always measure the deck temperature in the same spot where you intend to place the pizza.
- Observe and Adapt: Use the temperature readings in conjunction with visual cues, the color of the dome, the intensity of the flames/embers, and the way the pizza is cooking.
The Importance Of Oven Recovery Time
After a batch of pizzas, especially in a high-output situation, your oven’s temperature will inevitably drop. Understanding and planning for oven recovery time is crucial for maintaining consistency, particularly when baking multiple pizzas in succession.
Why Recovery Is Necessary
- Heat Loss During Baking: Opening the oven door to launch, turn, and retrieve pizzas allows heat to escape. The cooking process itself also consumes heat energy.
- Thermal Mass Cooling: Even with excellent insulation, the thermal mass absorbs heat from the cooking surface and air, leading to a gradual temperature decrease.
- Maintaining Pizza Quality: If the oven temperature drops too low between pizzas, subsequent pies will cook unevenly, resulting in pale crusts and undercooked toppings.
Factors Affecting Recovery Time
- Oven Size and Thermal Mass: Larger ovens with more refractory material will take longer to cool down but also longer to reheat.
- Insulation Quality: Better insulation means slower temperature loss and quicker recovery.
- Fuel Source and Management: For wood-fired ovens, the amount and type of fuel available in the embers will dictate how quickly the temperature can be restored. For gas/electric, the power output of the heating elements plays a role.
- Ambient Temperature: Colder environments will cause the oven to lose heat more rapidly.
Strategies For Managing Recovery
- Proactive Refueling (Wood-Fired): Add a small log or more wood to the embers *before* the temperature drops significantly. Aim to keep a consistent heat source available.
- Strategic Door Use: Minimize the time the oven door is open. Use a turning peel for rotation instead of removing the pizza entirely.
- Batch Baking: Group pizzas requiring similar temperatures together.
- Adjusting Cooking Times: If you anticipate a temperature drop, you might slightly adjust the cooking time for the next pizza or accept a slightly longer bake.
- Allowing Dedicated Preheat/Recovery: For critical bakes or when switching between vastly different temperature requirements, allow dedicated time for the oven to fully reheat.
Example: Imagine you’re catering an event and need to bake 10 pizzas in an hour. After the initial preheat, the first 2-3 pizzas might cook perfectly. However, if you don’t actively manage the embers in your wood-fired oven, the 4th and 5th pizzas might take longer and not achieve the same crispness. You need to anticipate this and feed the fire proactively to maintain the target temperature range.
Practice, Experimentation, And Refinement
The most comprehensive pizza oven heat management plan is incomplete without the element of practice and experimentation. Every oven is unique, and developing an intuitive understanding of its behavior takes time and hands-on experience.
Learning Your Oven’s Quirks
- Hot Spots: Identify them with your IR thermometer and learn to work around them or utilize them strategically.
- Heat Sink Areas: Areas that cool down faster than others.
- Response to Fuel: How quickly does your wood-fired oven respond to adding fuel? How long does a bed of embers last?
- Temperature Stability: How much does the temperature fluctuate during a typical baking session?
Experimentation Is Key
Don’t be afraid to try different techniques:
- Vary Preheating Times: See how slight variations affect the final bake.
- Test Different Fuel Loads: For wood-fired ovens, experiment with different amounts and types of wood.
- Try Different Pizza Styles: Bake thin crusts, thick crusts, and pizzas with various toppings to understand how they perform at different temperatures and zone placements.
- Adjust Door Usage: See how partially or fully closing the door impacts cooking time and crust texture.
Documenting Your Findings
Keep notes on:
- Preheat times and observed temperatures.
- Fuel used and refueling frequency.
- Pizza type, toppings, and cooking time.
- Results (crust crispness, topping doneness, spotting).
- Any adjustments made during the bake.
This documentation will build a personalized knowledge base for your specific oven, allowing you to replicate successes and troubleshoot issues more effectively. Resources like online forums dedicated to pizza making can also offer valuable insights from other users with similar oven models. For instance, the Forno Bravo Forum is a great place to find discussions on wood-fired oven techniques.
Frequently Asked Questions
What Is The Ideal Temperature For Most Pizzas?
The ideal temperature depends heavily on the pizza style. For authentic Neapolitan pizza, aiming for a deck temperature of 750-800°F (400-425°C) and an air temperature around 850-900°F (455-480°C) is ideal, cooking the pizza in 60-90 seconds. For New York-style pizza, a deck temperature of 600-700°F (315-370°C) works well, with cook times of 5-7 minutes. For Roman-style or thicker pizzas, lower temperatures around 500-600°F (260-315°C) may be preferable to allow the interior to cook through without burning the crust.
How Do I Know When My Wood-Fired Oven Is Ready?
The most reliable indicator is when the black soot on the inside of the dome has burned away, leaving it white or clear. This means the oven has reached a high enough temperature to combust the soot. Additionally, use an infrared thermometer to verify the deck temperature—it should read at or slightly above your target cooking temperature.
Can I Use a Gas Oven for Neapolitan-Style Pizza?
Yes, but with caveats. High-BTU gas ovens (with output of 20,000+ BTU) can reach the extreme temperatures needed for Neapolitan pizza. However, they may lack the intense radiant heat and smoky flavor of a wood-fired oven. Look for gas ovens specifically designed for high-temperature pizza baking.
Why Does My Oven Lose Heat So Quickly Between Pizzas?
This usually indicates insufficient thermal mass or poor insulation. The oven’s materials aren’t storing enough heat to recover quickly after a pizza is removed. Solutions include preheating longer, improving insulation, using a thicker deck material, or proactively boosting the heat source between bakes.
How Often Should I Add Fuel to My Wood-Fired Oven?
It depends on the oven size, insulation, and cooking phase. During preheating, add fuel every 15-20 minutes to build a robust fire. During cooking, add small pieces of wood every 10-15 minutes to maintain a bed of hot embers and occasional flames. A well-insulated oven with good thermal mass requires less frequent fueling.
What’s the Best Way to Manage Temperature Zones?
Use an infrared thermometer to map the deck’s temperature distribution. Place thin-crust pizzas in the hottest zone (closest to the fire or heating element) and thicker, more loaded pizzas in cooler zones. Rotate pizzas frequently for even cooking. For wood-fired ovens, push embers to one side to create a gradient from hot to cooler.
Can I Use My Pizza Oven in Cold or Windy Weather?
Yes, but expect longer preheating times and faster heat loss. Cold ambient air increases the temperature differential, which can strengthen draft in wood-fired ovens but also cools the oven faster. Wind can disrupt airflow and cause downdrafts. Mitigate by preheating longer, using more fuel, and protecting the oven from direct wind with a barrier or wind-resistant chimney cap.
Key Takeaways
- Preheating is Non-Negotiable: A fully saturated oven with a properly heated deck is the foundation of great pizza.
- Know Your Oven’s Thermal Dynamics: Wood-fired, gas, electric, and portable ovens each have unique heat-up times, recovery rates, and management needs.
- Temperature Zones Enable Versatility: Map your oven’s hot and cool spots to cook different pizza styles simultaneously.
- Master Fuel Management: For wood-fired ovens, control the fire—don’t let it control you. Use dry hardwood and manage embers proactively.
- Insulation is Critical: Better insulation means faster heat-up, longer heat retention, and lower fuel consumption.
- Use the Right Tools: An infrared thermometer is your most important tool. A turning peel, heat-resistant gloves, and a fuel rake are also essential.
- Plan for Recovery Time: Between pizzas, manage heat proactively to maintain consistent temperatures.
- Practice and Document: Every oven is unique. Keep notes on what works and refine your technique over time.
Conclusion
Mastering pizza oven heat management is the secret ingredient that transforms good pizza into unforgettable pizza. It begins with understanding your oven’s thermal dynamics—its materials, insulation, and fuel source—and continues with disciplined preheating, strategic temperature zone use, and proactive fuel management. Whether you’re tending a wood-fired brick oven or adjusting a gas burner, the principles remain the same: saturate the thermal mass, monitor with precision, and adapt to conditions. With practice, experimentation, and careful documentation, you’ll develop an intuitive understanding of your oven that no manual can teach. Master the heat, and every pizza you bake will be your best—consistently, efficiently, and deliciously.

As the author of the “Ultimate Pizza Guide: Recipes, Tips & Secrets Revealed,” I’m dedicated to sharing my love for pizza and empowering others to create delicious homemade pizzas with ease. Join me on a journey to uncover the secrets to perfecting your pizza game!


