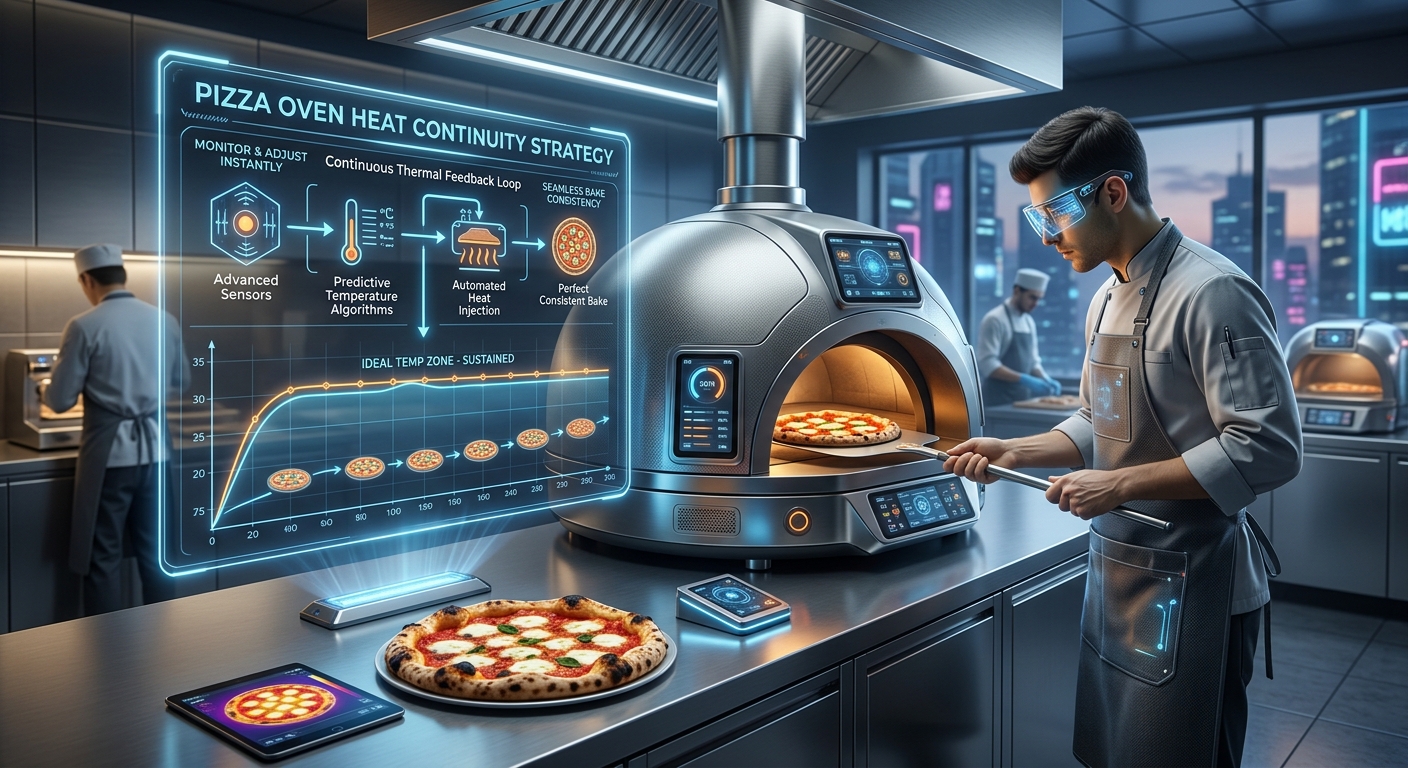
“Pizza Oven Heat Continuity Strategy”
Achieving consistently high-quality pizzas from a wood-fired oven isn’t just about the ingredients or the dough; it’s fundamentally about mastering the heat continuity strategy. This involves understanding how to build, maintain, and manage the intense temperatures required for that perfect Neapolitan char and crispy crust. Whether you’re a home enthusiast or a professional pizzaiolo, a well-executed heat strategy is the bedrock of exceptional pizza. Without it, you’ll be battling fluctuating temperatures, uneven cooking, and ultimately, disappointing results.
The journey to pizza perfection is paved with strategic heat management. It’s a dance between the fuel source, the oven’s construction, and your own operational savvy. This article will guide you through the essential elements of a robust pizza oven heat continuity strategy, covering everything from initial preheating to maintaining peak performance during a busy service.
By implementing these principles, you can transform your pizza-making experience and consistently produce pizzas that impress.
Key Takeaways
- Preheating is paramount: Allow ample time for your oven to reach and stabilize at the target temperature, typically 700-900°F (370-480°C).
- Fuel management is crucial: Understand the type of wood you’re using and how to add it consistently to maintain a stable flame and radiant heat.
- Oven construction matters: The materials and insulation of your oven significantly impact its ability to retain heat.
- Strategic fire placement: Position your fire correctly within the oven to maximize heat distribution and avoid scorching.
- Monitoring and adjustment: Regularly check temperatures and adjust fuel and fire placement as needed to ensure even cooking.
- Batch cooking techniques: Develop a rhythm for launching and retrieving pizzas to maintain oven temperature between pies.
Credit: www.minervaomegagroup.com
Understanding Your Oven’s Thermal Mass
The thermal mass of a pizza oven is its capacity to absorb, store, and release heat. This property is arguably the most critical factor in achieving heat continuity. Ovens constructed with dense, heat-retaining materials like refractory bricks, clay, or even thick concrete will hold heat for significantly longer periods than those made from lighter materials. This stored heat provides a stable cooking environment, allowing pizzas to cook quickly and evenly without the temperature plummeting after each pie.
The Role Of Refractory Materials
Refractory materials are designed to withstand extreme temperatures without degrading. In pizza ovens, these are typically firebricks, ceramic fiber blankets, and specialized refractory mortars. Firebricks, in particular, have a high density and specific heat capacity, meaning they can absorb a large amount of thermal energy and release it slowly.
When your oven is properly preheated, these bricks become saturated with heat, acting like a thermal battery. The thicker the bricks and the more comprehensive the insulation surrounding them, the greater the thermal mass and the better the heat retention.
Insulation: The Unsung Hero
While thermal mass stores heat, insulation prevents it from escaping too quickly. A well-insulated oven requires less fuel to reach and maintain temperature and is far more forgiving when opening the oven door or launching pizzas. Ceramic fiber blankets are commonly used for insulation due to their low thermal conductivity and ability to withstand high temperatures. Proper insulation, often layered beneath the cooking floor and around the dome, is essential for minimizing heat loss through convection and radiation. Without adequate insulation, even an oven with substantial thermal mass will struggle to maintain consistent temperatures during a busy service.
Dome Vs. Deck Ovens: Heat Dynamics
The design of the oven itself plays a significant role in heat continuity.
- Dome Ovens: These are the classic Neapolitan style, characterized by a hemispherical dome. The dome shape is excellent for reflecting heat downwards onto the pizza. The fire is typically kept towards the back or side, and the radiant heat from the dome cooks the top of the pizza while the hot deck cooks the base. Maintaining a consistent flame is key here, as it directly contributes to the dome’s radiant heat.
- Deck Ovens: Often found in commercial settings, deck ovens have a flatter, more rectangular cooking surface and may use a combination of heating elements (gas or electric) and the thermal mass of the deck. While they can achieve high temperatures, their heat distribution might differ, and maintaining consistent deck temperature is paramount. For wood-fired deck ovens, managing the fire to provide even heat across the entire deck is the primary challenge.

Credit: www.vesuvianoforni.com
Preheating: The Foundation Of Heat Continuity
Rushing the preheating process is one of the most common mistakes made by pizza oven operators. A pizza oven needs significant time to saturate its thermal mass with heat. This isn’t just about the air temperature inside the oven; it’s about the bricks, the floor, and the dome reaching a consistent, high temperature.
How Long Is Long Enough?
The preheating time varies greatly depending on the oven’s size, construction materials, insulation, and the ambient temperature. However, as a general rule of thumb:
- Small to Medium Home Ovens: Expect at least 45 minutes to 1.5 hours.
- Large Home or Commercial Ovens: This can range from 1.5 hours to 3 hours or even more for very large, heavily insulated ovens.
The goal is not just to see a high temperature reading on an infrared thermometer but to ensure that the cooking floor and the dome are thoroughly heated. When you can no longer see black soot on the inside of the dome, and the oven is consistently reading above 750°F (400°C), you are likely approaching readiness.
The Importance Of A Stable Flame Vs. Pure Heat
During preheating, the objective is to build a substantial fire that burns hot and clean for an extended period. This saturates the oven’s thermal mass. Once the oven reaches temperature, the strategy often shifts. For many Neapolitan-style pizzas, a sustained, rolling flame across the dome is desired.
This flame provides intense top heat, crucial for cooking toppings and achieving the characteristic leopard spotting on the crust. However, for longer-cooking pizzas or different styles, a more subdued, consistent heat from the retained thermal mass of the deck and walls might be prioritized, with less emphasis on a large, active flame.
Monitoring Temperature Accurately
Using an infrared thermometer is essential for monitoring the cooking surface temperature. Aim for temperatures between 700°F and 900°F (370°C – 480°C) for most Neapolitan-style pizzas. The dome temperature can be observed visually, when it turns clear (no more black soot), it indicates sufficient heat. However, the deck temperature is what directly affects the pizza base.
Fuel Management: The Art Of The Fire
The type of wood you use and how you manage the fire are central to maintaining consistent heat. Not all wood is created equal when it comes to pizza ovens.
Choosing The Right Wood
The best woods for pizza ovens are hardwoods that burn hot, clean, and long. They should also be seasoned (dried) properly.
- Oak, Maple, Ash, Beech: These are excellent choices. They provide consistent heat, burn relatively cleanly, and produce good embers.
- Fruitwoods (Apple, Cherry): These also burn well and can impart a subtle aroma, though they might burn slightly faster than denser hardwoods.
- Avoid: Softwoods like pine or fir. They burn too quickly, produce excessive creosote (which can affect flavor and clog the chimney), and don’t provide the sustained heat needed. Always use kiln-dried or well-seasoned (aged for at least 6-12 months) wood; wet wood is inefficient and produces smoke rather than heat.
Building And Maintaining The Fire
The process for maintaining heat involves a continuous cycle of adding fuel and managing the flame.
- Initial Build-up: Start with smaller pieces of kindling to establish a flame, then gradually add larger logs.
- Achieving Peak Heat: Once the oven is preheated, you’ll typically have a larger fire burning.
- Shifting the Fire: For most wood-fired ovens, the fire is moved to the side or back of the oven once the cooking floor reaches temperature. This allows the radiant heat from the dome and the retained heat from the floor to cook the pizza.
- Sustaining the Flame: As you cook pizzas, you’ll need to add small pieces of wood periodically to maintain the rolling flame across the dome. The frequency depends on the oven’s heat retention and how many pizzas you’re cooking. Adding fuel too late can cause the temperature to drop significantly between pizzas.
The Role Of Embers
While the flame is crucial for top heat, the embers provide a consistent source of radiant heat from the deck. A bed of glowing embers beneath the fire (or where the fire was) helps maintain the cooking floor temperature. Managing the fire so you have a good balance of flame and embers is key.

Credit: dynamicstonetools.com
Strategic Fire Placement And Management
Where you place your fire within the oven has a direct impact on how evenly your pizzas cook. This is particularly true for dome ovens.
The “rolling Flame” Technique
For Neapolitan-style pizzas, the ideal scenario is a rolling flame that sweeps across the dome. This flame should be active but not excessively large, providing intense radiant heat from above. The fire is typically positioned towards the back or side of the oven. As the flame rolls, it heats the dome, which then radiates heat down onto the pizza. This requires adding small pieces of wood every few pizzas to keep the flame alive.
Managing Hot Spots
Every oven has hot spots. Understanding where these are is crucial. Often, the area closest to the fire will be hotter. By rotating the pizza during cooking, you can ensure even browning and prevent one side from burning while the other is undercooked. An infrared thermometer can help identify these hot spots before launching your pizza.
The “rake And Sweep” Method
Some pizzaiolos use a method where they briefly rake the embers to one side and sweep away ash just before launching a pizza. This ensures a clean cooking surface and can help concentrate the heat where it’s needed most. However, this action can momentarily disrupt the oven’s thermal equilibrium, so it’s a technique that requires practice.
The Pizza Launch And Cook Cycle
The process of launching, cooking, and retrieving pizzas is where heat continuity is truly tested. Each pizza removal and insertion causes a temporary drop in oven temperature. A good strategy minimizes this disruption.
Minimizing Temperature Drop During Launch
- Speed is Key: The faster you can open the oven door, launch the pizza, and close the door, the less heat escapes.
- Use the Right Peel: A well-floured or semolina-dusted pizza peel allows the pizza to slide off easily, reducing the time the door is open.
- Pre-launch Preparation: Have your pizzas ready to go. Don’t start topping the next pizza while the previous one is still in the oven.
Rotating For Even Cooking
As mentioned, rotating the pizza is essential. Most pizzas will require one or two rotations during their short cooking time (often 60-90 seconds in a 900°F oven). Use a smaller turning peel to quickly spin the pizza within the oven.
This ensures the crust cooks evenly and the toppings don’t burn.
Batch Cooking Strategies
When cooking multiple pizzas, the strategy needs to adapt.
- Maintain the Flame: Continuously feed small pieces of wood to keep the flame active between pizzas.
- Monitor Deck Temperature: If you notice the deck cooling too much, you might need to briefly push embers back under the cooking area or add a slightly larger piece of wood.
- Pacing: Don’t try to launch pizzas too quickly if it means sacrificing temperature. It’s better to cook slightly slower with consistent heat than to rush and have fluctuating temperatures.
Example: A busy pizzeria might aim to cook a batch of 5-6 pizzas, then briefly add a larger piece of wood to bring the oven back up to full temperature before starting the next batch. This allows the thermal mass to recover.
Maintaining Heat For Different Pizza Styles
Not all pizzas are created equal, and neither are their heat requirements. A heat continuity strategy needs to be flexible enough to accommodate various styles.
Neapolitan Pizzas (high Heat, Short Cook Time)
- Target Temperature: 750°F – 900°F (400°C – 480°C)
- Cook Time: 60-90 seconds
- Strategy: Requires a strong, rolling flame and a very hot deck. The focus is on rapid cooking, achieving charring and a puffy cornicione. Heat needs to be consistently replenished to maintain the high dome temperature.
New York-style Pizzas (moderate Heat, Longer Cook Time)
- Target Temperature: 550°F – 650°F (290°C – 340°C)
- Cook Time: 3-5 minutes
- Strategy: Benefits from a more stable, less intense heat. The oven should still be hot, but the emphasis is on the retained heat of the deck and walls rather than a fierce rolling flame. This allows the crust to cook through without burning. Less frequent wood additions are needed compared to Neapolitan style.
Other Styles (thicker Crusts, Calzones)
- Target Temperature: Varies widely, often 450°F – 600°F (230°C – 315°C)
- Cook Time: 5-15 minutes
- Strategy: These styles require sustained, moderate heat. The oven needs to hold its temperature reliably for longer periods. A good bed of embers and less aggressive fire management is often preferred. The thick crust needs time to cook through evenly.
Comparison Table: Heat Requirements by Pizza Style
| Pizza Style | Target Deck Temp (°F) | Target Deck Temp (°C) | Typical Cook Time | Primary Heat Source Focus | Fuel Management Strategy |
|---|---|---|---|---|---|
| Neapolitan | 750-900 | 400-480 | 60-90 seconds | Rolling Flame & Hot Deck | Frequent small wood additions to maintain flame |
| New York-Style | 550-650 | 290-340 | 3-5 minutes | Retained Deck & Wall Heat | Moderate fire, less frequent additions |
| Sicilian/Thick Crust | 450-600 | 230-315 | 5-15 minutes | Sustained Deck Heat | Consistent embers, occasional larger wood additions |
| Calzone | 450-600 | 230-315 | 5-10 minutes | Sustained Deck & Wall Heat | Similar to thick crust; ensure even heat circulation |
Troubleshooting Common Heat Continuity Issues
Even with the best intentions, you might encounter problems maintaining optimal oven temperatures. Understanding these issues and their solutions is part of mastering heat continuity.
Symptom: Pizzas Cooking Unevenly (one Side Burnt, Other Pale)
- Cause: Hot spots in the oven, insufficient rotation, or uneven fire placement.
- Solution:
- Rotate more frequently: Use a turning peel to spin the pizza more often.
- Identify and manage hot spots: Use your infrared thermometer to map your oven’s hot zones. Adjust fire placement or learn to position pizzas to avoid these areas.
- Ensure even preheating: Make sure the entire cooking floor is saturated with heat.
Symptom: Pizzas Cooking Too Slowly Or Raw In The Middle
- Cause: Oven temperature is too low, or the deck is not hot enough.
- Solution:
- Preheat longer: Ensure the oven has reached its target temperature and the thermal mass is saturated.
- Add more fuel: If the temperature drops significantly between pizzas, add wood sooner and potentially slightly larger pieces.
- Check insulation: Poor insulation can lead to rapid heat loss.
Symptom: Crust Is Burnt On The Bottom, Undercooked On Top
- Cause: Deck is too hot relative to the dome temperature, or the fire is too low.
- Solution:
- Reduce deck heat: Allow the oven to cool slightly, or push embers away from the immediate cooking area.
- Increase dome heat: Add wood to create a more active rolling flame to cook the top faster.
- Check floor thickness: Very thin oven floors can overheat quickly.
Symptom: Temperature Drops Drastically After Each Pizza
- Cause: Insufficient thermal mass, poor insulation, or not enough fuel being added.
- Solution:
- Add fuel more frequently: Small additions of wood every 1-2 pizzas can make a big difference.
- Improve insulation: Consider adding more ceramic fiber insulation if your oven design allows.
- Allow longer preheating: Ensure the thermal mass is fully saturated before starting.
Pro Tip: Use A Log Gauge
For consistency, especially in professional settings, using a log gauge or measuring your wood pieces can help ensure you’re adding a consistent amount of fuel each time. This leads to more predictable temperature management.
Case Study: The Neighborhood Pizzeria’s Heat Strategy Evolution
“The Hearthstone,” a popular local pizzeria, initially struggled with consistency. Their wood-fired oven, a beautiful brick dome model, would get incredibly hot, but the temperature would plummet after the first few pizzas. Their heat continuity strategy was reactive rather than proactive.
Initial Problems:
- Insufficient Preheating: They would only preheat for about 45 minutes, not allowing the thick brick dome and floor to fully saturate.
- Erratic Fueling: They would add large logs infrequently, causing temperature spikes followed by significant drops.
- Focus on Deck Temp Only: They relied solely on infrared readings of the deck, neglecting the importance of a sustained flame for top cooking.
The Change:
- Extended Preheating: They committed to a minimum 2-hour preheat, ensuring the entire oven structure was thoroughly heated.
- Fuel Management System: They switched to using consistently sized pieces of seasoned oak and implemented a schedule: adding a small log every 3-4 pizzas to maintain a rolling flame.
- Visual Temperature Cues: They learned to read the dome’s clarity (no soot) as a sign of sufficient radiant heat, complementing the deck temperature readings.
- Batch Rotation: They organized their workflow to launch pizzas in batches of 4-5, followed by a slightly more robust fueling to bring the oven back to peak temperature for the next batch.
The Result: The Hearthstone saw a dramatic improvement. Pizzas cooked more evenly, with consistent charring and perfectly cooked toppings. Their output increased because they spent less time battling temperature fluctuations. This shift transformed their pizza quality and operational efficiency.
Frequently Asked Questions
What Is The Ideal Temperature Range For A Pizza Oven?
The ideal temperature range varies significantly depending on the pizza style. For authentic Neapolitan pizzas, aiming for a deck temperature of 750°F to 900°F (400°C to 480°C) is standard, allowing for a rapid 60-90 second cook time. For styles like New York or Sicilian, lower temperatures around 550°F to 650°F (290°C to 340°C) are more appropriate for longer cooking times.
Always use an infrared thermometer to check the deck temperature accurately.
How Long Does It Take To Preheat A Pizza Oven?
Preheating times vary based on oven size, construction, insulation, and ambient conditions. Generally, expect anywhere from 45 minutes to 1. 5 hours for smaller home ovens, and 1. 5 to 3 hours or more for larger commercial or heavily insulated ovens.
The key is not just reaching a temperature but ensuring the oven’s thermal mass (bricks and floor) is fully saturated with heat. You’ll know it’s ready when the dome is clear of soot and the deck temperature is stable at your desired level.
What Type Of Wood Is Best For A Pizza Oven?
The best woods are seasoned hardwoods that burn hot and clean. Oak, maple, ash, and beech are excellent choices due to their density and long, consistent burn. Fruitwoods like apple and cherry can also be used and may impart a subtle aroma. Always use wood that has been seasoned (dried) for at least 6-12 months. Avoid softwoods like pine or fir, as they burn too quickly, produce excessive creosote, and can negatively impact the pizza’s flavor.
How Do I Maintain Temperature When Cooking Multiple Pizzas?
Maintaining temperature during batch cooking involves consistent fuel management and minimizing heat loss. Add small pieces of your chosen hardwood regularly to sustain a rolling flame across the dome. Monitor the deck temperature between pizzas and adjust by pushing embers closer or adding a slightly larger piece of wood if necessary.
Work efficiently to launch and retrieve pizzas quickly to reduce the time the oven door is open. Some operators implement a strategy of cooking a batch, then briefly re-firing to bring the oven back to peak temperature before the next batch.
Can I Use Gas Or Electric Ovens For Pizza, And How Does Their Heat Continuity Differ?
Yes, gas and electric ovens can certainly cook pizza, and many achieve excellent results. Their heat continuity differs significantly from wood-fired ovens. Gas ovens often use burners strategically placed to heat the deck and circulate hot air, offering relatively consistent temperatures that are easy to control via a thermostat.
Electric ovens work similarly, using heating elements.

As the author of the “Ultimate Pizza Guide: Recipes, Tips & Secrets Revealed,” I’m dedicated to sharing my love for pizza and empowering others to create delicious homemade pizzas with ease. Join me on a journey to uncover the secrets to perfecting your pizza game!