
Are you ready to take your homemade pizza to the next level? Mastering the art of stretching pizza dough is the key to creating that perfect thin, crispy crust with a soft, chewy center.
But if you’ve ever struggled with dough snapping back or tearing, you’re not alone. The good news is, with a few simple techniques, you can learn how to stretch your dough like a pro—no fancy tools needed. In this guide, you’ll discover easy-to-follow tips that will help your dough relax, stretch evenly, and hold its shape so you can bake pizzas that impress every time.
Keep reading, and soon you’ll be tossing and shaping dough with confidence and skill!
Credit: www.prepapizza.com
Dough Preparation
Preparing pizza dough properly sets the stage for easy stretching and a perfect crust. The dough’s texture and flexibility depend on how you treat it before shaping. Proper preparation helps develop gluten and improves dough elasticity. This makes stretching smoother and prevents tearing.
Room Temperature Benefits
Cold dough is stiff and hard to stretch. Letting dough reach room temperature softens the gluten strands. This makes the dough more flexible and easier to work with. Dough at room temperature stretches evenly without snapping back. It also helps develop better flavor and texture in the crust.
Resting For Gluten Relaxation
After mixing, dough needs rest to relax gluten. Gluten forms a network that gives dough strength. Resting loosens this network and reduces resistance. Short rests of 20-30 minutes make dough less springy. This rest prevents dough from shrinking while stretching. It also improves dough extensibility and handling.
Long Fermentation Effects
Slow fermentation over many hours enhances dough flavor and texture. The yeast breaks down starches and proteins during fermentation. This process softens the dough and reduces gluten toughness. Long fermentation creates air bubbles, making dough airy and light. It also improves dough stretchability, making it easier to shape thin crusts.
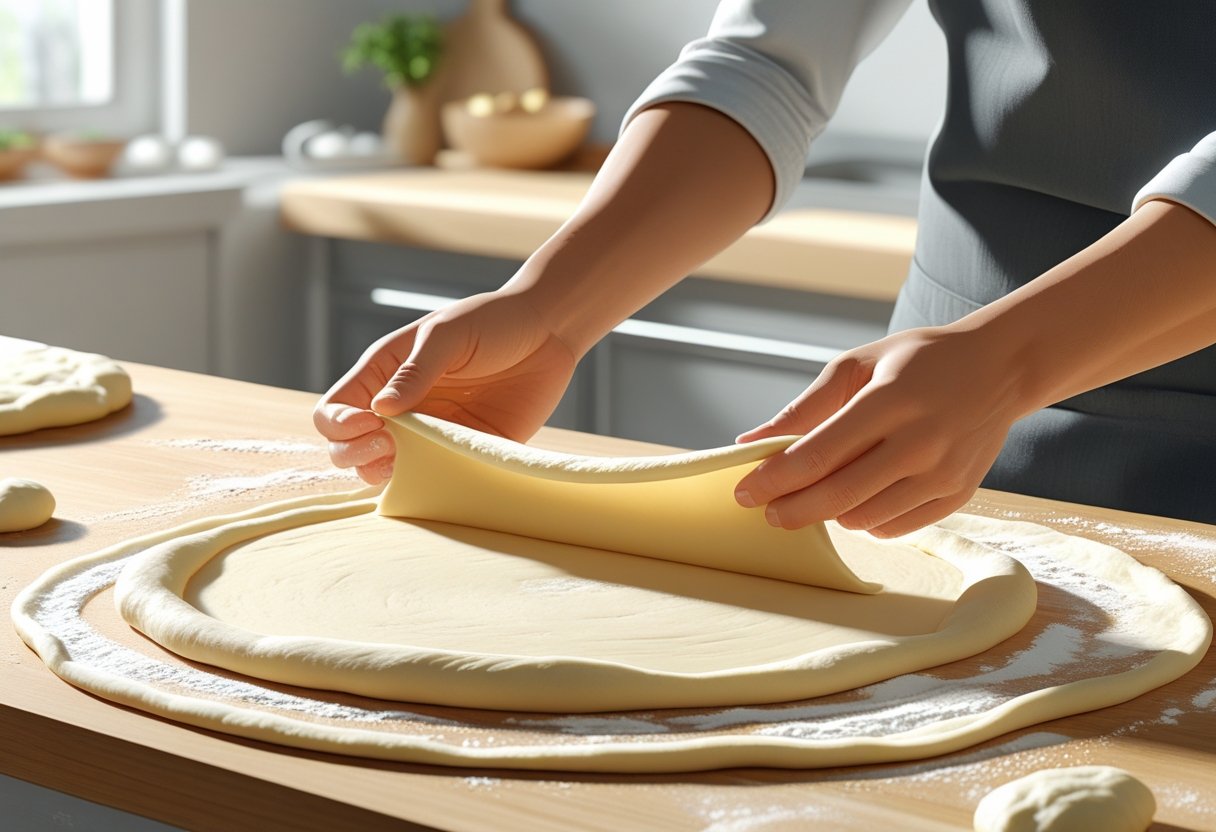
Stretching Basics
Stretching pizza dough is a key step to create the perfect base. Knowing the basics helps you shape the dough evenly and avoid tears. The dough should feel soft and elastic before you start. Warm dough stretches easier and will not snap back quickly. A gentle touch is better than force. Proper stretching keeps the pizza crust light and airy.
Using Hands Instead Of Tools
Hands give you better control and feel of the dough. Avoid using rolling pins or other tools that press out air. Use your fingertips and palms to gently stretch the dough. Hands help keep the dough airy and soft. This method preserves the dough’s natural texture.
Pressing From Center Outwards
Start pressing the dough from the center. Use your fingertips to push the dough out slowly. Move your hands outward in all directions. This helps spread the dough evenly and avoids thin spots. Keep the pressure light to prevent tearing the dough.
Keeping Crust Edge Thicker
Leave the outer edge of the dough thicker than the center. This forms the crust that holds toppings and sauce. Avoid pressing the edges too much. A thicker edge bakes into a nice, chewy crust. It also gives the pizza a classic look and feel.
Gravity Techniques
Gravity techniques use the natural pull of weight to stretch pizza dough gently. This method helps keep the dough thin and round without tearing. Gravity works slowly, letting the dough expand on its own. It is a favorite among pizza makers for creating an even crust.
Draping Over Knuckles
Start by shaping the dough into a loose ball. Place it over your knuckles, allowing the dough to hang freely. The dough’s weight will stretch it downward naturally. Rotate your hands slowly to keep the dough even. Avoid pulling too hard; let gravity do the work. This technique helps form a thin center and a thicker edge for the crust.
Gentle Tossing Method
Hold the dough with both hands and toss it gently in the air. Use a light, spinning motion to spread the dough evenly. Gravity pulls the dough down, stretching it wider as it spins. Keep the toss low and controlled to avoid tears. This method takes practice but creates a perfectly round pizza base. Use it to impress guests with your skill and style.
Surface Preparation
Preparing the surface before stretching pizza dough is a key step. It prevents the dough from sticking and helps shape a perfect crust. A well-prepared surface allows smooth stretching and easy transfer to the oven. Different materials can be used to create the right texture and grip for your dough.
Choosing the right surface preparation method also adds to the pizza’s final taste and texture. Each option has unique benefits, making it easier to work with your dough and achieve great results.
Dusting With Flour Or Semolina
Lightly dusting the surface with flour is a classic method. It prevents the dough from sticking while stretching. Semolina is a coarser alternative that adds slight crunch to the crust’s bottom. Both keep the dough loose and easy to move. Use a fine sprinkle, not too much, to avoid drying the dough.
Using Cornmeal For Texture
Cornmeal adds a grainy texture to the pizza base. Sprinkle it on the surface before placing the dough. It creates a barrier that stops sticking and adds a pleasant crunch. Cornmeal also helps slide the pizza off the peel easily. This method works well with wood-fired ovens or baking stones.
Olive Oil To Prevent Sticking
Brushing the surface with olive oil stops the dough from sticking. It creates a slick, smooth layer that allows easy stretching. Olive oil also adds subtle flavor and helps brown the crust. Use a small amount to avoid making the dough too greasy. This method works great on baking trays or pizza pans.
Troubleshooting
Troubles can happen while stretching pizza dough. These common issues can slow you down or ruin your crust. Knowing how to fix them helps keep your pizza perfect. Here are easy solutions for three frequent dough problems.
Handling Dough Snapbacks
Dough snapbacks when gluten pulls the dough back quickly. It means the dough is too tight or cold. Let the dough rest for 10 to 15 minutes at room temperature. This relaxes the gluten and stops snapbacks. Stretch the dough slowly and gently after resting. Avoid forcing it, or it will shrink again.
Fixing Tears In Dough
Tears happen when the dough is stretched too thin or uneven. Pinch the tear edges together gently to patch small holes. Use a little flour or oil on your fingers to help seal the dough. For big tears, fold the dough back slightly and press to join. Try to stretch the dough evenly to prevent tears.
Avoiding Tough Crusts
Tough crusts form if the dough is overworked or baked too long. Handle the dough lightly and avoid pressing too hard. Use a timer and check the pizza often while baking. Remove the pizza once the crust turns golden brown and feels firm but not hard. Proper hydration in the dough also keeps the crust soft.

Credit: www.gozney.com
Advanced Tips
Advanced pizza dough stretching tips enhance your pizza-making skills. These tips help create a thin, even crust with the perfect texture. They focus on dough handling, resting, and avoiding common errors. Follow these tips for better results every time.
Even Stretching Techniques
Start by pressing the dough from the center. Use your fingertips to push the dough outward gently. Keep the edges thicker to form a nice crust. Avoid using a rolling pin, which can make the dough too thin. Let gravity help by draping the dough over your hands. Slowly rotate the dough as it stretches evenly. This technique avoids thin spots and holes.
When To Let Dough Rest Longer
Rest the dough if it snaps back when stretched. Gluten needs time to relax for easier stretching. Cold dough often requires longer resting at room temperature. Cover the dough with a damp cloth to prevent drying. Rest periods of 15 to 30 minutes improve dough elasticity. Patience leads to a better, smoother dough surface.
Common Mistakes To Avoid
Do not pull the dough too hard; it may tear. Avoid skipping the resting step; tough dough results. Using too much flour can dry the dough out. Stretch dough on a sticky or wet surface. Overworking the dough can make it shrink back. Always handle dough gently for the best texture.

Credit: www.youtube.com
Frequently Asked Questions
What Is The Trick To Stretching Pizza Dough?
Let pizza dough reach room temperature and rest to relax gluten. Use gentle hand stretching, focusing on edges. Let gravity help by draping dough over knuckles. Lightly dust the surface with flour or semolina to prevent sticking. Avoid forcing; rest longer if dough snaps back.
How Long Should Pizza Dough Sit Before Stretching?
Let pizza dough sit at room temperature for 30 to 60 minutes before stretching. This relaxes the gluten and prevents snapping.
What Is The 55 Rule For Pizza Dough?
The 55 rule for pizza dough means using 55% hydration—55 grams of water per 100 grams of flour—for ideal stretch and texture.
Is It Easier To Stretch Pizza Dough Warm Or Cold?
Stretching pizza dough is easier when warm or at room temperature. Warm dough relaxes gluten, making it more pliable and less likely to snap back. Cold dough resists stretching and often needs resting before handling. Always let dough rest and warm slightly for best results.
Conclusion
Stretching pizza dough well takes patience and gentle hands. Warm dough stretches easier and won’t snap back. Let it rest to relax gluten before shaping. Use fingertips or knuckles to stretch from the center out. Gravity helps by letting the dough hang and stretch naturally.
Keep your surface lightly floured or oiled to avoid sticking. Small tears can be fixed by pinching the dough gently. Practice these simple steps to make your pizza bases soft and even. Enjoy the fun of crafting pizza dough just right every time.

As the author of the “Ultimate Pizza Guide: Recipes, Tips & Secrets Revealed,” I’m dedicated to sharing my love for pizza and empowering others to create delicious homemade pizzas with ease. Join me on a journey to uncover the secrets to perfecting your pizza game!


