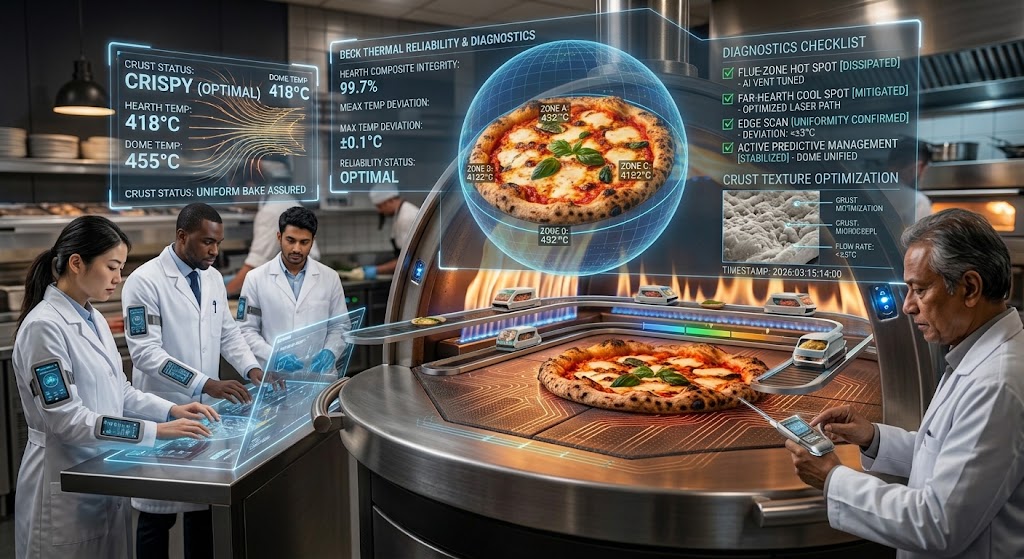
Achieving the perfect pizza requires more than just quality ingredients; it hinges critically on the oven’s heat management. For professional pizzerias and serious home cooks alike, understanding and mastering the pizza oven heat ramp is the secret to consistently delicious, perfectly cooked pies. This process isn’t merely about getting the oven hot; it’s a strategic, timed sequence of heating that ensures the oven structure absorbs and radiates heat evenly, creating the ideal environment for baking. Without a well-planned heat ramp, you risk undercooked bases, burnt toppings, and unevenly cooked crusts, regardless of how fresh your mozzarella is.
The journey from a cold oven to a ready-to-bake temperature is a nuanced dance between fuel, oven material, and time. Different oven types, wood-fired, gas, electric, or even specialized portable models, have their own unique heating characteristics and require tailored ramp strategies.
Mastering this fundamental aspect of pizza making elevates your craft, transforming a good pizza into an exceptional one. This article will guide you through the essential elements of pizza oven heat ramp planning, covering everything from understanding heat absorption to optimizing your ramp for various oven types and pizza styles.
Key Takeaways
- Heat Ramp Definition: A pizza oven heat ramp is the controlled process of gradually increasing the oven’s temperature to a desired baking point, ensuring even heat distribution and absorption by the oven’s thermal mass.
- Importance of Thermal Mass: Ovens with significant thermal mass (like brick or stone) require longer, more deliberate heat ramps to absorb and store heat effectively.
- Fuel Type Influence: Wood-fired ovens require a different ramp strategy than gas or electric ovens due to the nature of their heat source and flame management.
- Temperature Zones: A successful heat ramp establishes distinct temperature zones within the oven, a hot floor for the crust and a high ambient temperature for cooking toppings.
- Monitoring and Adjustment: Consistent monitoring of the oven floor and dome temperatures, along with visual cues, is crucial for fine-tuning the ramp.
- Preheating Duration: Adequate preheating time, often ranging from 1 to several hours depending on the oven, is essential for achieving optimal thermal saturation.
- Pizza Style Impact: Different pizza styles (Neapolitan, New York, etc.) May benefit from slightly varied heat ramp profiles and final baking temperatures.
Understanding The Science Behind The Heat Ramp
The core principle behind a pizza oven heat ramp is thermal mass. Most authentic pizza ovens, especially those built with brick, stone, or refractory materials, are designed to absorb and retain a significant amount of heat. This stored heat is then radiated back into the oven cavity, cooking the pizza from all sides simultaneously. A rapid heating process, often referred to as “blasting” the oven, does not allow the thermal mass to absorb heat efficiently. Instead, the heat primarily stays near the heat source, leading to hot spots and cold spots.
The Role Of Thermal Mass
Think of the oven’s walls and floor as a battery for heat. When you introduce a heat source (wood, gas flame, electric element), the energy begins to transfer into these materials. This transfer is not instantaneous. It takes time for the heat to penetrate deep into the refractory bricks or stone.
A well-executed heat ramp allows sufficient time for this heat penetration. The deeper the heat penetrates, the more evenly it will be released during the baking process. This sustained, gentle release of stored heat is what gives pizzas baked in high-temperature ovens their characteristic crispy yet tender crust.
A common misconception is that the oven is ready to bake once the air temperature reaches the target. However, for ovens with substantial thermal mass, the oven floor temperature is often a more critical indicator. The floor needs to be sufficiently hot to crisp the base of the pizza quickly, preventing it from becoming soggy. Without adequate heat absorption into the floor, the crust will cook too slowly, potentially becoming tough or undercooked before the toppings are done.
Heat Transfer Mechanisms
In a pizza oven, heat transfer occurs through three primary mechanisms:
- Conduction: Direct transfer of heat from the heat source (flames, hot surfaces) to the oven walls and floor, and then from the oven surfaces to the pizza dough.
- Convection: The movement of hot air and gases within the oven cavity, circulating heat around the pizza. This is particularly important for cooking the toppings and the top of the crust.
- Radiation: Heat energy emitted directly from the hot dome and walls of the oven onto the pizza. This is a significant contributor to the rapid cooking times in high-temperature ovens, especially for Neapolitan-style pizzas.
A proper heat ramp ensures that all these transfer mechanisms are working in harmony. The initial phase focuses on conduction to heat the mass. As the oven heats up, convection currents develop, and the radiant heat from the dome becomes powerful.
By the time the oven reaches its target temperature, the thermal mass is saturated, ready to provide consistent heat through all three mechanisms.
Factors Influencing Ramp Time
Several factors dictate how long your heat ramp should take:
- Oven Size and Material: Larger ovens and those with thicker refractory materials will naturally take longer to heat up.
- Insulation: The quality of insulation surrounding the oven chamber significantly impacts how quickly it heats and how well it retains heat. Better insulation means a more efficient ramp and less fuel consumption.
- Heat Source Intensity: The power of your burner (gas/electric) or the volume and quality of wood being burned will affect the rate of temperature increase.
- Ambient Temperature and Wind: Colder weather and strong winds can increase heat loss, potentially extending the ramp time.
- Desired Baking Temperature: Ovens designed for very high temperatures (e.g., 800-900°F or 425-480°C for Neapolitan) require a more robust heat soak than those for lower temperatures.
Planning Your Heat Ramp Strategy: Step-by-step
A successful heat ramp is not a guesswork exercise; it’s a planned sequence. While specific times vary, the general principles remain consistent across most oven types. The goal is to saturate the oven’s thermal mass with heat before you begin baking.
Phase 1: Initial Heating And Mass Saturation
This is the longest and most crucial phase. For wood-fired ovens, it involves building a fire and allowing it to burn steadily. For gas or electric ovens, it means setting the thermostat to a high temperature and letting the elements or burners do their work.
- Wood-Fired Ovens: Start with small kindling and gradually add larger pieces of seasoned hardwood. The aim is to build a consistent fire that heats the dome and oven floor. Once a good bed of coals has formed, you can push the embers to the side or back and allow the flames to lick the dome. This direct flame contact is vital for heating the dome’s refractory material. You’ll often see the black soot marks on the dome gradually disappear as it reaches high temperatures, indicating it’s clean and saturated. This phase can take anywhere from 1 to 3 hours, sometimes more for larger, heavily insulated ovens.
- Gas/Electric Ovens: Set the oven to its maximum temperature. For ovens with a visible heating element or burner, observe how it cycles. The goal is to allow the oven to reach its peak temperature and then maintain it for a significant period. This “soaking” time allows the thermal mass to absorb the heat. This phase can last from 45 minutes to 2 hours, depending on the oven’s construction and insulation.
Phase 2: Stabilizing Temperatures And Floor Heat
Once the oven has reached its target ambient temperature, it’s time to ensure the floor is equally hot.
- Wood-Fired Ovens: Continue to maintain a moderate fire or a bed of embers. The radiant heat from the dome and the residual heat from the floor will work together. You might see the temperature fluctuate slightly as you manage the fire. Use an infrared thermometer to check the floor temperature. You’re looking for a consistent, high reading across the baking surface.
- Gas/Electric Ovens: After reaching the maximum temperature, let the oven “soak” at that temperature for an extended period (e.g., 30-60 minutes). This ensures the thermal mass is fully saturated. The oven’s thermostat will cycle the heating elements on and off, but the goal is to keep the overall temperature high and stable.
Phase 3: Final Checks And Preparation
Before launching your first pizza, perform a final check.
- Temperature Verification: Use an infrared thermometer to measure the temperature of the oven floor at multiple points. Ensure it’s within your target range for the pizza style you’re making. The dome temperature, often visible through a thermometer or inferred from the color of the dome, should also be at the desired level.
- Ash Removal (Wood-Fired): If using a wood-fired oven, ensure any loose ash is cleared from the baking surface. A small brush or peel can be used for this.
- Flour Test (Optional): Some pizzaiolos sprinkle a small amount of flour on the oven floor. If it browns and crisps almost instantly, the floor is ready.
Example: Neapolitan Pizza Heat Ramp (wood-fired Oven)
A typical Neapolitan pizza requires extremely high temperatures (around 800-900°F / 425-480°C) and cooks in 60-90 seconds.
- Build Fire: Start with small kindling, gradually increasing to larger hardwood logs. Burn vigorously for 1-1.5 hours until the dome is clear of soot and the oven is visibly very hot.
- Manage Fire: Push embers to the side or rear. Maintain a rolling flame that licks the dome.
- Soak Floor: Allow the oven to reach ambient temperatures of 850-950°F (450-510°C). Check floor temperature with an infrared thermometer, aim for 750-850°F (400-450°C). This might take another 30-60 minutes after the dome is saturated.
- Final Check: Brush away ash. Ensure consistent floor and dome heat. Launch pizza.
Optimizing Heat Ramp For Different Oven Types
While the principles are similar, the execution of a heat ramp varies significantly based on the oven’s fuel source and construction. Understanding these differences is key to achieving optimal results.
Wood-fired Ovens
Wood-fired ovens are the traditional choice for many pizza styles, especially Neapolitan. Their ramp-up process is dynamic and requires active management.
- Fuel Management: The quality and type of wood are crucial. Dry, seasoned hardwoods like oak, maple, or fruitwoods provide consistent heat and good coals. Avoid softwoods, which burn too quickly and produce excessive creosote.
- Fire Placement: Initially, the fire is built in the center. As the oven heats, the fire is often moved to the side or back. This allows the heat to radiate evenly across the dome and floor. A “rolling flame” that licks the dome is essential for superheating the dome’s refractory material.
- Soot Indicator: A key visual cue is the dome turning from black (soot-covered) to white or clear. This indicates the oven has reached a high enough temperature to burn off the soot, signifying the dome’s thermal saturation.
- Ramp Duration: Typically 1.5 to 3 hours, depending on oven size, insulation, and ambient conditions. The goal is maximum heat absorption by the brickwork.
Gas Ovens
Gas ovens offer convenience and easier temperature control, but their heat ramp differs from wood-fired models.
- Burner Placement: Gas burners can be located at the rear, side, or even under the oven floor. This affects how heat distributes. Ovens with burners under the floor require careful management to avoid scorching the base while still heating the mass.
- Thermostat Control: Set the oven to its highest setting. Monitor the temperature gauge, but also rely on an infrared thermometer for the floor. Gas ovens often achieve target temperatures faster than wood-fired ovens.
- Soaking Time: Even with gas, allowing the oven to “soak” at its maximum temperature for 30-60 minutes after reaching it is crucial for saturating the thermal mass.
- Flame Management: Some gas ovens allow for adjusting the flame intensity during the ramp-up. Start high and then potentially reduce it slightly once the target temperature is reached to maintain stability.
- Ramp Duration: Typically 45 minutes to 1.5 hours.
Electric Ovens
Electric ovens are the simplest to operate, often found in commercial kitchens or as high-end home appliances.
- Heating Elements: Electric ovens use resistance heating elements, usually located above and sometimes below the baking deck.
- Consistent Heat: Electric elements provide very consistent heat. The primary challenge is ensuring the thermal mass underneath the elements gets sufficiently hot.
- Thermostat Setting: Similar to gas ovens, set to the maximum temperature. The elements will cycle on and off to maintain this temperature.
- Soaking Time: Crucial for electric ovens with stone or brick decks. Allow ample time (45 minutes to 1.5 hours) for the deck to absorb heat.
- Ramp Duration: Generally 45 minutes to 1.5 hours.
Comparison Of Heat Ramp Characteristics
| Oven Type | Primary Heat Source | Ramp Up Time (Typical) | Key Considerations | Ideal For |
|---|---|---|---|---|
| Wood-Fired | Burning Wood | 1.5 – 3+ hours | Fire management, fuel quality, soot indicator, flame licking dome, active monitoring | Authentic Neapolitan, artisanal pizzas, smoky flavor |
| Gas | Natural Gas/Propane | 45 mins – 1.5 hours | Burner placement, thermostat control, soaking time, consistent temperature | Versatile pizza styles, convenience, moderate to high temperatures |
| Electric | Electricity | 45 mins – 1.5 hours | Heating element location, thermostat accuracy, soaking time, consistent heat | Consistency, ease of use, home kitchens, specific commercial applications |
| Portable (Gas) | Propane | 15 – 30 minutes | Often lack significant thermal mass, designed for quick heating, direct flame | Quick Neapolitan-style pizzas, outdoor cooking, portability |
Portable Pizza Ovens
These compact ovens, often powered by propane, are designed for speed. They typically have less thermal mass than larger built-in ovens.
- Rapid Heating: They preheat very quickly, often within 15-30 minutes.
- Direct Heat: Many rely heavily on a direct flame that sweeps over the pizza.
- Less Thermal Mass: Because they have less material to heat, the “ramp” is much shorter. The focus is on getting the air and cooking surface hot quickly.
- Temperature Management: Temperature control might be less precise. Rely on visual cues and the oven’s design for optimal heat.
Monitoring And Adjusting Your Heat Ramp
A successful heat ramp isn’t just about following a set time; it involves active observation and adjustment. Your senses and tools are your allies here.
Using Infrared Thermometers
An infrared thermometer is an invaluable tool for any pizza oven owner. It allows you to measure the surface temperature of the oven floor and dome without direct contact.
- Floor Temperature: This is arguably the most critical measurement. For Neapolitan pizzas, you’re aiming for 750-850°F (400-450°C). For New York-style or other pizzas cooked at slightly lower temperatures, you might target 550-650°F (290-340°C). Measure in several spots to ensure evenness.
- Dome Temperature: While the floor is paramount for the crust, the dome temperature dictates how quickly the toppings cook via radiant heat. A higher dome temperature is essential for the rapid cooking of Neapolitan pizzas.
- Consistency is Key: Look for consistent readings across the baking surface. If one area is significantly hotter or colder, you may need to adjust your fire (wood-fired) or understand your oven’s heat patterns.
Visual Cues And Sensory Feedback
Don’t underestimate your own observation skills.
- Wood-Fired Ovens:
- Soot Burn-Off: As mentioned, the dome turning clear is a primary indicator of sufficient heat saturation.
- Flame Color: A bright yellow or white flame indicates efficient combustion and high heat. A dull orange or red flame suggests the fire is dying down or not hot enough.
- Heat Shimmer: A visible shimmer in the air inside the oven indicates intense heat.
- All Oven Types:
- Sound: A well-heated oven often has a distinct “hum” or sound associated with the intense heat.
- Smell: As the oven heats, any residual oils or manufacturing residues will burn off, producing a distinct smell. This should dissipate once the oven is properly seasoned.
Adjusting The Ramp
Based on your monitoring, you may need to make adjustments:
- Too Slow: If the oven is taking too long to heat, you may need to add more fuel (wood), increase the gas burner setting, or ensure your oven’s insulation is adequate. Check for drafts or heat leaks.
- Too Fast: While less common for the initial ramp, if you’re concerned about overheating a sensitive oven, you might slightly reduce the heat source intensity. However, for most ovens, especially those with thermal mass, a longer, slower ramp is generally preferable to a rushed one.
- Uneven Heat: In wood-fired ovens, adjusting the position of the fire or adding wood strategically can help even out hot spots. In gas/electric ovens, rotating the pizza during baking is essential to compensate for inherent unevenness.
Baking Temperature And Pizza Style Considerations
The heat ramp culminates in reaching a specific baking temperature, which should ideally be tailored to the style of pizza you intend to bake. Different pizza styles evolved to be cooked at different temperatures and times, and your oven’s heat ramp should prepare it accordingly.
Neapolitan Pizza
- Target Temperature: 800-900°F (425-480°C) ambient, 750-850°F (400-450°C) floor.
- Ramp Goal: Achieve maximum thermal saturation rapidly. The goal is a very hot dome for intense radiant heat and a super-hot floor for immediate crust crisping.
- Baking Time: 60-90 seconds.
- Oven Type: Best suited for well-insulated wood-fired ovens capable of reaching and sustaining these extreme temperatures.
New York-style Pizza
- Target Temperature: 550-650°F (290-340°C) ambient and floor.
- Ramp Goal: A moderate heat ramp that saturates the thermal mass to provide consistent heat for a longer bake. The floor needs to be hot enough to crisp the larger, thinner crust, but not so hot that it burns before the toppings cook.
- Baking Time: 5-8 minutes.
- Oven Type: Can be achieved in well-heated wood-fired, gas, or electric ovens with good thermal mass.
Roman Pizza (pizza Al Taglio / Pinsa Romana)
- Target Temperature: 500-600°F (260-315°C) ambient and floor.
- Ramp Goal: A gentler, longer heat ramp is often employed. The focus is on evenly baking a thicker, airier crust. The oven needs to hold heat steadily for a longer period.
- Baking Time: 10-20 minutes.
- Oven Type: Gas or electric ovens with good temperature stability, or wood-fired ovens where the fire has died down to embers, providing consistent radiant heat.
Other Styles (e.g., Detroit, Sicilian)
- Target Temperature: Varies, but generally lower than Neapolitan, often in the 450-550°F (230-290°C) range.
- Ramp Goal: Ensure the oven, especially the floor, is evenly heated to cook through thicker crusts, often baked in pans.
- Baking Time: 15-25 minutes.
- Oven Type: Most home ovens, gas, or electric ovens capable of maintaining moderate temperatures reliably.
Table: Pizza Style vs. Heat Ramp & Baking Parameters
| Pizza Style | Target Ambient Temp (°F/°C) | Target Floor Temp (°F/°C) | Typical Bake Time | Primary Oven Heat Ramp Focus |
|---|---|---|---|---|
| Neapolitan | 800-900°F / 425-480°C | 750-850°F / 400-450°C | 60-90 seconds | Rapid dome superheat, floor saturation |

As the author of the “Ultimate Pizza Guide: Recipes, Tips & Secrets Revealed,” I’m dedicated to sharing my love for pizza and empowering others to create delicious homemade pizzas with ease. Join me on a journey to uncover the secrets to perfecting your pizza game!