Stone Sisters Pizza Crust Recipe is a simple and delicious homemade pizza crust recipe. It is perfect for pizza nights at home.
Pizza is a cherished classic that everyone loves. Whether you prefer a basic cheese pizza or enjoy loading up on toppings, the crust is a crucial component. The Stone Sisters Pizza Crust Recipe is a tried and true method to create the perfect pizza crust from scratch.
This recipe is simple yet yields a crust with a crispy outside and a tender, chewy inside. It is the ideal base for any pizza creation, providing a sturdy foundation to hold all your favorite toppings. With this recipe, you can easily enjoy the comforting taste of homemade pizza right in your own kitchen. So, roll up your sleeves, gather your ingredients, and let’s get started on making a delicious stone oven-inspired pizza crust!
Stone Sisters Pizza Crust Recipe: Introduction
Introducing the Stone Sisters Pizza Crust Recipe, a delicious homemade crust that will elevate your pizza to the next level. With simple ingredients and easy steps, you can create a crispy and flavorful base for your favorite toppings.
In this blog post, we are delighted to share with you the tantalizing Stone Sisters Pizza Crust Recipe. If you are a pizza lover, this recipe is a must-try! With its homemade thin crust, this pizza is guaranteed to make your taste buds dance with joy. Whether you are hosting a casual get-together or simply craving a delicious pizza night at home, the Stone Sisters Pizza Crust Recipe is the perfect choice. Let’s dive into the details and discover what makes this recipe so special.
The Highlight: Homemade Thin Crust
The star of our Stone Sisters Pizza Crust Recipe is undoubtedly the homemade thin crust. Unlike store-bought crusts that can often be thick, doughy, or lack flavor, our homemade recipe offers the perfect balance of crispiness and chewiness. The thin crust is expertly crafted to provide a delicate base that showcases the flavors of your favorite toppings.
Using just a handful of simple ingredients, you can create a thin crust that rivals that of your favorite pizzerias. With our step-by-step instructions, you’ll be amazed at how easy it is to achieve restaurant-quality results in your very own kitchen.
Why Stone Sisters Pizza Crust Recipe Is Perfect For Homemade Pizza Lovers
Stone Sisters Pizza Crust Recipe is a dream come true for homemade pizza lovers. Its perfect blend of ingredients creates a crispy and flavorful crust that will leave your taste buds wanting more. Say goodbye to store-bought pizza crusts and hello to a homemade masterpiece.
Discuss The Advantages Of Making Pizza Crust At Home
Making your own pizza crust at home has numerous advantages that will elevate your homemade pizza game. When you create your own pizza crust, you have complete control over the ingredients, allowing you to cater to your personal preferences and dietary requirements. Unlike store-bought crusts, which often contain additives and preservatives, homemade pizza crusts are made with fresh and natural ingredients.
By making your own pizza crust, you also have the freedom to experiment with different flavors and textures. You can customize the crust to be thin and crispy or thick and chewy, depending on your preference. Plus, you can add your favorite seasonings or herbs to the dough to enhance the overall taste.
Another advantage of making pizza crust at home is the cost savings. Store-bought pizza crusts can be expensive compared to making your own, especially when you consider the quantity and quality of ingredients you can get for the same price. By making your own crust, you can enjoy homemade pizza without breaking the bank.
Lastly, making pizza crust at home allows you to engage in a fun and rewarding cooking experience. The process of kneading the dough, watching it rise, and then shaping it into a perfect crust can be incredibly satisfying. You can involve friends or family members in the process, making it a memorable activity to bond over.
Highlight The Unique Features Of Stone Sisters Pizza Crust Recipe
The Stone Sisters Pizza Crust Recipe stands out from other homemade pizza crust recipes due to its exceptional qualities. Here are the unique features of this recipe:
- Perfect crispy texture: The Stone Sisters Pizza Crust Recipe yields a crust that is perfectly crispy on the outside while remaining soft and chewy on the inside. The balance of textures ensures a delightful eating experience with each bite.
- Aromatic flavor profile: The recipe incorporates a combination of aromatic herbs and spices that infuse the crust with a burst of flavor. The result is a crust that enhances the overall taste of your pizza, taking it to a whole new level.
- Simple and quick preparation: The Stone Sisters Pizza Crust Recipe is designed to be easy to follow, even for beginners. With clear instructions and minimal ingredients, you can whip up the crust in no time, ensuring you spend more time enjoying your homemade pizza.
- Diverse topping compatibility: This recipe’s versatility makes it suitable for a wide range of pizza toppings. Whether you prefer classic Margherita, loaded veggie, or meat lovers, the Stone Sisters Pizza Crust Recipe will provide a solid base that complements any combination of ingredients.
- Authentic stone-baked taste: The Stone Sisters Pizza Crust Recipe recreates the taste and texture of a stone-baked pizza, reminiscent of those served in traditional Italian pizzerias. The crust becomes beautifully golden and slightly charred, providing an authentic pizza experience from the comfort of your own home.
With its advantages and unique features, the Stone Sisters Pizza Crust Recipe is a game-changer for homemade pizza lovers. Its perfect texture, flavorful profile, easy preparation, diverse topping compatibility, and authentic taste make it the ideal choice for elevating your homemade pizza experience. Say goodbye to store-bought crusts and enjoy the satisfaction of creating your own delicious pizza crust with the Stone Sisters Pizza Crust Recipe.
Ingredients For Stone Sisters Pizza Crust Recipe
The Stone Sisters Pizza Crust Recipe calls for a blend of high-quality ingredients to create a delicious homemade pizza crust. This recipe provides a step-by-step guide on how to make the perfect crust for your pizza.
List The Ingredients Required For Making The Perfect Homemade Thin Crust
The key to a truly irresistible homemade pizza lies in the crust – delightfully thin, crispy, and bursting with flavor. The Stone Sisters Pizza Crust recipe brings this culinary masterpiece to your kitchen, allowing you to indulge in the ultimate pizza experience. To create this delectable crust, you’ll need a list of carefully chosen ingredients that work together harmoniously. Here’s what you’ll need:
Ingredients:
- 3 cups of all-purpose flour
- 1 ½ teaspoons of active dry yeast
- 1 teaspoon of salt
- 1 teaspoon of sugar
- 1 ¼ cups of warm water
- 1 tablespoon of olive oil
- 1 tablespoon of cornmeal (optional)
Each ingredient plays a crucial role in creating the perfect homemade thin crust. The all-purpose flour provides the foundation for the dough, while the active dry yeast lends its magic to achieve that beautiful rise and texture. Don’t forget about the salt and sugar – these simple additions enhance the flavor, making each bite a savory delight.
Moving onto the liquid component, the warm water serves as the catalyst for activating the yeast, bringing it to life and allowing the dough to rise. Meanwhile, the olive oil adds richness and moisture to the crust, resulting in a wonderfully tender and fragrant offering.
Lastly, the optional addition of cornmeal adds a delightful touch of crunch and texture to the bottom of the crust. This is a signature technique from the Stone Sisters that adds extra character to their pizza creations.
While the specific brands for each ingredient aren’t crucial, it’s worth noting that using high-quality flour and olive oil can elevate the taste and overall quality of your thin crust. Choose brands that you trust and that fit your preferences to ensure the best results possible.
Flour
Choosing the right type of flour is crucial when making the perfect pizza crust. The type of flour you use not only affects the texture of the crust but also its flavor. With so many options available, it’s important to understand how each type of flour can impact your homemade pizza. In this section, we will discuss the importance of selecting the right type of flour for the Stone Sisters Pizza Crust Recipe and explain how different types of flour can affect the texture and flavor of the crust.
Semolina Flour
One of the flours commonly used for pizza crust is semolina flour. This flour is made from durum wheat and is known for its high protein and gluten content. Using semolina flour in your crust can result in a chewy and slightly dense texture. The crust will have a golden brown color and a sweet, nutty flavor. Semolina flour is great for creating a crust with a bit of crunch and a rustic appeal. However, it’s important to note that semolina flour alone might not be suitable for those with gluten sensitivities or allergies.
All-purpose Flour
All-purpose flour is another popular choice for pizza crusts. It is versatile and readily available, making it an easy option for most home bakers. All-purpose flour contains a moderate amount of protein, which contributes to a balanced texture. When using all-purpose flour, the crust will be soft and tender with a light and airy quality. This type of flour allows the flavors of the toppings and sauce to shine. Moreover, all-purpose flour can be a suitable choice for individuals with gluten sensitivities if paired with a gluten-free flour alternative.
Bread Flour
If you prefer a crust with a chewy and sturdy texture, bread flour is the way to go. Bread flour has a higher protein content compared to all-purpose flour, which helps develop gluten and creates a chewier crust. The crust will have a slightly more substantial bite and a better ability to hold its shape. The higher protein content also enhances the flavor, creating a crust that is rich and satisfying. Keep in mind that bread flour may not be suitable for those with gluten sensitivities or allergies.
Gluten-free Flour
For those with gluten sensitivities or allergies, there are alternative flours available that can still create a delicious pizza crust. Gluten-free flour blends typically consist of a variety of flour and starches such as rice flour, almond flour, tapioca starch, or potato starch. These blends can be used as a substitute for traditional flours, resulting in a crust that is gluten-free but still flavorful and satisfying. The texture of the crust might be slightly different, but it’s a great option for individuals with dietary restrictions.
Yeast
Yeast plays a crucial role in creating the perfect pizza crust. It provides the dough with the right amount of rise and a desirable texture. Understanding the importance of yeast and its different types can greatly contribute to the success of your homemade Stone Sisters Pizza Crust. In this article, we will delve into the role of yeast in pizza dough and provide you with helpful tips to select and use the right type of yeast for your recipe.
Explain The Role Of Yeast In Pizza Dough
Yeast is a living organism that serves as a leavening agent in pizza dough. When it comes into contact with moisture and the right conditions, it consumes sugar and produces carbon dioxide. This gas gets trapped within the dough, causing it to rise and create those airy pockets that we love in a good pizza crust.
The yeast also plays a crucial role in developing flavor and improving the dough’s overall structure. It produces alcohol and other by-products during fermentation, contributing to the characteristic taste and aroma of freshly baked pizza.
Provide Tips For Selecting And Using The Right Type Of Yeast
1. Active Dry Yeast
Active Dry Yeast is a widely available and commonly used type of yeast for pizza crust recipes. It comes in small granules that need to be rehydrated before use. To activate the yeast, dissolve it in lukewarm water (about 110°F) with a small amount of sugar. Let it sit for a few minutes until the mixture becomes foamy, indicating that the yeast is alive and ready to be added to the dough.
2. Instant Dry Yeast
Instant Dry Yeast is another popular choice for pizza crusts. Unlike active dry yeast, it does not require rehydration and can be added directly to the dry ingredients. This type of yeast provides a quicker rise and eliminates the need for proofing. Since it is more potent, you may need to adjust the amount used in your recipe accordingly.
3. Fresh Yeast
Fresh Yeast, also known as cake yeast or compressed yeast, is less common but still an option for making pizza crusts. It comes in a solid block or cube and has a shorter shelf life than dry yeast. When using fresh yeast, crumble it into lukewarm water along with a small amount of sugar, and allow it to dissolve before adding it to the dough.
4. Pro Tips for Selecting and Using Yeast
- Check the expiration date on the yeast packaging to ensure its freshness.
- Store yeast in a cool, dry place to maintain its viability.
- Use water at the right temperature for activating the yeast (around 110°F). Water that is too hot can kill the yeast, while cold water may hinder activation.
- If you are unsure about the yeast’s viability, you can perform a proofing test by dissolving it in warm water along with a pinch of sugar. If it becomes foamy within a few minutes, it is still active and suitable for use.
- Keep in mind that the rise time may vary depending on the type of yeast and the temperature of the room. Allow the dough to double in size during the fermentation process for optimal results.
Conclusion
Understanding the role of yeast and selecting the right type can make a significant difference in your homemade Stone Sisters Pizza Crust. Consider these tips when choosing and using yeast, and you’ll be well on your way to creating delicious, airy, and flavorful pizza crust right in your own kitchen.
Other Ingredients
The Stone Sisters Pizza Crust Recipe incorporates a variety of other ingredients to create a delicious and flavorful base. These ingredients enhance the taste and texture of the crust, resulting in a perfect homemade pizza every time.
List And Briefly Describe Any Other Ingredients Required, Such As Salt, Sugar, And Olive Oil
When it comes to making the perfect pizza crust, it’s not just about the flour and water. There are a few other key ingredients that come into play, adding crucial flavor and texture to the dough. In this section, we will explore these essential ingredients: salt, sugar, and olive oil. Let’s dive in and discover how each one contributes to the dough preparation process.
Salt
Salt might seem like a simple ingredient, but it plays a significant role in pizza crust preparation. It enhances the flavor of the dough by bringing out the natural taste of the other ingredients. In addition to flavor, salt also helps to strengthen the gluten network in the dough, which improves its structure and elasticity. This is particularly important in pizza crust, as it allows the dough to stretch without tearing and ensures a light and airy texture when baked.
Sugar
While too much sugar can be overpowering, a small amount can work wonders in a pizza crust recipe. Sugar acts as food for the yeast, promoting fermentation and giving the dough a nice rise. It helps to activate the yeast, resulting in a faster and more consistent dough rise. Additionally, sugar contributes to the browning process during baking, giving the crust a delicious golden color and a slightly caramelized flavor. It also adds a hint of sweetness, which balances out the acidity of the tomato sauce and enhances the overall taste of the pizza.
Olive Oil
Olive oil is a versatile ingredient that lends both flavor and moisture to the pizza crust. It adds richness and depth to the dough, infusing it with a subtle nutty taste. Olive oil also helps to keep the crust moist and tender, preventing it from becoming too dry or crumbly. Furthermore, it contributes to the crispness of the crust, creating a delightful contrast between the softness of the dough and the slight crunch on the outside. The oil also aids in browning and creates a glossy sheen on the crust, making it visually appealing.
In conclusion, the other ingredients used in the Stone Sisters Pizza Crust recipe are just as important as the flour and water. Salt strengthens the dough, sugar promotes fermentation and browning, and olive oil adds flavor, moisture, and texture. By carefully balancing these key ingredients, you can create a pizza crust that is not only delicious but also perfectly complemented by your favorite toppings. So, gather these ingredients, and let’s embark on a culinary journey to pizza perfection!
Step-by-step Instructions For Stone Sisters Pizza Crust Recipe
Welcome to our detailed guide on how to prepare the homemade thin crust for Stone Sisters Pizza! Making your own pizza crust is not only satisfying but also allows you to control the texture and flavor to perfection. In this step-by-step walkthrough, we will provide you with easy-to-follow instructions and valuable tips to achieve that crispy yet chewy crust that you’ve always dreamed of. Let’s get started!
Provide A Detailed Guide On How To Prepare The Homemade Thin Crust
Preparing the homemade thin crust for Stone Sisters Pizza is simpler than you might think! Follow these steps:
- Gather all your ingredients and tools. You will need:
- – 2 ¼ cups of all-purpose flour
- – 1 teaspoon of sugar
- – 1 ½ teaspoons of salt
- – 1 ½ teaspoons of instant yeast
- – 1 cup of warm water
- – 2 tablespoons of olive oil
- In a large mixing bowl, combine the flour, sugar, salt, and instant yeast.
- Create a well in the center of the dry ingredients and pour in the warm water and olive oil.
- Using a wooden spoon or your hands, mix the ingredients together until a dough forms.
- Transfer the dough onto a floured surface and knead for about 5 minutes until it becomes smooth and elastic.
- Shape the dough into a ball and place it in a greased bowl, covering it with a damp cloth or plastic wrap.
- Allow the dough to rise in a warm place for approximately 1 hour or until it has doubled in size.
- Preheat your oven to 475°F (245°C) and lightly grease a pizza pan or baking sheet.
- Punch down the risen dough to release any air bubbles and transfer it onto your prepared pan.
- With your hands, gently press and stretch the dough out to form a thin and even crust.
- Once your crust is shaped, it’s time to add your favorite toppings and bake your pizza!
Include Tips And Techniques For Achieving The Perfect Texture And Flavor
Achieving the perfect texture and flavor for your Stone Sisters Pizza crust is all about attention to detail and the right techniques. Here are some tips to help you create an outstanding crust:
- Use high-quality ingredients to ensure the best flavor. Fresh yeast and olive oil, for example, can greatly enhance the taste of your crust.
- Allow the dough to rise sufficiently. This is crucial for developing a light and airy texture. Make sure you give it enough time to double in size during the proofing process.
- For the best thin crust, resist the temptation to overload your pizza with too many toppings. A light and balanced topping selection will help your crust crisp up nicely in the oven.
- Consider pre-baking the crust before adding your toppings. This can prevent a soggy bottom and help achieve that sought-after crispness.
- Experiment with different flour types. While all-purpose flour is commonly used, substituting some of it with bread flour or whole wheat flour can create interesting flavor profiles and textures.
- Use a pizza stone if you have one. Preheating the stone will create a hot surface that helps the crust cook evenly and become wonderfully crisp.
- Don’t forget to let your pizza rest for a few minutes after it comes out of the oven. This allows the flavors to meld and ensures the toppings won’t slide off.

Credit: www.pepperdelight.com
Mixing The Dough
When it comes to making the perfect pizza, the dough is the foundation that sets the stage for a delicious culinary experience. The Stone Sisters Pizza Crust recipe ensures that every bite is full of flavor and has the perfect balance of texture and crispiness. Let’s dive into the process of mixing the dough and discover some tips to achieve optimal results.
Explain The Process Of Combining The Ingredients To Make The Dough
Creating the Stone Sisters Pizza Crust starts with the careful combination of a few key ingredients. Here’s a breakdown of how to mix the dough:
- Start by measuring 2 ½ cups of all-purpose flour into a large mixing bowl.
- Add 1 teaspoon of salt to the flour.
- In a separate small bowl, dissolve 1 teaspoon of sugar in 1 cup of warm water until the sugar is completely dissolved.
- Sprinkle 2 ¼ teaspoons of active dry yeast over the water and sugar mixture. Let it sit undisturbed for about 5 minutes until it becomes foamy.
- Pour the yeast mixture into the bowl with flour and salt.
- Stir the ingredients with a wooden spoon until they come together and form a shaggy dough.
- Transfer the dough to a floured surface and knead it for about 5-7 minutes until it becomes smooth and elastic.
Provide Tips On Kneading And Resting The Dough For Optimal Results
Kneading and resting the dough are crucial steps to achieve the desired texture and flavor in your pizza crust. Here are some tips to make sure you get the most out of these steps:
Tips for Kneading:
- Apply sufficient pressure while kneading to stretch and develop the gluten in the dough.
- Use the heel of your hand to push the dough away from you, then fold it back in and repeat.
- Avoid adding excessive flour during kneading, as it can make the dough tough and dry. Add flour gradually only if necessary.
- Knead until the dough springs back when gently pressed with your finger.
Tips for Resting:
- After kneading, shape the dough into a ball and place it in a greased bowl.
- Cover the bowl with a damp cloth or plastic wrap.
- Let the dough rest in a warm, draft-free area for about 1-2 hours or until it doubles in size.
- This resting period allows the yeast to work its magic, resulting in a light and airy crust.
By following these tips, your Stone Sisters Pizza Crust will turn out superbly every time. The next step is rolling out the dough and adding your favorite toppings before baking it to perfection. Enjoy the process of creating a mouthwatering homemade pizza!
Rolling Out The Dough
Discover the Stone Sisters Pizza Crust Recipe, a game-changer for homemade pizza enthusiasts. Learn how to roll out the dough perfectly, achieving a crispy crust every time.
Describe The Technique For Rolling Out The Dough To Achieve The Desired Thickness
Rolling out pizza dough might seem like a simple task, but achieving the perfect thickness can make all the difference in the final product. To ensure your Stone Sisters Pizza Crust turns out just right, follow these steps:
- Dust your work surface and rolling pin with flour to prevent the dough from sticking.
- Place the dough in the center of the floured surface and gently press down to flatten it.
- Start rolling the dough out from the center, using firm but even pressure. Roll in one direction, then give the dough a quarter turn and repeat. Continue until you’ve achieved the desired thickness.
- Be mindful of the shape you’re creating as you roll. If you prefer a round pizza, periodically check the diameter to ensure it remains consistent.
- Once the dough is rolled out, transfer it to a pizza stone or baking sheet that has been sprinkled with cornmeal or semolina. This will prevent the dough from sticking during the baking process.
Include Tips For Preventing The Dough From Sticking To The Rolling Surface
- Use a light dusting of flour on both the rolling surface and the rolling pin. This will provide a barrier between the dough and the surface, reducing the chances of sticking.
- If you find that the dough is sticking despite using flour, try adding a small amount of oil to your hands and gently rub it over the dough. This can provide additional lubrication and prevent sticking.
- Avoid rolling the dough too thin. The thicker dough tends to stick less and is easier to handle. Aim for a thickness that suits your personal preference, but be careful not to make it too thick, as it may affect the texture and bake time.
- If you’re having trouble with sticking, you can also try rolling the dough between two sheets of parchment paper or silicone baking mats. This method creates a non-stick surface that makes it easier to transfer the dough to the baking surface.
Prepping The Crust For Baking
Prepare your stone sisters pizza crust recipe by prepping the crust for baking. Follow the steps carefully to ensure a deliciously crispy and flavorful crust.
Provide Instructions On Transferring The Rolled-out Dough To A Baking Surface
Once your Stone Sisters Pizza Crust dough is rolled out to the desired thickness, it’s time to transfer it to a baking surface. This step is crucial for ensuring a perfectly baked crust that is both crispy and delicious. Follow these simple instructions to transfer your dough like a pro:
- Gently place your hand under one edge of the rolled-out dough and lift it up, allowing the remaining dough to drape over your hand.
- With your other hand, carefully slide a pizza peel or large, flat spatula under the dough.
- Slowly transfer the dough onto the baking surface, making sure it is centered and doesn’t fold or tear.
- If using a pizza stone, dust it with some cornmeal or flour before transferring the dough.
By following these steps, you can maintain the shape and integrity of your pizza crust without any fuss or complications. Remember, it’s all about balance and precision when it comes to transferring the dough.
Mention Any Additional Steps, Such As Docking The Crust, For Better Baking Results
To achieve an evenly baked and perfectly crispy pizza crust, docking can make all the difference. Docking involves using a fork or a docking tool to create small holes or indentations on the surface of the dough. These holes allow the steam to escape and prevent the crust from puffing up excessively during baking.
Here’s how you can dock your Stone Sisters Pizza Crust for better baking results:
- Once the dough is transferred to the baking surface, take a fork or a docking tool and gently press it into the crust at regular intervals.
- Make sure not to pierce the dough all the way through, as this may cause the toppings to seep through during baking.
- By creating these small holes, the steam trapped inside the dough is released, resulting in a crust that is both crispy and tender.
Remember, docking your crust is an optional step, but it can significantly enhance the texture and overall baking experience. It’s a small effort that yields big, delicious results.
Baking The Crust
When it comes to making the perfect Stone Sisters Pizza Crust, baking is the final step that brings everything together. Achieving a crisp and golden crust is key to enhancing the overall taste and texture of your homemade pizza. In this section, we’ll discuss the ideal baking temperature and time for the Stone Sisters Pizza Crust recipe, as well as provide you with some expert tips for achieving that perfect, mouthwatering crust.
Explain The Ideal Baking Temperature And Time For The Stone Sisters Pizza Crust Recipe
In order to achieve optimal results when baking your Stone Sisters Pizza Crust, it’s crucial to pay attention to the baking temperature and time. By following these guidelines, you’ll be able to produce a crust that is perfectly cooked, with a delightful crunch on the outside and a deliciously chewy interior.
Temperature:
The ideal baking temperature for the Stone Sisters Pizza Crust is 450°F (232°C). This temperature allows the crust to cook evenly throughout, ensuring a nice, even browning without drying out the dough. It’s important to preheat your oven to this temperature before placing the pizza crust inside.
Time:
The recommended baking time for the Stone Sisters Pizza Crust is 12-15 minutes. This timeframe may vary slightly depending on your oven’s characteristics, so it’s always a good idea to keep an eye on your crust while it bakes. You’ll know the crust is ready when the edges turn a golden brown color and the center is cooked through.
Tips For Achieving A Crisp And Golden Crust
To ensure your Stone Sisters Pizza Crust turns out perfectly every time, here are some expert tips for achieving a crisp and golden crust:
- Preheat the oven: Make sure to preheat your oven to the recommended temperature of 450°F (232°C) for at least 15 minutes before placing the pizza crust inside. This allows the oven to reach the desired temperature, which is vital for achieving a crispy crust.
- Use a pizza stone or baking sheet: For even heat distribution and a crisper crust, consider using a pizza stone or a baking sheet. These tools help to absorb and distribute heat evenly, resulting in a more consistent and golden crust.
- Roll the crust thin: Thicker crusts tend to be chewier, while thinner crusts crisp up more easily. Roll your Stone Sisters Pizza Crust to the desired thickness, keeping in mind that a thinner crust will yield a crisper end result.
- Place the crust on a preheated surface: If using a pizza stone or baking sheet, it’s crucial to preheat them in the oven along with your oven. This ensures that the bottom of the crust receives immediate heat, resulting in a crispy and well-cooked base.
- Brush with olive oil: Before adding your desired toppings, brush the crust with a thin layer of olive oil. This not only adds flavor but also helps to create a barrier that prevents the crust from becoming soggy, resulting in a crispier finished pizza.
- Monitor the baking process: Keep a close eye on your pizza crust as it bakes. Every oven is unique, and baking times can vary, so take note of how your crust is progressing. This way, you’ll be able to achieve the perfect balance between a crisp exterior and a tender interior.
By following these tips and guidelines, you’ll be well on your way to creating a Stone Sisters Pizza Crust with a satisfyingly crisp and golden finish that will have your taste buds rejoicing.
Toppings And Variations For Stone Sisters Pizza Crust Recipe
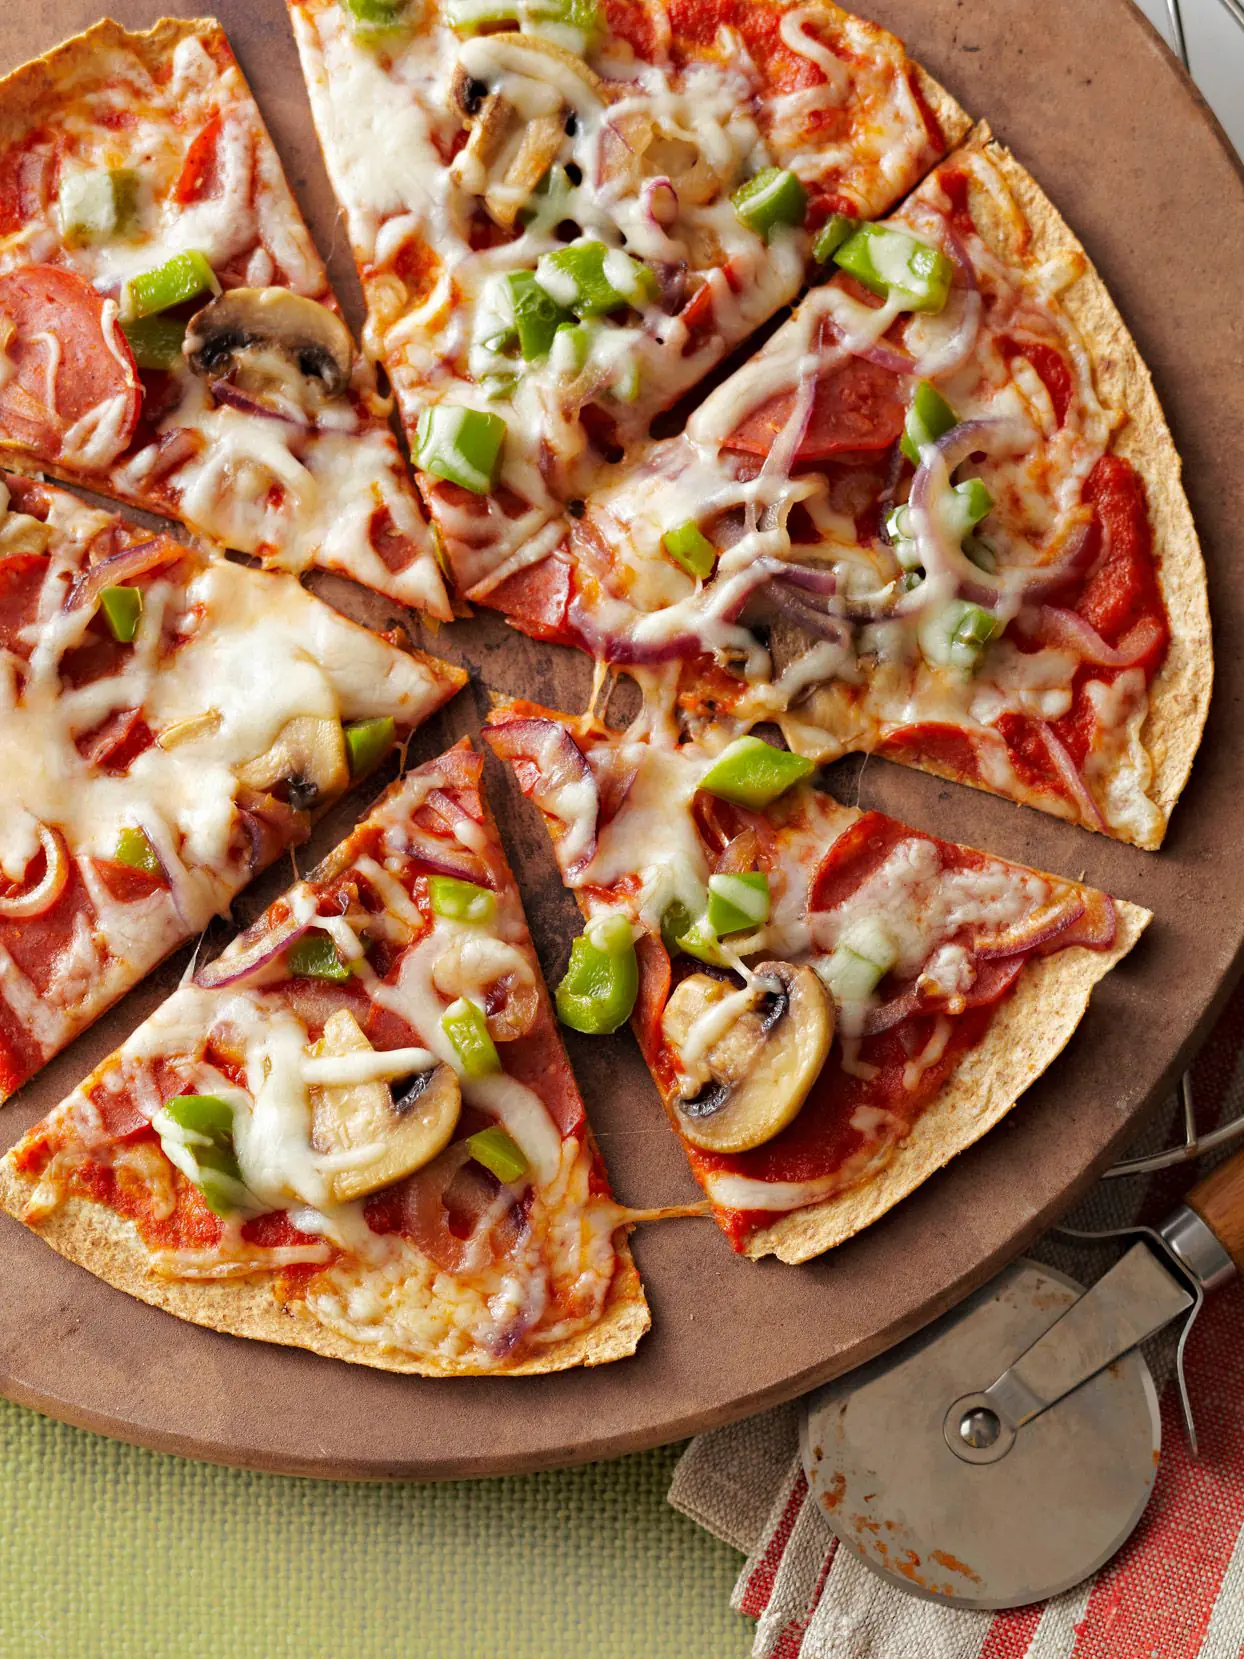
One of the best things about making your own pizza at home is the ability to customize the toppings to your liking. When it comes to the Stone Sisters Pizza Crust Recipe, the options are endless. Whether you prefer classic combinations or are feeling adventurous, there are numerous toppings and flavor variations that perfectly complement the homemade thin crust. Let’s explore some delightful options that will take your homemade pizza to the next level.
Discuss Various Topping Options That Complement The Homemade Thin Crust
When it comes to choosing toppings for your Stone Sisters Pizza Crust, it’s essential to find the right balance of flavors and textures. This not only ensures the best taste experience but also creates a visually appealing pizza. Here are some topping options that perfectly complement the homemade thin crust:
Savory and Delicious Meat Toppings:
- Classic Italian pepperoni
- Sliced Italian sausage for a flavorful kick
- Smoky bacon for that irresistible crispiness
- Tender grilled chicken for a lean protein option
Fresh and Vibrant Vegetable Toppings:
- Sliced bell peppers for a burst of color
- Hearty mushrooms for an earthy flavor
- Sweet caramelized onions for a touch of sweetness
- Cherry tomatoes for a juicy pop
Rich and Creamy Cheese Toppings:
- Mozzarella is the classic choice for a gooey and stretchy texture
- Salty feta for a Mediterranean flair
- Sharp cheddar for an extra flavor punch
- Gorgonzola crumbles for a bold and tangy taste
Provide Suggestions For Flavor Combinations And Ingredient Substitutions
To create unique and delightful flavor combinations, you can experiment with different ingredient substitutions. Here are some suggestions to try:
Flavorful Combinations:
- Mediterranean Delight: Top your pizza with mozzarella, cherry tomatoes, kalamata olives, and fresh basil leaves. Drizzle with a balsamic glaze for a tangy finish.
- Spicy Southwest: Layer your crust with grilled chicken, sliced bell peppers, red onions, and jalapenos. Sprinkle with Monterey Jack cheese and a drizzle of chipotle sauce.
- Caprese Twist: Spread a thin layer of pesto on the crust, then top with mozzarella, sliced tomatoes, and fresh basil leaves. Finish with a sprinkle of balsamic reduction.
Ingredient Substitutions:
| Ingredient | Substitute |
|---|---|
| Mozzarella | Provolone, fontina, or gouda |
| Pepperoni | Sliced salami, ham, or prosciutto |
| Italian sausage | Spicy chorizo or ground beef seasoned with Italian herbs |
These are just a few examples of the countless flavor combinations and ingredient substitutions you can explore when making your Stone Sisters Pizza Crust. Get creative and have fun experimenting with different toppings that suit your taste preferences. By adding your personal touch, you can create pizza masterpieces that are sure to impress family and friends!
Classic Margherita Pizza
Indulge in the timeless taste of a classic Margherita pizza with the Stone Sisters Pizza Crust. This recipe brings together simple yet vibrant flavors that perfectly harmonize on a bed of freshly made pizza crust. With a blend of juicy tomatoes, aromatic basil, and creamy mozzarella cheese, this Margherita pizza is a true crowd-pleaser.
Provide A Recipe For A Classic Margherita Pizza Using The Stone Sisters Pizza Crust
Making your own classic Margherita pizza at home is easier than you might think. Follow this simple recipe to create a mouthwatering pizza that will transport you straight to the streets of Naples.
Ingredients:
- 1 Stone Sisters Pizza Crust
- 1 cup homemade or store-bought pizza sauce
- 2 cups fresh mozzarella cheese, shredded or sliced
- 2-3 ripe tomatoes, thinly sliced
- A handful of fresh basil leaves
- Extra-virgin olive oil
- Salt and pepper to taste
Instructions:
- Preheat your oven to 450°F (230°C) and place the Stone Sisters Pizza Crust on a baking sheet or pizza stone.
- Spread the pizza sauce evenly over the crust, leaving a small border around the edges.
- Arrange the tomato slices on top of the sauce, covering the entire surface.
- Season the tomatoes with salt and pepper.
- Layer the shredded or sliced mozzarella cheese over the tomatoes.
- Add the fresh basil leaves, tearing them into smaller pieces if desired.
- Drizzle a little extra-virgin olive oil over the pizza for added flavor.
- Place the pizza in the preheated oven and bake for 12-15 minutes, or until the crust is golden and the cheese is melted and bubbly.
- Remove from the oven and let the pizza cool for a few minutes before slicing.
- Serve hot and enjoy this delicious and authentic Margherita pizza!
With the Stone Sisters Pizza Crust as your foundation, this classic Margherita pizza will come together effortlessly. The combination of fresh ingredients and a perfect crust ensures that every bite is bursting with flavor. Whether you’re cooking for friends or family, or simply indulging in a cozy night, this Margherita pizza is sure to impress!
Vegetarian Delight Pizza
Experience the perfect combination of flavors with the Stone Sisters Pizza Crust Recipe. Indulge in the Vegetarian Delight Pizza, loaded with fresh veggies and a crisp crust.
Offer A Vegetarian Pizza Option Using The Homemade Thin Crust
If you’re a vegetarian or simply looking to switch up your pizza routine, our Stone Sisters Pizza Crust Recipe has got you covered with our delectable Vegetarian Delight Pizza. Made with our homemade thin crust, this vegetarian pizza option is sure to satisfy your cravings.
List Of Vegetable Toppings And Additional Ingredients To Enhance The Flavor
Our Vegetarian Delight Pizza is generously topped with an array of fresh and flavorful vegetables, all carefully selected to create a medley of tastes that will tantalize your taste buds. Here are the vegetable toppings and additional ingredients that enhance the flavor:
| Toppings | Additional Flavor Enhancers |
|---|---|
|
|
With the combination of these fresh vegetables and flavorful ingredients, our Vegetarian Delight Pizza bursts with vibrant colors and enticing aromas that will leave you craving for more. The homemade thin crust provides a firm yet deliciously crispy base that perfectly complements the harmonious flavors of the toppings.
Whether you’re a dedicated vegetarian or simply looking to explore the realm of vegetables on your pizza, our Vegetarian Delight Pizza is an enticing option that promises a mouthwatering experience. Indulge in a slice or two and let the flavors transport you to a world of vegetarian delight.
Meat Lovers Pizza
If you’re a meat lover and a pizza enthusiast, then you’re in for a treat! Our Stone Sisters Pizza Crust Recipe is the perfect base for creating a mouthwatering Meat Lovers Pizza. The combination of a perfectly crispy crust and a medley of savory meats is sure to satisfy any carnivorous craving.
H3describe A Meat Lovers Pizza Variation That Pairs Well With The Stone Sisters Pizza Crust/h3
Making a Meat Lovers Pizza using the Stone Sisters Pizza Crust is a match made in heaven. The crust’s sturdy texture provides the ideal foundation for holding a variety of delicious meaty toppings. The combination of flavors and textures is truly exceptional.
H3list Of Meat Toppings And Recommended Sauces Or Seasonings/h3
When it comes to choosing the right meat toppings for your Meat Lovers Pizza, the options are endless. Here are some delectable choices to consider:
| Meat Toppings | Recommended Sauces or Seasonings |
|---|---|
| Pepperoni | Classic tomato sauce, oregano |
| Italian Sausage | Garlic-infused olive oil, red pepper flakes |
| Bacon | Barbecue sauce, brown sugar glaze |
| Ground Beef | Marinara sauce, Italian seasoning |
| Ham | Alfredo sauce, dried parsley |
| Chicken | Buffalo sauce, ranch dressing drizzle |
These meat toppings can be combined or used individually, depending on your personal preferences. Their rich flavors and textures complement the Stone Sisters Pizza Crust perfectly, creating a pizza that is sure to impress.
Serving And Enjoying Stone Sisters Pizza Crust Recipe
Discover the satisfaction of serving a homemade pizza with the delicious Stone Sisters Pizza Crust Recipe. Indulge in the perfect blend of flavors and textures as you enjoy every bite of this mouthwatering culinary creation.
Share Tips For Serving The Homemade Thin Crust Pizza
Now that you have mastered the art of making the delicious Stone Sisters Pizza Crust, it’s time to showcase your culinary skills while serving it to your friends and family. Here are some helpful tips for serving homemade thin-crust pizza:
1. Presentation matters: To make your pizza visually appealing, present it on a wooden cutting board or a colorful platter. You can sprinkle some fresh herbs, like basil or oregano, on top of the pizza to add a burst of color.
2. Slice it right: Use a sharp pizza cutter or a knife to slice the pizza into even slices. This will ensure that each slice is easy to handle and enjoyable to eat.
3. Serve it hot: Pizza tastes best when served hot. Make sure to serve the pizza immediately after it comes out of the oven. This ensures that the cheese is gooey and the crust is crisp.
4. Customization is key: One of the best things about homemade pizza is that you can customize it according to your guests’ preferences. Offer a variety of toppings, such as sliced olives, mushrooms, peppers, or even pineapple, so that everyone can enjoy their favorite flavor combinations.
Suggest Beverage Pairings And Side Dishes For A Complete Meal Experience
Pairing the right beverages and side dishes with your homemade thin-crust pizza can elevate the overall dining experience. Here are some suggestions for a complete meal:
| Beverage Pairings | Side Dish Ideas |
|---|---|
|
|
Choose a beverage pairing that complements the flavors of the pizza. For example, a cold bottle of beer goes well with a classic cheese and pepperoni pizza, while a glass of red wine pairs nicely with a more sophisticated combination of toppings, like prosciutto and arugula.
As for side dishes, you can never go wrong with a fresh garden salad or garlic breadsticks. If you’re looking for something more indulgent, crispy french fries or a flavorful caprese salad can be the perfect accompaniment. For a more elaborate meal, consider serving an antipasto platter with cured meats, cheeses, and marinated vegetables.
By following these tips and suggestions, you can enjoy a delightful meal experience with the Stone Sisters Pizza Crust recipe. Get creative, have fun, and savor every bite of your homemade thin-crust pizza!
Enjoying Freshly Baked Pizza With Family And Friends
There’s something special about the experience of sharing a freshly baked pizza with your loved ones. It’s not just about the food; it’s about the joy and bond that comes with enjoying a homemade pizza together. Whether it’s a casual weeknight dinner or a weekend gathering with friends, pizza has a way of bringing people together.
Emphasize The Joy Of Sharing Homemade Pizza With Loved Ones
Imagine the aroma of the pizza dough as it bakes in the oven, filling the air with its tantalizing scent. The anticipation builds as you gather around the table, eagerly waiting for the pizza to be served. As you take that first bite, the flavors explode in your mouth, and you can’t help but smile. This is not just any pizza; it’s a labor of love, made with your own hands.
Sharing a homemade pizza allows you to put your own personal touch on it. You can customize the toppings to your liking, experiment with different cheeses, and even add a sprinkle of fresh herbs from your garden. It’s a chance to unleash your creativity, try new flavors, and make something truly unique that reflects your taste and style.
Encourage Readers To Make The Pizza Experience An Opportunity For Bonding And Enjoyment
Making pizza from scratch can be a fun and interactive activity for the whole family or a group of friends. It’s a chance to roll up your sleeves, get your hands dirty, and work together to create a delicious masterpiece. From kneading the dough to spreading the sauce and sprinkling the toppings, everyone can have a role in the process.
While the pizza bakes, why not use this time to engage in conversation, play some games, or simply enjoy each other’s company? Turn off the distractions and focus on the present moment. The joy of homemade pizza isn’t just about the taste; it’s about the memories you create with your loved ones.
As you sit around the table, savoring each slice, laughter fills the room. You share stories, jokes, and maybe even a few friendly debates about whose pizza creation is the best. It’s these moments of connection and togetherness that make the pizza experience truly special.
So, the next time you’re in the mood for some pizza, consider making it a family affair or a gathering with friends. Get everyone involved in the process, create lasting memories, and enjoy the delicious outcome of your teamwork. After all, there’s nothing quite like enjoying a freshly baked pizza with your loved ones.
Frequently Asked Questions On Stone Sisters Pizza Crust Recipe
Can I Substitute All-purpose Flour With Whole Wheat Flour?
Yes, you can substitute all-purpose flour with whole wheat flour in this pizza crust recipe. However, keep in mind that the texture and flavor may be slightly different compared to using all-purpose flour. Whole wheat flour will provide a nuttier taste and a denser crust.
How Long Should I Let The Dough Rest Before Rolling It Out?
It is recommended to let the dough rest for at least 30 minutes before rolling it out. This resting period allows the gluten in the dough to relax, making it easier to stretch and shape. Additionally, it helps develop a better texture and flavor in the final crust.
Can I Freeze The Pizza Crust Dough?
Yes, you can freeze the pizza crust dough for later use. After preparing the dough, divide it into individual portions and wrap each portion tightly in plastic wrap. Place them in a freezer-safe bag or container and freeze them for up to 3 months.
Thaw in the refrigerator before using.
What’s The Ideal Temperature For Baking The Pizza Crust?
To achieve a crisp and golden pizza crust, preheat your oven to 475°F (245°C) or as high as your oven can go. This high temperature helps create a quick rise and a beautiful browning of the crust. Be sure to use a preheated pizza stone or baking sheet for even heat distribution.
Conclusion
The Stone Sisters Pizza Crust recipe is a game-changer for homemade pizza lovers. With its simple ingredients and easy-to-follow steps, anyone can create a delicious and crispy crust right at home. Plus, the SEO-friendly nature of this recipe ensures that it can be easily found by those searching for the perfect pizza crust.
So why wait? Try this recipe today and experience pizza perfection in your own kitchen.

As the author of the “Ultimate Pizza Guide: Recipes, Tips & Secrets Revealed,” I’m dedicated to sharing my love for pizza and empowering others to create delicious homemade pizzas with ease. Join me on a journey to uncover the secrets to perfecting your pizza game!


