Pizza Crust Recipe Instant Yeast: To make a pizza crust with instant yeast, combine yeast, flour, salt, sugar, and water. Allow the dough to rise before rolling it out and adding your favorite toppings.
Making homemade pizza can be a fun and satisfying experience. Whether you prefer thin and crispy or thick and chewy crust, getting the perfect pizza base is crucial. One popular option is using instant yeast for a quick and convenient rise.
By following a simple recipe, you can create a delicious homemade pizza crust that rivals those from your favorite pizzerias. We will guide you through the process of making pizza crust with instant yeast, from mixing the ingredients to achieving a fluffy and flavorful dough ready for your creative toppings. Let’s get started!
Ingredients For The Ultimate Crust
When it comes to making a pizza crust that is truly exceptional, the choice of ingredients plays a crucial role. From the type of flour to the yeast and even the water temperature, each component contributes to the texture, taste, and overall quality of the crust. In this section, we will explore the essential ingredients that will elevate your pizza crust from average to extraordinary.
List Of Essential Ingredients
To create the ultimate pizza crust, you will need the following ingredients:
| Ingredient | Quantity |
|---|---|
| High-quality bread flour | 2 cups |
| Instant yeast | 1 teaspoon |
| Salt | 1 teaspoon |
| Olive oil | 2 tablespoons |
| Warm water | 3/4 cup |
| Sugar | 1 teaspoon |
These ingredients work together harmoniously to create a crust that is crispy on the outside, chewy on the inside, and bursting with flavor.
Role Of Instant Yeast In Dough Formation
Instant yeast is a crucial ingredient in pizza crust dough formation. It is responsible for the leavening process, allowing the dough to rise and become light and airy. Unlike active dry yeast, instant yeast does not require proofing and can be added directly to the dry ingredients. Its fast-acting nature saves time and ensures that the dough rises quickly, resulting in a perfectly fluffy crust.
Gluten Development: The Key To A Good Texture
Gluten development is essential for achieving the ideal texture in your pizza crust. Gluten, a protein found in wheat flour, gives the dough its elasticity and structure. When the dough is mixed and kneaded, the gluten proteins align, forming a network that traps air bubbles during the rising process. This network of gluten strands creates the desired chewiness and allows the crust to hold its shape, preventing it from becoming too dense or floppy.
Importance Of Water Temperature
The water temperature used in the dough-making process is often overlooked, but it plays a vital role in the final result. Water that is too cold can impede yeast activation, leading to a slow rise and a less flavorful crust. On the other hand, water that is too hot can kill the yeast, preventing the dough from rising altogether. The ideal water temperature for pizza dough is around 105°F to 110°F (40°C to 43°C). This lukewarm temperature provides the yeast with the perfect environment to thrive, resulting in a well-risen and flavorful crust.
Dough Preparation Steps
Baking the perfect pizza starts with the dough, and mastering the art of preparing it is the key to achieving a crispy, yet chewy crust. In this section, we will dive into the essential dough preparation steps, covering everything from mixing techniques to yeast activation. Follow these guidelines to ensure your pizza crust turns out absolutely sublime.
Mixing The Right Way: Techniques For Consistency
When it comes to mixing your dough, you want to achieve a consistent texture that will result in a uniform crust. To do this, follow these simple steps:
- Start by combining your instant yeast, flour, sugar, and salt in a large mixing bowl. Make sure to sift the flour to remove any lumps.
- Using a whisk or a fork, gently mix the dry ingredients together until they are well incorporated.
- Create a well in the center of the dry mixture and slowly pour in the warm water and olive oil.
- With a wooden spoon or your hands, gradually incorporate the wet ingredients into the dry ones. Mix until the dough starts to come together.
- If the dough feels too dry, add a small amount of additional warm water; if it feels too sticky, sprinkle in a bit more flour. The goal is to achieve a slightly tacky consistency.
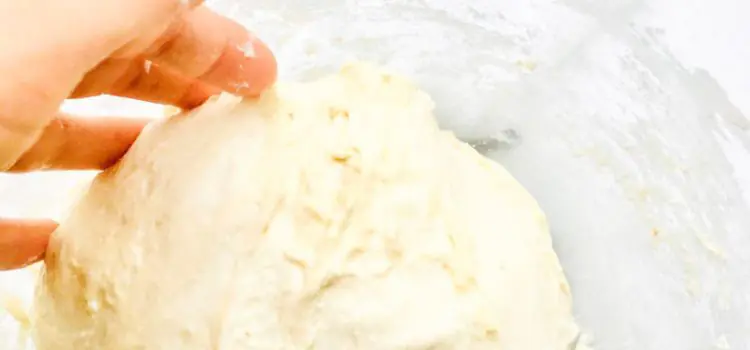
Kneading: How To Develop Gluten By Hand
Kneading the dough is crucial for developing gluten, which gives the crust its desired elasticity and structure. Follow these steps to ensure your dough reaches its full gluten potential:
- Lightly flour a clean surface or a pastry board to prevent sticking.
- Transfer the dough onto the floured surface and begin kneading by pushing it away from you with the heel of your hand.
- Fold the dough over itself, rotate it a quarter turn, and repeat the process.
- Continue kneading for about 10 minutes or until the dough becomes smooth and springs back when lightly pressed with your finger.
- Shape the dough into a round ball and place it in a lightly oiled bowl, covering it with a damp cloth or plastic wrap.
First Rise Magic: Ideal Conditions For Yeast Activity
During the first rise, the yeast in the dough will be activated, allowing it to ferment and create those delightful air pockets that give the crust its light and airy texture. Follow these steps to ensure the best conditions for yeast activity:
- Place the covered bowl of dough in a warm and draft-free area, such as inside an unheated oven or microwave.
- Allow the dough to rise undisturbed for at least one hour or until it has doubled in size. This may take longer depending on the room temperature.
Quick Tips For Dough Handling And Rest
Handling the dough properly during different stages is essential for achieving the desired results. Here are some quick tips to keep in mind:
- Always handle the dough with lightly floured hands to prevent sticking.
- After the first rise, gently punch down the dough to release any trapped air, and let it rest for a few minutes before shaping it.
- Divide the dough into individual portions, and let them rest for another 10-15 minutes before shaping further.
- For a more developed flavor, refrigerate the shaped dough overnight, covered with plastic wrap.
Rolling Out Your Masterpiece
Once you’ve perfected your pizza crust recipe with instant yeast, it’s time to roll out your dough and create the base for your culinary masterpiece. This step is crucial in ensuring that your pizza crust comes out just right – crisp on the outside, and light and airy on the inside. In this section, we’ll explore surface preparation techniques to prevent sticking, achieving uniform thickness using various tools and techniques, creative shaping ideas that go beyond the traditional round, and pre-baking strategies for a crunchier outcome.
Surface Preparation To Prevent Sticking
Before starting to roll out your dough, it’s essential to prepare your work surface to prevent sticking. Here are a few tips:
- Lightly flour your work surface to create a non-stick barrier between the dough and the surface. It helps to use fine flour like all-purpose or bread flour for a smoother texture.
- Consider using a silicone baking mat or parchment paper to roll out your dough. These non-stick surfaces make it easier to handle the dough without it sticking to the surface.
- If using a wooden surface, lightly coat it with olive oil or cooking spray to prevent sticking. This provides an extra layer of protection while adding a subtle flavor to your pizza crust.
Achieving Uniform Thickness: Techniques And Tools
To ensure even baking and consistent results, achieving uniform thickness in your pizza crust is crucial. Here are some techniques and tools you can use:
- Start by dividing your dough into equal portions. This allows you to work with a manageable size for rolling.
- Use a rolling pin to roll out the dough evenly. Roll from the center outward, applying even pressure. If the dough starts to stick, lightly dust it with flour.
- For a more precise approach, consider using a dough sheeter or a pasta machine. These tools help you achieve a consistent thickness throughout the dough.
- You can also invest in rolling pin rings or adjustable rolling pins that allow you to control the thickness and achieve a uniform crust.
Creative Shaping: Beyond The Traditional Round
While round pizzas are undoubtedly classic, why not take your pizza crust to the next level with creative shaping? Here are some ideas to explore:
- Create a rectangular pizza for a unique twist. This shape is perfect for serving pizza slices at parties or gatherings.
- Try your hand at making a stuffed crust pizza by folding the edges of your dough over cheese or other delicious fillings.
- Experiment with oblong shapes, oval shapes, or even free-form shapes that match your creative vision. It’s a fun way to add a personal touch to your pizza crust.
Pre-baking Strategies For Crunchier Outcomes
If you prefer a crunchier pizza crust, implementing pre-baking strategies can make a noticeable difference. Here are some techniques to achieve that crispy texture:
- Preheat your oven to a high temperature, typically around 475°F or higher. The intense heat will help crisp up the crust.
- Consider par-baking your pizza crust for a few minutes before adding toppings. This process partially cooks the dough, resulting in a crispy base that can hold up the weight of the toppings without becoming soggy.
- Brush the unbaked crust with olive oil or melted butter to add a golden color and enhance crispiness.
By following these surface preparation, shaping, and pre-baking techniques, you’ll be well on your way to rolling out a pizza crust that not only tastes amazing but also looks visually appealing. Let your creativity run wild as you shape and personalize your pizza, and don’t forget to experiment with different ingredients and flavors to elevate your pizza-making skills even further!
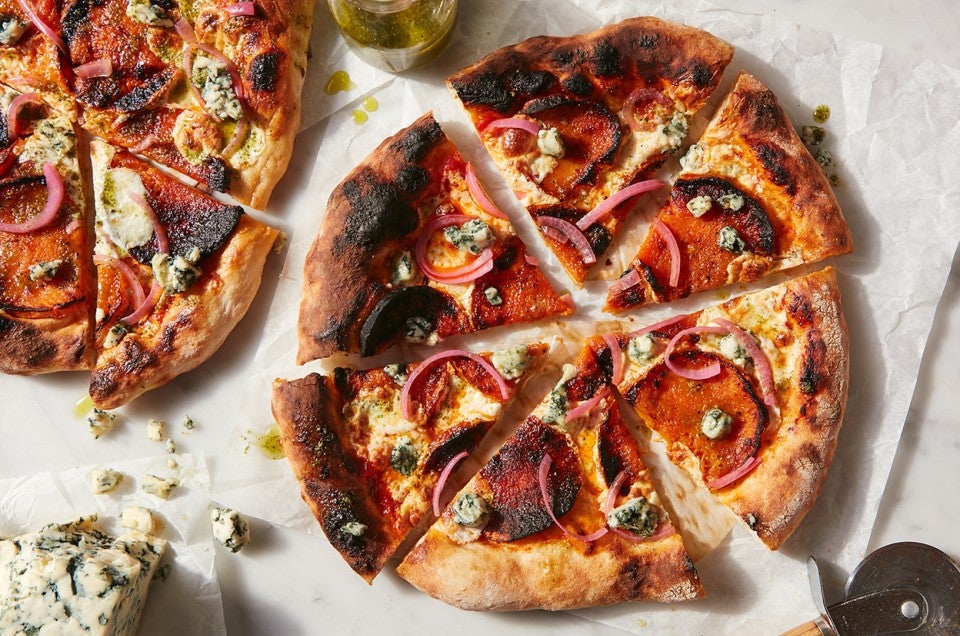
Credit: www.kingarthurbaking.com
Topping Suggestions And Techniques
When it comes to making the perfect pizza, the toppings can make or break the entire experience. Whether you prefer a classic margarita or a loaded meat lover’s, the right combination of flavors and techniques can take your pizza from ordinary to extraordinary. In this section, we will explore the art of balancing flavors with sauce and cheese basics, the difference between using fresh and dried herbs and spices, and tips for ensuring even cooking and taste with proper distribution. So, let’s dive in!
Balancing Flavors: Sauce And Cheese Basics
In the world of pizza, sauce and cheese act as the building blocks of flavor. Finding the perfect balance between the two is essential for creating a mouthwatering masterpiece. Here are some considerations when it comes to sauce and cheese:
- Choose the right sauce: Traditional tomato-based sauces are a popular choice, but don’t be afraid to experiment with pesto, white sauce, or even barbecue sauce for a unique twist. When selecting a sauce, keep in mind the flavor profile of your desired pizza. If you’re going for a spicy kick, opt for a spicy marinara or add some crushed red pepper flakes to your sauce.
- Cheese matters: The type of cheese you use can greatly impact the taste and texture of your pizza. Mozzarella is a classic choice, known for its stringy meltiness, but don’t be limited by tradition. Try experimenting with different cheese combinations such as cheddar, provolone, or feta. For those looking for a dairy-free option, vegan cheeses made from cashews or almond milk can be a delicious alternative.
- Don’t forget the seasoning: Enhance your pizza’s flavor by sprinkling some dried oregano, basil, or garlic powder on top of your sauce before adding the cheese. This simple step can elevate the taste and bring out the herbaceous notes.
Fresh Vs. Dried: Best Herbs And Spices For Pizza
When it comes to herbs and spices for your pizza, you have two options to consider – fresh or dried. Each offers its own unique flavor and aroma, so let’s weigh the pros and cons:
| Fresh Herbs and Spices | Dried Herbs and Spices |
|---|---|
|
|
Fresh herbs offer a vibrant and aromatic quality that can take your pizza to the next level. However, they can be more delicate and may not hold up well during the prolonged cooking time. On the other hand, dried herbs have a concentrated flavor and are sturdy enough to withstand high heat. Ultimately, the choice between fresh and dried herbs and spices comes down to personal preference and the desired taste experience.
Distribution Tips For Even Cooking And Taste
A well-cooked pizza is one that is evenly cooked and bursting with flavor in every bite. To achieve this, focus on distributing your toppings properly. Here are some tips:
- Spread the sauce evenly: Use the back of a spoon or a ladle to spread the sauce evenly across the crust, leaving a small border for the crust to shine.
- Thinly slice your toppings: Whether it’s vegetables, meats, or even fruits, thinly slicing your toppings ensures they cook evenly and prevent any single ingredient from overpowering the others.
- Mindful cheese placement: Distribute your cheese evenly over the sauce, ensuring it covers the entire pizza. This not only helps with even melting but also prevents any bare spots.
By following these distribution tips, you can achieve a well-balanced pizza with a harmonious blend of flavors in each bite.
Baking To Perfection
The key to a perfect pizza lies not only in its toppings but also in its crust. A well-baked crust can make or break the entire pizza experience, and achieving that desired texture and taste requires careful attention to detail. In this section, we’ll explore the crucial aspects of baking your pizza crust to perfection using instant yeast. From oven preparation to timing and visual cues for doneness, we’ll guide you through each step.
Oven Preparation: Temperatures And Positioning
Before diving into the baking process, it’s essential to prepare your oven properly. Preheating the oven at the right temperature ensures an even and consistent baking experience. Set your oven to 450°F (232°C) for a traditional crust or 500°F (260°C) if you prefer a crispy crust.
Proper positioning of your pizza inside the oven is equally important. Place the pizza on the middle rack of your oven to ensure even heat distribution. This will result in a crust that’s cooked to perfection, achieving a delicate balance between crispiness and chewiness.
Timing For Different Crust Types
The ideal baking time varies depending on the type of crust you prefer. Here’s a general guideline to follow:
| Crust Type | Baking Time |
|---|---|
| Thin Crust | About 10-12 minutes |
| Thick Crust | About 15-20 minutes |
| Deep Dish Crust | About 20-25 minutes |
Note: These baking times are approximate and may vary depending on your oven and personal preferences.
Visual And Texture Cues For Doneness
While timing is a helpful guide, visual and texture cues are essential to determine if your crust is perfectly baked. Here’s what to look for:
- Golden Brown Color: The crust should have a beautiful golden brown color indicating caramelization and a crisp exterior.
- Crispy and Crunchy: Gently tap the crust with a fork or your fingers. It should sound crispy and crunchy.
- Air Bubbles: Look for small air bubbles on the surface of the crust. These indicate that the yeast has done its magic, creating a light and airy texture.
Cooling Before Slicing: Patience For Quality
As tempting as it may be to cut into your pizza right away, it’s crucial to allow it to cool for a few minutes before slicing. This step ensures that the steam trapped within the crust settles, preventing it from becoming soggy. By patiently waiting, you’ll be rewarded with a crust that maintains its perfect balance of crispiness and chewiness.
Mastering the art of baking pizza crust with instant yeast takes practice and attention to detail. By following the steps outlined above – from oven preparation to timing and visual cues for doneness – you’ll be well on your way to achieving a pizza that is baked to perfection and sure to impress.
Frequently Asked Questions For Pizza Crust Recipe Instant Yeast
Can I Make Pizza Crust Using Instant Yeast?
Yes, you can make pizza crust using instant yeast. Instant yeast is a quick-rising yeast that eliminates the need for a long proofing time. It can be mixed directly into the dough, saving you time and effort while still achieving a fluffy and delicious crust.
How Does Instant Yeast Differ From Active Dry Yeast?
Instant yeast and active dry yeast are both leavening agents used in baking, but they differ in their properties. While active dry yeast needs to be dissolved in warm water before use, instant yeast can be mixed directly into the dry ingredients.
Instant yeast also has smaller granules, which allows it to activate and rise more quickly.
Does Using Instant Yeast Affect The Taste Of The Pizza Crust?
Using instant yeast does not affect the taste of the pizza crust. The yeast primarily functions to leaven the dough, creating a light and airy texture. The flavor of the crust is determined by the ingredients used in the dough, such as flour and salt, as well as any toppings added to the pizza.
Can I Substitute Instant Yeast For Active Dry Yeast In A Pizza Crust Recipe?
Yes, you can substitute instant yeast for active dry yeast in a pizza crust recipe. Keep in mind that instant yeast may have a slightly different activation time, so you may need to adjust the rising time accordingly. Follow the recipe instructions and keep an eye on the dough’s rise to achieve the desired results.
Conclusion
Mastering the art of pizza crust is now within your reach with this instant yeast recipe. By following these simple steps, you can create a homemade crust that rivals your favorite pizzerias. The combination of easy-to-understand instructions makes this recipe a must-try for pizza enthusiasts.
Get ready to impress your friends and family with a perfectly crispy and flavorful crust!

As the author of the “Ultimate Pizza Guide: Recipes, Tips & Secrets Revealed,” I’m dedicated to sharing my love for pizza and empowering others to create delicious homemade pizzas with ease. Join me on a journey to uncover the secrets to perfecting your pizza game!


